Love this? Save it for later!
Share the inspiration with your friends
There used to be a tiny bakery tucked between a vintage bookstore and a laundromat in my old neighborhood that made the most incredible apple cider caramel cake. When they closed suddenly two winters ago, I stood outside their shuttered door like a complete fool, holding a sticky note with their phone number that nobody answered. I’m not dramatic about food usually, but that cake was something else—tender layers soaked in warm apple cider, with a caramel frosting that had this salty edge you couldn’t quite place. After twelve tries—twelve, let me tell you, my kitchen looked like a caramel explosion—I finally got it.
The first few attempts were disasters. Too dry, too dense, the caramel seized up like it had given up on life. I mean, I almost called it quits after attempt number seven, when I dropped an entire layer on the floor and my dog looked at me like I’d lost my mind. But I kept thinking about that first bite at the bakery, sitting on a wobbly stool with a friend who’s since moved away, and how that moment felt like a hug you didn’t know you needed. Maybe you’ve been there—chasing a flavor that feels like coming home.
This cake is that feeling. It’s not just a recipe; it’s the one I make when the weather turns cold and I need something that actually delivers on the promise of comfort. The apples, the cider, that caramel that gets all glossy and perfect—it all comes together in a way that makes you close your eyes after the first forkful. I keep making it because every time I pull it out of the oven, my kitchen smells like the bakery that broke my heart, and honestly, that’s a pretty good reason to bake.
Why You’ll Love This Recipe
This isn’t just another layer cake recipe that sounds good on paper but falls flat in real life. I’ve tested this one until my family begged me to take a break (they didn’t really mean it), and every single time, it delivers that cozy, nostalgic feeling we’re all chasing. Here’s why this one’s different:
- Perfectly Moist Every Time: The apple cider reduction does something magical to the crumb—it keeps the layers tender for days, not hours. No dry cake tragedy here.
- That Caramel Frosting: I spent weeks getting this right. It’s not too sweet, has a hint of salt, and spreads like a dream. You’ll want to eat it with a spoon, and honestly, you should.
- Simple Pantry Ingredients: Nothing weird or hard to find. Apples, cider, butter, sugar—the usual suspects that make something extraordinary.
- Make-Ahead Friendly: The layers freeze beautifully, and the frosting keeps in the fridge. You can spread the work over a few days like a pro.
- Crowd-Pleaser Status: I brought this to a potluck last fall, and three people asked for the recipe before I even got my coat off. It’s that kind of cake.
What really sets this apart is the technique—reducing the apple cider down to a concentrate that packs all that fruity, spiced flavor into every bite without making the batter watery. It’s a little trick I picked up from a pastry chef friend who swears by it, and honestly, it’s the secret weapon here. This cake is the kind that makes people close their eyes after the first bite, and isn’t that exactly what we need on a chilly evening?
What Ingredients You Will Need
This recipe uses simple, honest ingredients that work together to create something truly special. Most of these are pantry staples, which makes this cake perfect for those days when you need baking therapy but don’t want to run to the store.
For the Cake Layers
- 2 cups apple cider (reduced to ½ cup concentrate—this is the flavor bomb)
- 2 ½ cups all-purpose flour (I use King Arthur for consistent results)
- 1 ½ teaspoons baking powder
- ½ teaspoon baking soda
- 1 teaspoon cinnamon (freshly ground if you can, it makes a difference)
- ½ teaspoon nutmeg (freshly grated is worth the extra effort)
- ¼ teaspoon cloves
- ½ teaspoon salt (don’t skip this—it balances the sweetness)
- ¾ cup unsalted butter, softened (room temperature is crucial)
- 1 ½ cups granulated sugar
- 3 large eggs, room temperature
- 1 teaspoon vanilla extract
- ½ cup buttermilk (or milk with a squeeze of lemon, in a pinch)
For the Caramel Frosting
- 1 cup unsalted butter (yes, a full cup—we’re not messing around)
- 2 cups brown sugar, packed (dark brown gives deeper flavor)
- ½ cup heavy cream
- 1 teaspoon vanilla extract
- ½ teaspoon salt (flaky sea salt is lovely here)
- 3 cups powdered sugar, sifted (lumps are the enemy of smooth frosting)
For the Apple Cider Soak
- ½ cup apple cider (warmed slightly)
- 1 tablespoon brown sugar
- Pinch of cinnamon
I recommend using a good-quality apple cider—not the filtered stuff, but the cloudy, unfiltered kind that tastes like autumn in a glass. If you can find it at a local orchard, even better. The caramel sauce benefits from a heavy cream with at least 35% fat content for that silky texture that makes people swoon.
Equipment Needed
You don’t need a professional bakery setup for this cake, but having the right tools makes the process smoother and more enjoyable. Here’s what you’ll need:
- Three 8-inch round cake pans (or two, if you’re okay with thicker layers and longer baking time)
- Stand mixer or hand mixer (I’ve used both; my KitchenAid is my favorite, but a hand mixer works fine)
- Small saucepan for reducing the cider
- Medium saucepan for the caramel frosting
- Parchment paper (circle liners save so much frustration)
- Cooling racks (wire racks are best for even cooling)
- Offset spatula (for smooth frosting—worth the $10 investment)
- Pastry brush for the cider soak
- Cake stand or serving plate
If you don’t have three cake pans, you can bake the layers one at a time—just let the pans cool completely between batches. I’ve done this more times than I care to admit, and it works perfectly. A good instant-read thermometer is helpful for the caramel, but you can also use the cold water test if you’re old-school like that.
Preparation Method
Let’s walk through this together. Take your time, and don’t rush—this cake rewards patience with incredible flavor.
- Reduce the apple cider: Pour 2 cups of apple cider into a small saucepan over medium-high heat. Bring it to a boil, then reduce the heat to a simmer. Let it bubble away until it reduces to about ½ cup—this takes 15-20 minutes. You’re looking for a syrupy consistency that coats the back of a spoon. Set it aside to cool completely. Don’t rush this step; the concentrated flavor is what makes the cake special.
- Preheat and prepare pans: Preheat your oven to 350°F (175°C). Grease three 8-inch round cake pans, line the bottoms with parchment paper circles, and dust with flour. Tap out the excess—nobody wants a gritty crust.
- Whisk dry ingredients: In a medium bowl, whisk together the flour, baking powder, baking soda, cinnamon, nutmeg, cloves, and salt. Set this aside while you work on the wet ingredients.
- Cream butter and sugar: In the bowl of your stand mixer fitted with the paddle attachment, beat the softened butter and granulated sugar together on medium speed until light and fluffy—about 3-4 minutes. It should look pale and almost doubled in volume. Scrape down the sides and bottom of the bowl at least once.
- Add eggs and vanilla: Add the eggs one at a time, beating well after each addition. Scrape the bowl again, then add the vanilla extract and mix until combined. The mixture might look slightly curdled at this point—that’s normal, don’t panic.
- Alternate dry and wet ingredients: With the mixer on low speed, add the flour mixture in three additions, alternating with the buttermilk in two additions. Start and end with the flour mixture. Mix just until combined—overmixing leads to tough cake, and we don’t want that.
- Add the cider concentrate: Pour in the cooled apple cider reduction and fold it in gently with a spatula. The batter will be thick and smell incredible—like autumn in a bowl.
- Divide and bake: Divide the batter evenly among the three prepared pans (about 1 ½ cups each). Smooth the tops with a spatula. Bake for 22-25 minutes, rotating the pans halfway through. The cakes are done when a toothpick inserted in the center comes out clean or with a few moist crumbs. The tops should spring back when lightly touched.
- Cool completely: Let the cakes cool in the pans for 10 minutes, then turn them out onto wire racks. Peel off the parchment paper and let them cool completely—this is important, warm cake will melt your frosting into a sad puddle.
- Make the caramel frosting: While the cakes cool, melt 1 cup of butter in a medium saucepan over medium heat. Add the brown sugar and stir until dissolved—about 2 minutes. Slowly pour in the heavy cream while stirring constantly. Bring the mixture to a gentle boil and let it cook for 1 minute without stirring. Remove from heat, stir in the vanilla and salt. Let it cool for 10 minutes, then gradually beat in the powdered sugar until smooth and spreadable. If it gets too thick, add a tablespoon of cream. Too thin, add more powdered sugar.
- Prepare the soak: In a small bowl, whisk together ½ cup apple cider, 1 tablespoon brown sugar, and a pinch of cinnamon until the sugar dissolves.
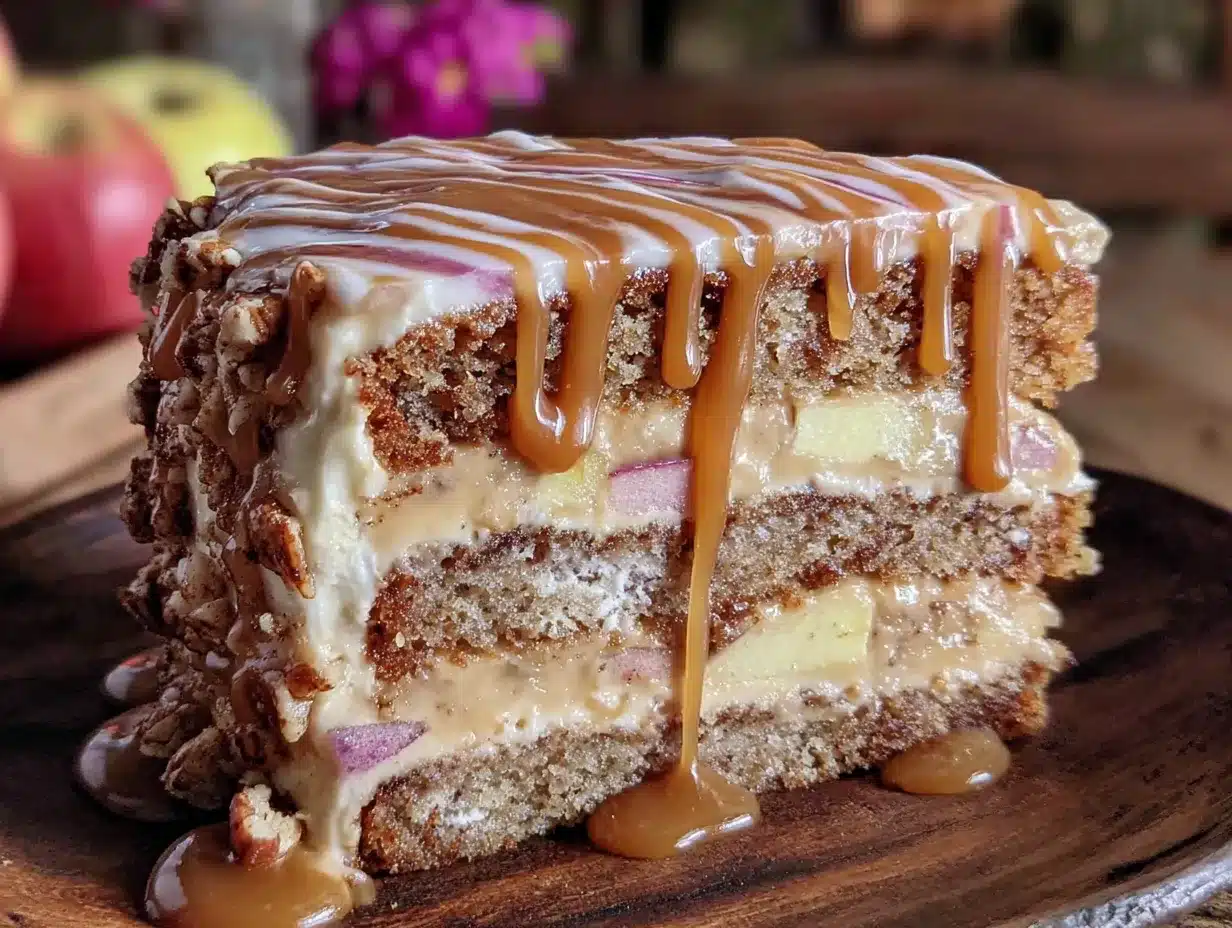
- Assemble the cake: Place one cake layer on your serving plate. Brush generously with the cider soak—don’t be shy, this is where the magic happens. Spread about ¾ cup of caramel frosting evenly over the layer. Repeat with the second layer, then top with the third layer. Frost the top and sides with the remaining frosting. For a rustic look, leave some swirls and peaks—I think it looks more inviting that way.
Cooking Tips & Techniques
I’ve made enough mistakes with this cake to fill a small notebook, so let me save you some trouble. Here’s what I’ve learned the hard way:
Temperature matters more than you think. Your butter, eggs, and buttermilk should all be at room temperature before you start. Cold ingredients don’t emulsify properly, and you’ll end up with a dense, uneven crumb. I’ve made this mistake on a cold morning when I was impatient, and the cake layers came out lopsided and sad. Take them out of the fridge an hour before baking—set a timer if you’re forgetful like me.
Don’t skip the parchment paper. I know it’s an extra step, but I’ve lost too many cake layers to sticky pans. Cut circles that fit snugly in the bottom of your pans, and your layers will release like a dream. My grandmother taught me this trick, and she never lost a cake layer in forty years of baking.
The caramel frosting is a living thing. It changes as it cools, so pay attention to its consistency. If it’s too runny, pop it in the fridge for 5 minutes and stir again. Too thick, add cream a tablespoon at a time. I once walked away from a batch for ten minutes and came back to a solid block of sugar—learn from my mistakes. Keep an eye on it, and trust your instincts.
Multitasking is your friend. While the cider reduces, measure out your dry ingredients. While the cakes bake, wash your mixing bowl and start the frosting. I’ve gotten so efficient at this process that I can have the kitchen cleaned up before the last layer cools. It feels like a superpower, honestly.
Variations & Adaptations
This cake is wonderful as written, but it’s also a fantastic base for your own creativity. Here are some variations I’ve tried and loved:
- Gluten-Free Version: Substitute the all-purpose flour with a good 1:1 gluten-free baking flour blend. I’ve used Bob’s Red Mill with great results—just add an extra tablespoon of buttermilk to keep the batter moist.
- Dairy-Free Adaptation: Use vegan butter sticks (not margarine) and full-fat oat milk mixed with a teaspoon of apple cider vinegar for the buttermilk. The caramel frosting works with coconut cream instead of heavy cream, though it sets up a bit softer.
- Spice It Up: Add ½ teaspoon of cardamom or ginger to the flour mixture for a more complex spice profile. I did this for a fall gathering once, and everyone asked what that “secret ingredient” was.
- Apple Cider Caramel Cupcakes: This batter makes about 24 cupcakes—bake for 18-20 minutes at 350°F. Perfect for parties or when you don’t want to commit to a whole cake.
- Maple Twist: Replace half the brown sugar in the frosting with maple sugar for a woodsy, Vermont-inspired version. I tried this after a trip to a maple farm, and it was incredible.
My personal favorite variation is adding a layer of thinly sliced fresh apples between the cake layers before frosting. It adds a little crunch and freshness that cuts through the richness beautifully. Just toss the slices in a bit of lemon juice to keep them from browning.
Serving & Storage Suggestions
This cake is best served at room temperature—the flavors are more pronounced, and the frosting softens to that perfect creamy consistency. If you’ve refrigerated it, let it sit out for about 30 minutes before slicing. I like to serve it with a hot mug of spiced chai or a glass of cold milk. For an extra touch, drizzle a little warm caramel sauce over each slice and add a pinch of flaky sea salt.
Storage: Keep the cake in an airtight container at room temperature for up to 3 days. If your kitchen runs warm, refrigerate it—just bring slices to room temperature before serving. The cake actually gets better on day two as the flavors meld together.
Freezing: You can freeze the unfrosted cake layers wrapped tightly in plastic wrap and foil for up to 3 months. Thaw overnight in the refrigerator before assembling and frosting. The caramel frosting freezes well too—just thaw it in the fridge and re-whip before using. I always make extra frosting and keep a jar in the freezer for emergencies.
The apple cider soak keeps the cake incredibly moist, so don’t worry about it drying out. I’ve had slices on day four that were still tender and delicious—though honestly, it never lasts that long in my house.
Nutritional Information & Benefits
Let’s be real—this is a celebration cake, not a health food. But that doesn’t mean it’s without its merits. A standard slice (1/12 of the cake) contains approximately:
- Calories: 480-520
- Fat: 24g
- Carbohydrates: 68g
- Protein: 5g
- Fiber: 1g
- Sugar: 52g
Apples and apple cider are rich in antioxidants and vitamin C, and the cinnamon in this recipe has anti-inflammatory properties. The butter and cream provide vitamin A and healthy fats that help your body absorb fat-soluble nutrients. Plus, there’s something to be said for the mental health benefits of baking—the process itself is therapeutic, and sharing food with loved ones is good for the soul.
For those with dietary concerns, this cake contains dairy, gluten, and eggs. The variations section above offers alternatives for common restrictions. I personally appreciate that this recipe uses real, recognizable ingredients—no artificial flavors or preservatives, just honest food made with care.
Conclusion
This apple cider caramel layer cake is more than just a dessert—it’s a way to slow down and savor the season. Every time I make it, I think about that little bakery and the people I’ve shared it with since. It’s become my go-to for birthdays, cozy dinner parties, and those days when you just need something beautiful to come out of your kitchen.
I hope you’ll try it and make it your own. Maybe you’ll add extra cinnamon, or skip the soak, or stack it with four layers instead of three. That’s the beauty of baking—it’s personal, and every version tells a story. When you make this cake, tag me or leave a comment below. I’d love to hear how it turned out, what you changed, and who you shared it with. Because honestly, the best part of any recipe is the people around the table.
Happy baking, friends. Your kitchen is about to smell incredible.
Frequently Asked Questions
Can I use store-bought caramel sauce instead of making the frosting?
You can, but it won’t have the same texture or depth of flavor. Homemade caramel frosting is creamier and less sweet than most store-bought sauces. If you’re short on time, look for a high-quality caramel sauce in the baking aisle and whip it with some butter and powdered sugar to approximate the texture.
Why did my cake layers turn out dry?
This usually happens from overbaking or overmixing the batter. Check your oven temperature with an oven thermometer—many run hot. Also, make sure you’re measuring flour correctly by spooning it into the measuring cup and leveling it off, not scooping directly from the bag. The apple cider soak also helps, so don’t skip it!
Can I make this cake a day ahead?
Absolutely. In fact, many people prefer it the next day. Bake and cool the layers, wrap them tightly in plastic wrap, and refrigerate overnight. Make the frosting the next day, assemble, and serve. The flavors meld beautifully overnight.
How do I get clean slices when cutting the cake?
Use a long, sharp knife and wipe it clean between each cut. For the cleanest slices, refrigerate the assembled cake for 20 minutes before cutting. Run the knife under hot water and dry it before each slice—this helps the knife glide through the frosting without dragging.
Can I reduce the sugar in this recipe?
You can reduce the sugar in the cake layers by about ¼ cup without major issues, but the caramel frosting needs the full amount for proper texture and structure. The sugar isn’t just for sweetness—it affects the chemistry of both the cake and the frosting. I’d recommend keeping the recipe as written for your first try, then adjusting in future batches.
Pin This Recipe!
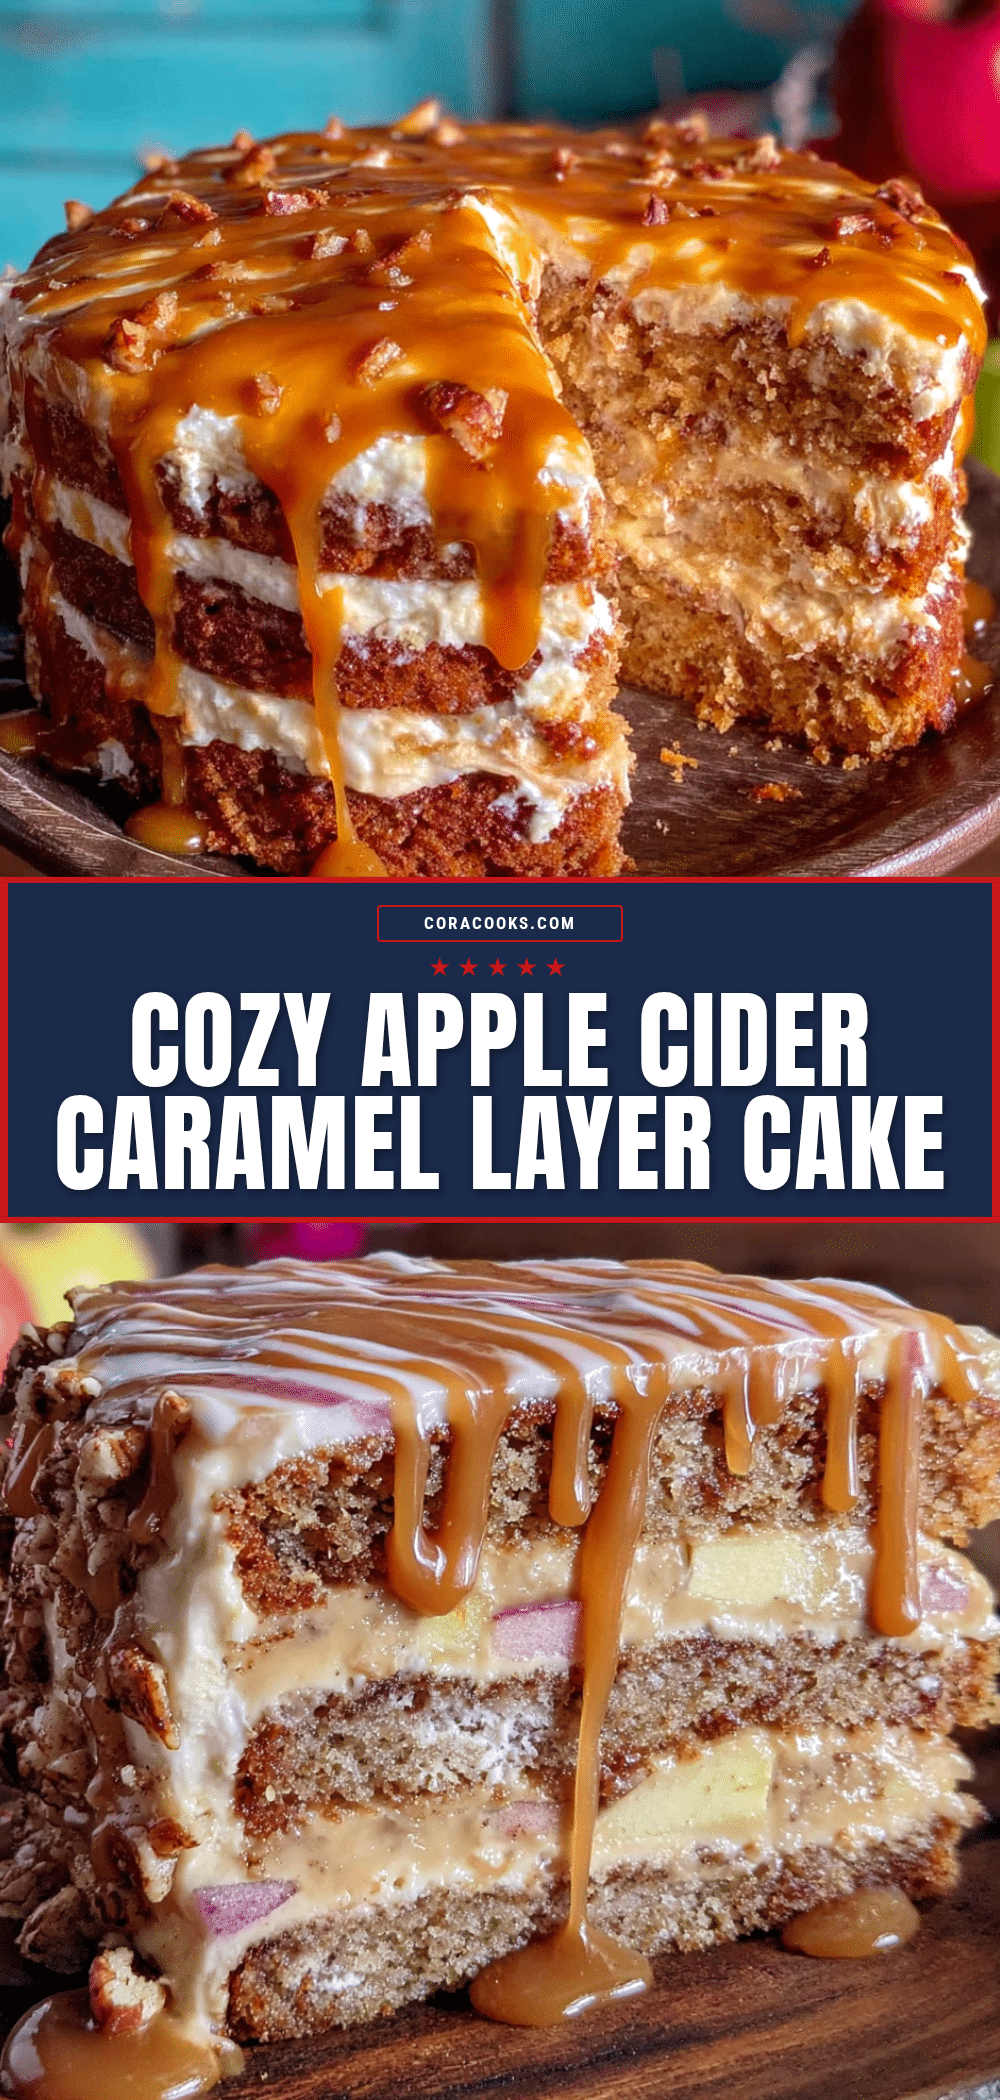
Cozy Apple Cider Caramel Layer Cake: Easy Homemade Delight
This apple cider caramel layer cake is tender, moist, and topped with a salty-sweet caramel frosting. It’s the perfect cozy dessert for chilly evenings, made with simple pantry ingredients and a secret apple cider reduction for incredible flavor.
- Prep Time: 30 minutes
- Cook Time: 25 minutes
- Total Time: 1 hour 55 minutes
- Yield: 12 servings 1x
- Category: Dessert
- Cuisine: American
Ingredients
- 2 cups apple cider (reduced to ½ cup concentrate)
- 2 ½ cups all-purpose flour
- 1 ½ teaspoons baking powder
- ½ teaspoon baking soda
- 1 teaspoon cinnamon
- ½ teaspoon nutmeg
- ¼ teaspoon cloves
- ½ teaspoon salt
- ¾ cup unsalted butter, softened
- 1 ½ cups granulated sugar
- 3 large eggs, room temperature
- 1 teaspoon vanilla extract
- ½ cup buttermilk
- 1 cup unsalted butter (for frosting)
- 2 cups brown sugar, packed (for frosting)
- ½ cup heavy cream (for frosting)
- 1 teaspoon vanilla extract (for frosting)
- ½ teaspoon salt (for frosting)
- 3 cups powdered sugar, sifted (for frosting)
- ½ cup apple cider (for soak)
- 1 tablespoon brown sugar (for soak)
- Pinch of cinnamon (for soak)
Instructions
- Reduce the apple cider: Pour 2 cups of apple cider into a small saucepan over medium-high heat. Bring to a boil, then reduce to a simmer. Let it reduce to about ½ cup (15-20 minutes) until syrupy. Set aside to cool completely.
- Preheat and prepare pans: Preheat oven to 350°F (175°C). Grease three 8-inch round cake pans, line bottoms with parchment paper circles, and dust with flour.
- Whisk dry ingredients: In a medium bowl, whisk together flour, baking powder, baking soda, cinnamon, nutmeg, cloves, and salt.
- Cream butter and sugar: In a stand mixer with paddle attachment, beat butter and granulated sugar on medium speed until light and fluffy (3-4 minutes). Scrape down bowl.
- Add eggs and vanilla: Add eggs one at a time, beating well after each. Add vanilla and mix until combined.
- Alternate dry and wet ingredients: With mixer on low, add flour mixture in three additions, alternating with buttermilk in two additions, starting and ending with flour. Mix just until combined.
- Add the cider concentrate: Fold in cooled apple cider reduction with a spatula.
- Divide and bake: Divide batter evenly among prepared pans (about 1 ½ cups each). Bake for 22-25 minutes, rotating halfway. Cakes are done when a toothpick comes out clean or with a few moist crumbs.
- Cool completely: Let cakes cool in pans for 10 minutes, then turn out onto wire racks. Peel off parchment and cool completely.
- Make the caramel frosting: Melt 1 cup butter in a medium saucepan over medium heat. Add brown sugar and stir until dissolved (about 2 minutes). Slowly pour in heavy cream while stirring. Bring to a gentle boil and cook for 1 minute without stirring. Remove from heat, stir in vanilla and salt. Cool for 10 minutes, then gradually beat in powdered sugar until smooth and spreadable.
- Prepare the soak: In a small bowl, whisk together ½ cup apple cider, 1 tablespoon brown sugar, and a pinch of cinnamon until sugar dissolves.
- Assemble the cake: Place one cake layer on serving plate. Brush generously with cider soak. Spread about ¾ cup caramel frosting evenly over layer. Repeat with second layer, then top with third layer. Frost top and sides with remaining frosting.
Notes
Temperature matters: butter, eggs, and buttermilk should be at room temperature. Don’t skip the parchment paper. The caramel frosting changes as it cools; adjust consistency with cream or powdered sugar as needed. The cake can be made a day ahead; flavors meld overnight. For clean slices, refrigerate assembled cake for 20 minutes before cutting.
Nutrition
- Serving Size: 1 slice (1/12 of cak
- Calories: 500
- Sugar: 52
- Sodium: 320
- Fat: 24
- Saturated Fat: 15
- Carbohydrates: 68
- Fiber: 1
- Protein: 5
Keywords: apple cider cake, caramel cake, layer cake, fall dessert, apple dessert, homemade cake, caramel frosting