Love this? Save it for later!
Share the inspiration with your friends
My neighbor, Sarah, asked why I couldn’t just use black cocoa powder instead of all that food coloring. I started to explain why that wouldn’t work—then stopped. She was eight years old, standing at my kitchen counter with chocolate smeared on her cheek, holding a bag of black cocoa I’d bought on a whim and never opened. I had been lamenting how my “vampire velvet” cupcakes always looked more purple than black, and she’d been listening while licking frosting off her fingers. The truth is, I’d been making red velvet cakes for years and assumed the color came from the dye. I was about to launch into a whole lecture about how cocoa naturally reacts with acid to create that reddish hue, but something made me pause. Maybe it was the way she looked so certain, or maybe I was just tired of washing purple stains off my mixing bowls.
So I handed her the whisk. I told her to dump the whole bag in if she wanted. Honestly, I expected a disaster. What I got was a batter so dark it looked like outer space in a bowl. The cupcakes came out of the oven looking like little black velvet pillows—no dye needed, no staining, no purple disappointment. I mean, I’ve been baking for over fifteen years, and a third-grader just taught me the most important lesson I’d learned all season. Maybe you’ve been there, right? That moment when you realize you’ve been overcomplicating something that had a much simpler answer all along. These black velvet cupcakes became my go-to for every Halloween party after that night. They’re the kind of dessert that makes people stop mid-conversation and ask, “Wait, what’s in these?” And honestly? I love watching their faces when I tell them there’s no creepy ingredients, just really good cocoa.
Why You’ll Love This Recipe
Let me tell you why these black velvet cupcakes have become my absolute favorite Halloween dessert to bring to every gathering. I’ve tested this recipe at least a dozen times across different ovens, different altitudes, and different crowds, and it never lets me down.
- Completely Dye-Free Color : You get that dramatic black velvet color using only black cocoa powder. No neon food coloring, no stained fingers, no worrying about kids eating artificial dyes.
- Simple Pantry Ingredients : Besides the black cocoa, everything else is stuff you probably already have. Butter, sugar, eggs, flour, buttermilk—the usual suspects.
- Perfect for Halloween Parties : These cupcakes are designed to impress. They look stunning on a dessert table, and they’re easy to transport without ruining the frosting.
- Crowd-Pleaser Guaranteed : Every time I bring these to a potluck or gathering, people ask for the recipe. Kids love them because they’re chocolatey, adults love them because they’re not overly sweet.
- Unbelievably Moist Texture : The combination of buttermilk and oil keeps these cupcakes tender for days. They don’t dry out like some Halloween treats that sit out all evening.
What makes this recipe different from every other black cupcake out there is the technique. I blend the black cocoa with hot coffee before adding it to the batter, which deepens the color and intensifies the chocolate flavor without any bitterness. It’s one of those small tricks that transforms a good cupcake into a showstopper. These aren’t just Halloween cupcakes—they’re the kind of dessert that makes you close your eyes after the first bite. They’re perfect for when you want to impress your guests without spending all day in the kitchen. Trust me, I’ve brought these to everything from casual neighborhood gatherings to full-blown costume parties, and they always steal the show.
What Ingredients You Will Need
This recipe uses simple, honest ingredients to create that dramatic black velvet color and rich chocolate flavor. Most of these are pantry staples, but the black cocoa powder is worth seeking out for that signature look.
For the Cupcakes
- 1 ½ cups all-purpose flour (spooned and leveled for accuracy)
- ½ cup black cocoa powder (I prefer Guittard or King Arthur brands for deepest color)
- 1 teaspoon baking soda
- ½ teaspoon salt
- 1 cup granulated sugar
- ½ cup vegetable oil (or melted coconut oil for subtle flavor)
- 2 large eggs, room temperature
- 1 teaspoon vanilla extract
- ½ cup buttermilk, shaken well (adds tenderness and reacts with cocoa)
- ½ cup hot brewed coffee (deepens color, don’t skip this!)
For the Cream Cheese Frosting
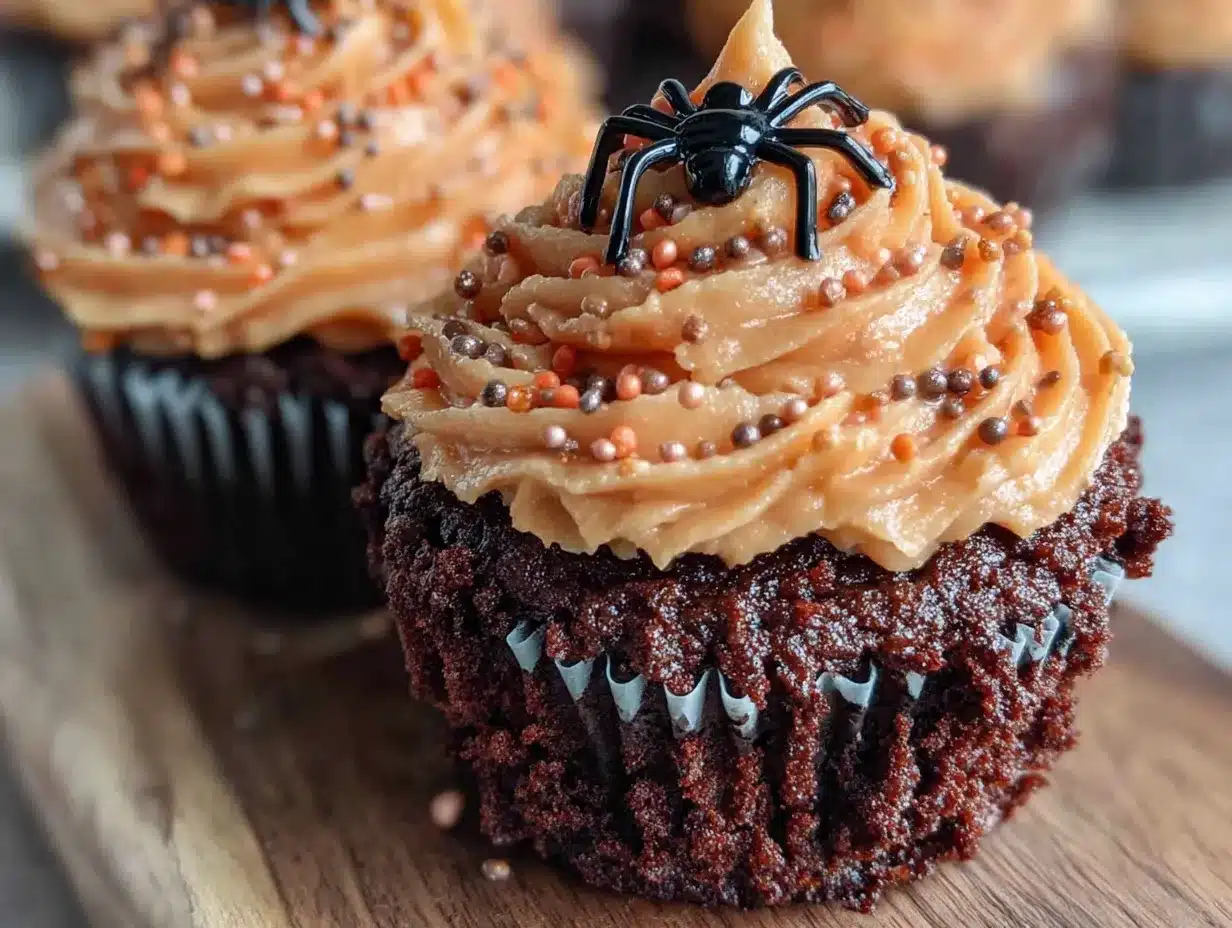
- 8 ounces cream cheese, softened (full-fat works best for stability)
- ½ cup unsalted butter, softened
- 3 cups powdered sugar, sifted
- 1 teaspoon vanilla extract
- Pinch of salt
Ingredient Tips and Substitutions
If you can’t find black cocoa powder, you can substitute Dutch-process cocoa, but the color will be dark brown rather than true black. For a dairy-free version, use almond milk with 1 tablespoon of vinegar as a buttermilk substitute, and swap the cream cheese for a vegan alternative like Kite Hill. I’ve also made these with gluten-free all-purpose flour blend, and they turned out beautifully—just add ½ teaspoon of xanthan gum if your blend doesn’t include it. The coffee is non-negotiable in my book, but you can use decaf or even hot water if caffeine is a concern. Trust me on the buttermilk though—it makes these cupcakes unbelievably tender.
Equipment Needed
- 12-cup muffin tin (standard size, nonstick or lined)
- Paper cupcake liners (black or Halloween-themed ones look amazing)
- Two mixing bowls (medium and large)
- Whisk (for dry ingredients)
- Hand mixer or stand mixer (for frosting, but you can whisk by hand)
- Rubber spatula
- Cooling rack
- Piping bag with star tip (or a zip-top bag with the corner snipped)
If you don’t have a piping bag, don’t worry. I’ve used a zip-top bag for years, and it works perfectly. Just snip about ½ inch off the corner and go for it. You can also simply spread the frosting with a knife for a more rustic look. For the muffin tin, any standard size works, but I recommend lining it with paper cups for easy removal and presentation.
Preparation Method
Preheat your oven to 350°F (175°C). Line your muffin tin with 12 paper liners and set it aside. This recipe comes together quickly, so having everything prepped makes the process smooth.
- Mix the dry ingredients : In a medium bowl, whisk together the flour, black cocoa powder, baking soda, and salt. Make sure there are no lumps in the cocoa powder—I usually sift it if it looks clumpy. Set this aside.
- Combine the wet ingredients : In a large bowl, whisk the sugar and vegetable oil together until well combined. Add the eggs one at a time, whisking after each addition until smooth. Stir in the vanilla extract. The mixture should look glossy and slightly thick.
- Alternate adding dry and wet : Add about one-third of the flour mixture to the wet ingredients and stir gently. Then add half the buttermilk and stir. Repeat with another third of flour, the remaining buttermilk, and finish with the last of the flour. Mix just until combined—overmixing makes tough cupcakes.
- Add the hot coffee : Pour in the hot coffee and stir gently. The batter will look very thin, almost like a milkshake. Don’t panic—this is exactly how it should look. The coffee deepens the color and adds moisture without any coffee flavor.
- Fill the liners : Divide the batter evenly among the 12 liners, filling each about two-thirds full. I use a cookie scoop for this—it’s cleaner and ensures even sizes. The batter will be runny, so work quickly.
- Bake : Place the tin in the preheated oven and bake for 18 to 22 minutes. You’ll know they’re done when a toothpick inserted into the center comes out clean or with a few moist crumbs. The tops should spring back when lightly touched.
- Cool completely : Let the cupcakes cool in the tin for 5 minutes, then transfer them to a wire rack. They need to be completely cool before frosting—warm cupcakes will melt your cream cheese frosting into a puddle.
For the frosting : While the cupcakes cool, beat the softened cream cheese and butter together until smooth and creamy, about 2 minutes. Add the vanilla and salt, then gradually add the powdered sugar, beating on low speed until incorporated. Increase speed to medium and beat for another minute until light and fluffy. If the frosting seems too soft, refrigerate it for 15 minutes before piping.
Cooking Tips & Techniques
I learned the hard way that black cocoa powder behaves differently than regular cocoa. The first time I made these, I treated it the same as Dutch-process cocoa and ended up with cupcakes that tasted flat and looked grayish. The trick is to bloom the cocoa with hot coffee or hot water before mixing it into the batter. This activates the flavor and deepens the color dramatically. Don’t skip this step—it’s the difference between okay cupcakes and unforgettable ones.
Another mistake I made early on was overmixing the batter. Because the batter is so thin, it’s tempting to keep stirring until it looks perfectly smooth. But overmixing develops gluten, and gluten makes cupcakes tough. Stop mixing as soon as the flour disappears into the liquid. A few small lumps are totally fine—they’ll disappear during baking.
For the frosting, make sure your cream cheese and butter are truly at room temperature. Cold cream cheese creates lumpy frosting that won’t pipe smoothly. I usually take mine out of the fridge about an hour before I start baking. If you forget, cut the cream cheese into small cubes and let it sit on the counter while you make the batter—it’ll soften faster that way.
Timing tip: bake the cupcakes the day before your party and store them in an airtight container. Frost them the morning of your event. This saves so much stress when you’re hosting. Plus, the cupcakes actually taste better the next day—the flavors have time to meld together.
Variations & Adaptations
Spooky Spider Web Cupcakes : After frosting, drizzle melted white chocolate in concentric circles on top of each cupcake. Use a toothpick to drag lines from the center outward, creating a web effect. It looks incredible and takes only seconds per cupcake.
Vegan Black Velvet Cupcakes : Substitute the eggs with flax eggs (2 tablespoons ground flaxseed mixed with 6 tablespoons water), use plant-based milk with vinegar for buttermilk, and swap the butter and cream cheese for vegan alternatives. The texture will be slightly denser but still delicious.
Gluten-Free Version : Use a 1:1 gluten-free flour blend that contains xanthan gum. I’ve had great results with Bob’s Red Mill brand. Add an extra tablespoon of buttermilk to compensate for the drier gluten-free flour.
Peppermint Halloween Twist : Add ½ teaspoon peppermint extract to the batter along with the vanilla. Top with crushed candy canes or peppermint candies for a festive crunch. This variation always surprises people—they expect chocolate, but the mint is a welcome twist.
Stuffed Cupcakes : After baking, use a small knife to cut a cone-shaped piece from the top of each cupcake. Fill the hole with a teaspoon of marshmallow fluff or raspberry jam, then replace the cone. Frost as usual. Your guests will discover a hidden surprise inside.
Serving & Storage Suggestions
These black velvet cupcakes are best served at room temperature. If you’ve refrigerated them (which I recommend for the frosting), take them out about 30 minutes before serving. The crumb is more tender and the frosting softens to the perfect consistency.
For Halloween parties, arrange them on a black or orange cake stand for maximum visual impact. I like to sprinkle a little edible glitter or Halloween-themed sprinkles on top right before serving. They pair beautifully with hot apple cider, pumpkin spice lattes, or even a glass of cold milk for the kids.
Store unfrosted cupcakes in an airtight container at room temperature for up to 3 days. Frosted cupcakes should be refrigerated in a single layer (or stacked with parchment paper between layers) for up to 5 days. The flavor actually improves after a day or two—the black cocoa deepens and becomes more complex.
These cupcakes freeze beautifully. Wrap unfrosted cupcakes individually in plastic wrap, then place them in a freezer bag. They’ll keep for up to 3 months. When you’re ready to serve, thaw them at room temperature for about an hour, then frost as usual. I always keep a batch in my freezer for unexpected guests or last-minute party invites.
For reheating, pop a cupcake in the microwave for about 10 seconds. It brings back that fresh-from-the-oven warmth without melting the frosting. Just don’t overdo it—nobody likes hot frosting.
Nutritional Information & Benefits
Each black velvet cupcake with cream cheese frosting contains approximately 380 calories, 18 grams of fat, 52 grams of carbohydrates, and 4 grams of protein. These are definitely a treat, not an everyday snack, but they’re made with real ingredients you can feel good about serving to your family.
Black cocoa powder is rich in antioxidants called flavonoids, which can help reduce inflammation and support heart health. It also contains less sugar than milk chocolate, so you get deep chocolate flavor without the sweetness overload. The cream cheese frosting provides calcium and protein, though let’s be honest—we’re eating these for the joy, not the nutrition.
These cupcakes are naturally nut-free (double-check your cocoa powder label), making them safe for school parties and gatherings with allergy concerns. They contain dairy, eggs, and gluten, but as mentioned above, substitutions work well for most dietary needs.
Conclusion
These black velvet Halloween cupcakes have become my signature party contribution, and I don’t see that changing anytime soon. They’re proof that sometimes the best ideas come from the most unexpected places—like an eight-year-old with more confidence than I had. Every time I make them, I think of Sarah standing at my counter, and I smile. That’s the thing about cooking, isn’t it? You never stop learning, even when you think you know everything.
I really hope you try these for your next Halloween gathering. They’re forgiving, they’re impressive, and they genuinely taste amazing. Don’t be afraid to play with the decorations or try one of the variations I mentioned. The best recipes are the ones you make your own. If you do make them, come back and let me know how they turned out in the comments. I love hearing about your kitchen victories—and your kitchen mishaps too. Happy Halloween baking!
Frequently Asked Questions
Can I use regular cocoa powder instead of black cocoa?
You can, but the color will be dark brown rather than black. If you want that dramatic black color for Halloween, black cocoa is worth the investment. You can find it at specialty baking stores or online.
Why did my cupcakes turn out dry?
Overbaking is the most common culprit. Start checking your cupcakes at 18 minutes. Also, make sure you’re measuring your flour correctly—spoon it into the measuring cup and level it off, don’t scoop directly from the bag, which packs the flour too tightly.
Can I make these cupcakes ahead of time?
Absolutely! Bake them up to 2 days ahead and store them unfrosted in an airtight container. Frost them the day you plan to serve for the best presentation. You can also freeze unfrosted cupcakes for up to 3 months.
How do I get the frosting to be perfectly smooth?
Make sure your cream cheese and butter are truly at room temperature. Sift your powdered sugar to remove any lumps. Beat the frosting for at least 2 minutes until it’s light and fluffy. If it still looks lumpy, warm the bowl slightly by placing it in a warm water bath for 30 seconds, then beat again.
Can I make these into a cake instead of cupcakes?
Yes! Pour the batter into two greased 8-inch round cake pans and bake at 350°F for 25 to 30 minutes. You’ll get a beautiful two-layer black velvet cake that’s perfect for Halloween celebrations. Adjust the frosting recipe by 1.5 times to have enough for filling and covering the cake.
Pin This Recipe!
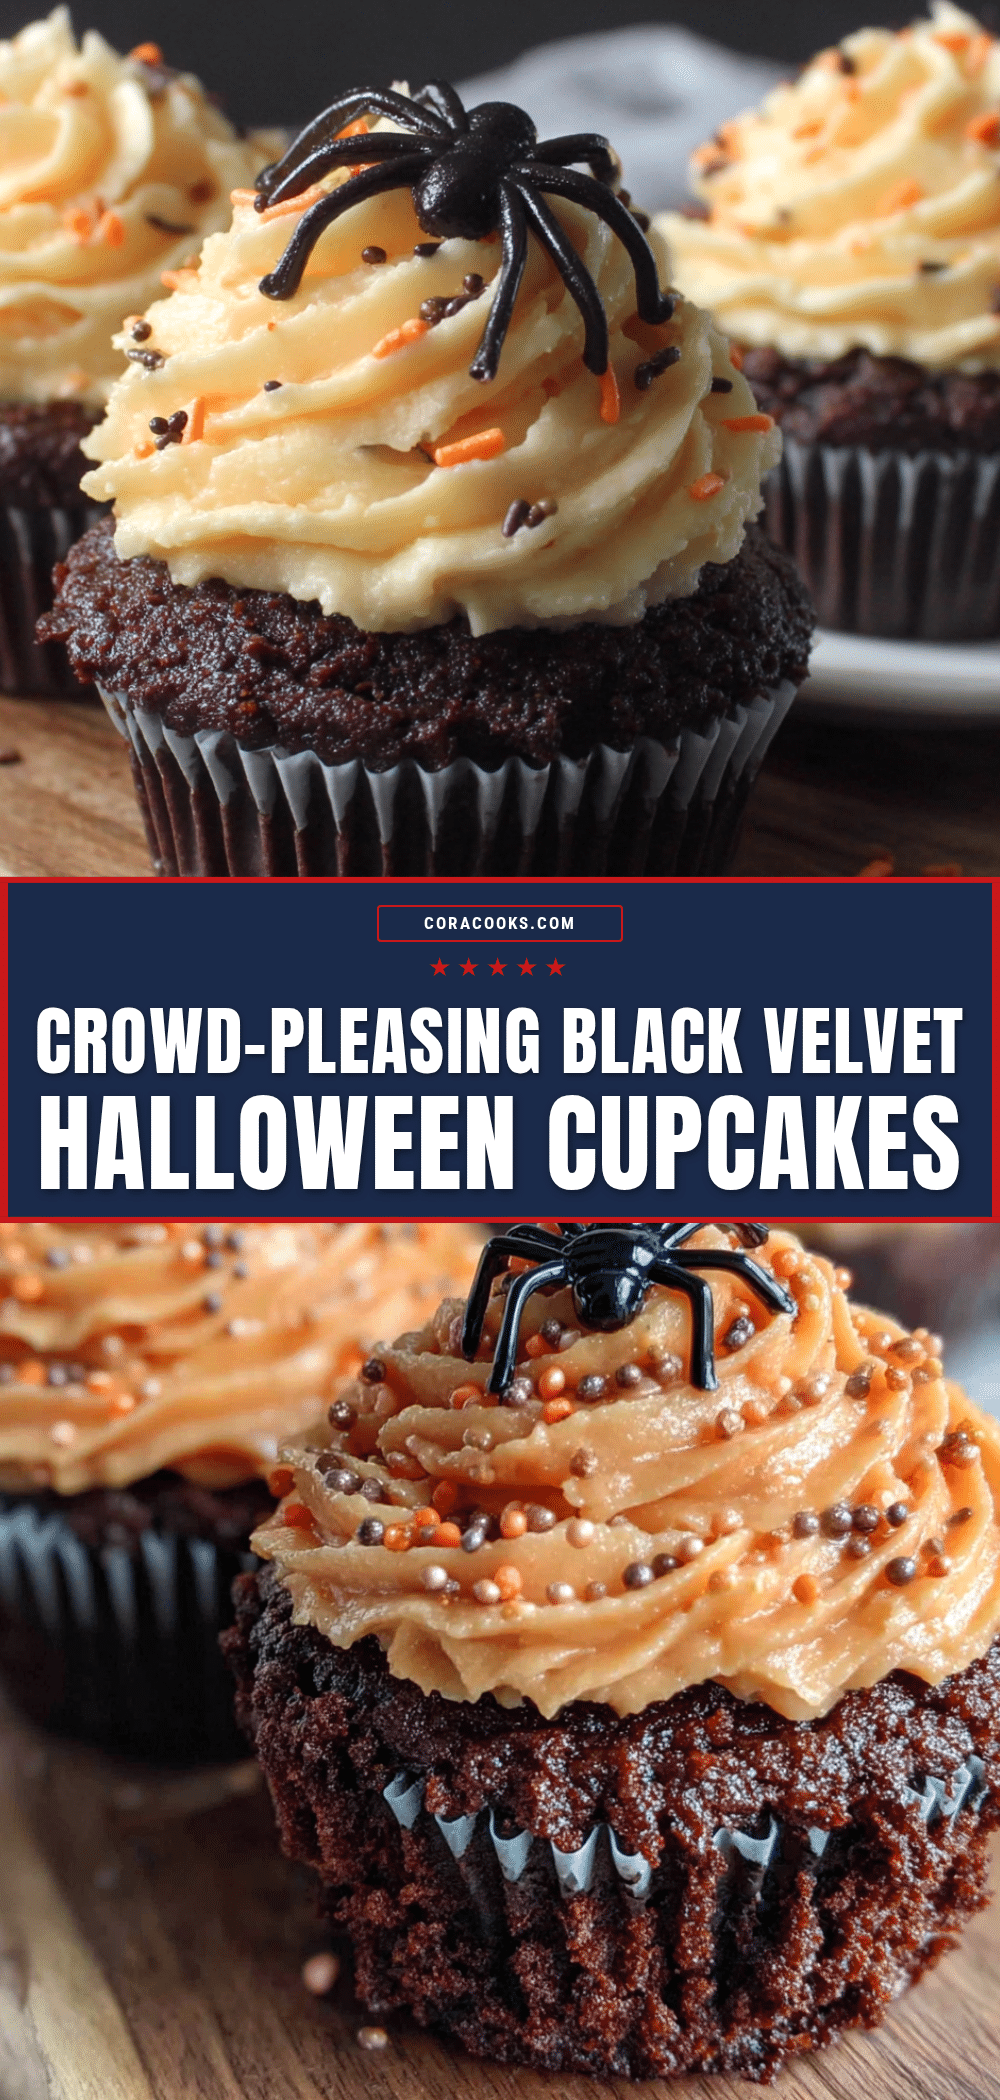
Black Velvet Cupcakes: Best Easy Halloween Dessert
These black velvet cupcakes are completely dye-free, using black cocoa powder for a dramatic color. They are moist, chocolatey, and perfect for Halloween parties.
- Prep Time: 20 minutes
- Cook Time: 20 minutes
- Total Time: 40 minutes
- Yield: 12 cupcakes 1x
- Category: Dessert
- Cuisine: American
Ingredients
- 1 ½ cups all-purpose flour (spooned and leveled)
- ½ cup black cocoa powder (Guittard or King Arthur recommended)
- 1 teaspoon baking soda
- ½ teaspoon salt
- 1 cup granulated sugar
- ½ cup vegetable oil (or melted coconut oil)
- 2 large eggs, room temperature
- 1 teaspoon vanilla extract
- ½ cup buttermilk, shaken well
- ½ cup hot brewed coffee
- 8 ounces cream cheese, softened
- ½ cup unsalted butter, softened
- 3 cups powdered sugar, sifted
- 1 teaspoon vanilla extract
- Pinch of salt
Instructions
- Preheat oven to 350°F (175°C). Line a 12-cup muffin tin with paper liners.
- In a medium bowl, whisk together flour, black cocoa powder, baking soda, and salt. Sift cocoa if clumpy.
- In a large bowl, whisk sugar and vegetable oil until combined. Add eggs one at a time, whisking after each. Stir in vanilla.
- Add one-third of the flour mixture to the wet ingredients and stir gently. Add half the buttermilk and stir. Repeat with another third of flour, remaining buttermilk, and finish with the last of the flour. Mix just until combined.
- Pour in hot coffee and stir gently. Batter will be thin.
- Divide batter evenly among the 12 liners, filling each about two-thirds full.
- Bake for 18 to 22 minutes, until a toothpick inserted in the center comes out clean or with a few moist crumbs. Cool in tin for 5 minutes, then transfer to a wire rack to cool completely.
- For frosting: Beat softened cream cheese and butter until smooth and creamy, about 2 minutes. Add vanilla and salt. Gradually add powdered sugar, beating on low until incorporated. Increase speed to medium and beat for 1 minute until light and fluffy. Refrigerate 15 minutes if too soft before piping.
Notes
Bloom the black cocoa with hot coffee to deepen color and flavor. Do not overmix the batter. For best results, bake cupcakes a day ahead and frost the morning of serving. Store unfrosted cupcakes at room temperature for up to 3 days; frosted cupcakes refrigerated for up to 5 days. Freeze unfrosted cupcakes for up to 3 months.
Nutrition
- Serving Size: 1 cupcake
- Calories: 380
- Sugar: 38
- Sodium: 220
- Fat: 18
- Saturated Fat: 8
- Carbohydrates: 52
- Fiber: 2
- Protein: 4
Keywords: black velvet cupcakes, Halloween dessert, black cocoa cupcakes, dye-free cupcakes, cream cheese frosting