Love this? Save it for later!
Share the inspiration with your friends
My sister swore she hated Halloween baking. For years. The kind of hate that comes with crossed arms and a firm “I don’t do themed food” every October. Then last year, I was making these witch finger pretzel rods “just for my own kids” in her kitchen while she pretended to read a magazine. I turned around and found her elbow-deep in the green candy melts, carefully pressing almond slivers onto pretzel rods with a concentration I’d only ever seen her use on tax forms. She didn’t even look up. She just said, “Hand me the red gel. I want the witch nails to look really wicked.” That was the moment. The Halloween baking convert was born, and honestly, it was glorious to watch.
These Easy Witch Finger Pretzel Rods are the kind of recipe that sneaks up on you. You think you’re just dipping pretzels in candy melts, and then suddenly you’re making a whole batch because they’re so simple and ridiculously fun. The green color, the almond fingernails, the little red gel details — it all comes together in about twenty minutes, and kids absolutely go wild for them. I mean, what’s not to love about a treat that looks like a creepy witch finger but tastes like sweet, salty, crunchy goodness?
Maybe you’ve been there — staring at complicated Halloween recipes that require special molds, hours of chilling time, and a level of patience you just don’t have after a long day. These pretzel rods are the opposite of that. They’re forgiving, they’re fast, and they let you get creative without any pressure. Plus, they use ingredients you can find at any grocery store without breaking the bank. That’s the kind of Halloween magic I can get behind. Let me tell you, once you make these, they’ll become your go-to for every spooky season gathering, school party, or just a fun afternoon with the kids.
Why You’ll Love This Recipe
Let’s be real — Halloween treats can be a pain. Between the expensive kits, the complicated steps, and the mess that takes an hour to clean up, it’s easy to just buy something from the store. But these witch finger pretzel rods? They’re different. I’ve tested this recipe multiple times with my own kids and their friends, and it’s consistently the most popular thing at any Halloween party. Here’s why this one works so well:
- Quick & Easy: From start to finish, you’re looking at about 20 minutes of active time. No baking, no chilling, no fuss. Just dip, decorate, and let them set.
- Simple Ingredients: Pretzel rods, green candy melts, sliced almonds, and red decorating gel. That’s it. You probably already have the almonds in your pantry.
- Perfect for Halloween: These look genuinely creepy but taste amazing. Kids love the witch finger theme, and adults appreciate the salty-sweet combo.
- Crowd-Pleaser: I’ve brought these to school parties, family gatherings, and neighbor get-togethers. Every single time, they disappear first. Even the pickiest eaters go for them.
- Unbelievably Delicious: The contrast between the crunchy pretzel, the smooth candy coating, and the nutty almond is just perfect. It’s comfort food with a spooky twist.
What makes this recipe stand out from all the other Halloween treats out there is the technique. Instead of using complicated molds or fussy decorating tools, we’re using simple ingredients in a clever way. The almond sliver becomes a witch fingernail, and a tiny dot of red gel makes it look like freshly painted nail polish. It’s genius in its simplicity. Plus, these are budget-friendly — a bag of pretzel rods costs a couple of dollars, and the candy melts are affordable too. You can make a big batch for under ten bucks, which is perfect when you’re feeding a crowd on a sensible budget.
What Ingredients You Will Need
This recipe uses just a handful of simple ingredients to create something that looks impressively spooky. The beauty of these witch finger pretzel rods is that everything is easy to find and budget-friendly. Here’s what you’ll need:
- Pretzel rods (12-16 rods) — The base of our witch fingers. Look for sturdy, thick pretzel rods that won’t break easily when you dip them. I prefer the brand from the bulk bin at my local grocery store — they’re usually fresher and less likely to snap.
- Green candy melts (1 cup, about 6 ounces) — This gives the witch fingers their classic green color. You can find these at most craft stores or in the baking aisle of larger grocery stores. Wilton brand works great, but any brand will do. If you can’t find green, white candy melts with green food coloring work too (just use gel coloring to avoid thinning the candy).
- Sliced almonds (about 24-32 pieces) — These become the witch fingernails. Look for natural, unroasted sliced almonds for the best look. You want them to be flat and relatively uniform in size. If your almonds are broken, that’s fine — they’ll look even more like real nails.
- Red decorating gel (1 small tube) — For the nail polish detail. You can find this in the baking aisle near the sprinkles and food coloring. Any brand works, but I like the ones with a fine tip for better control.
- Optional: Coconut oil or shortening (1 teaspoon) — If your candy melts are too thick, a tiny bit of coconut oil or shortening will thin them out without affecting the flavor. Don’t use butter or regular oil — they can cause the candy to seize.
Substitution Guidance:
- For the pretzel rods: If you can’t find pretzel rods, thick pretzel sticks work too. Just note that they’ll be shorter and thinner, so adjust your decorating accordingly. Avoid thin pretzel sticks — they’ll break when you dip them.
- For the candy melts: White chocolate chips or almond bark can be used instead, but you’ll need to add green food coloring. Use gel food coloring for the best results — liquid coloring can cause the chocolate to seize.
- For the almonds: If someone has a nut allergy, you can use a small piece of white chocolate or a candy corn for the fingernail. It won’t look quite as realistic, but it’ll still be cute.
- For the red gel: You can use red food coloring mixed with a tiny bit of corn syrup, but it’s messier. The tube gel is worth the small investment for ease of use.
Equipment Needed
You don’t need any fancy equipment for this recipe, which is part of what makes it so great. Here’s what you’ll need:
- Microwave-safe bowl — For melting the candy melts. A glass measuring cup works perfectly because it’s easy to dip the pretzels into. I use a 2-cup Pyrex measuring cup — it’s the perfect depth for dipping.
- Parchment paper or silicone baking mat — For letting the finished pretzels set. Parchment paper is cheap and disposable, while silicone mats are reusable. Either works great.
- Baking sheet — To hold the parchment paper and give you a stable surface for the pretzels to set on. A standard half-sheet pan is perfect.
- Small spoon or offset spatula — For helping to coat the pretzels evenly if needed. A regular butter knife works in a pinch.
- Toothpick — For making small adjustments to the almond placement. I keep a few handy just in case.
- Optional: Microwave or double boiler — I use the microwave because it’s faster, but a double boiler gives you more control. If you’re melting a large batch, the double boiler method is more consistent.
Budget-Friendly Tip: Don’t run out and buy special equipment for this. A regular dinner plate lined with wax paper works fine for setting the pretzels. And a butter knife can do the job of a small spoon. The only thing I’d recommend buying is the parchment paper — it really does make cleanup easier.
Preparation Method
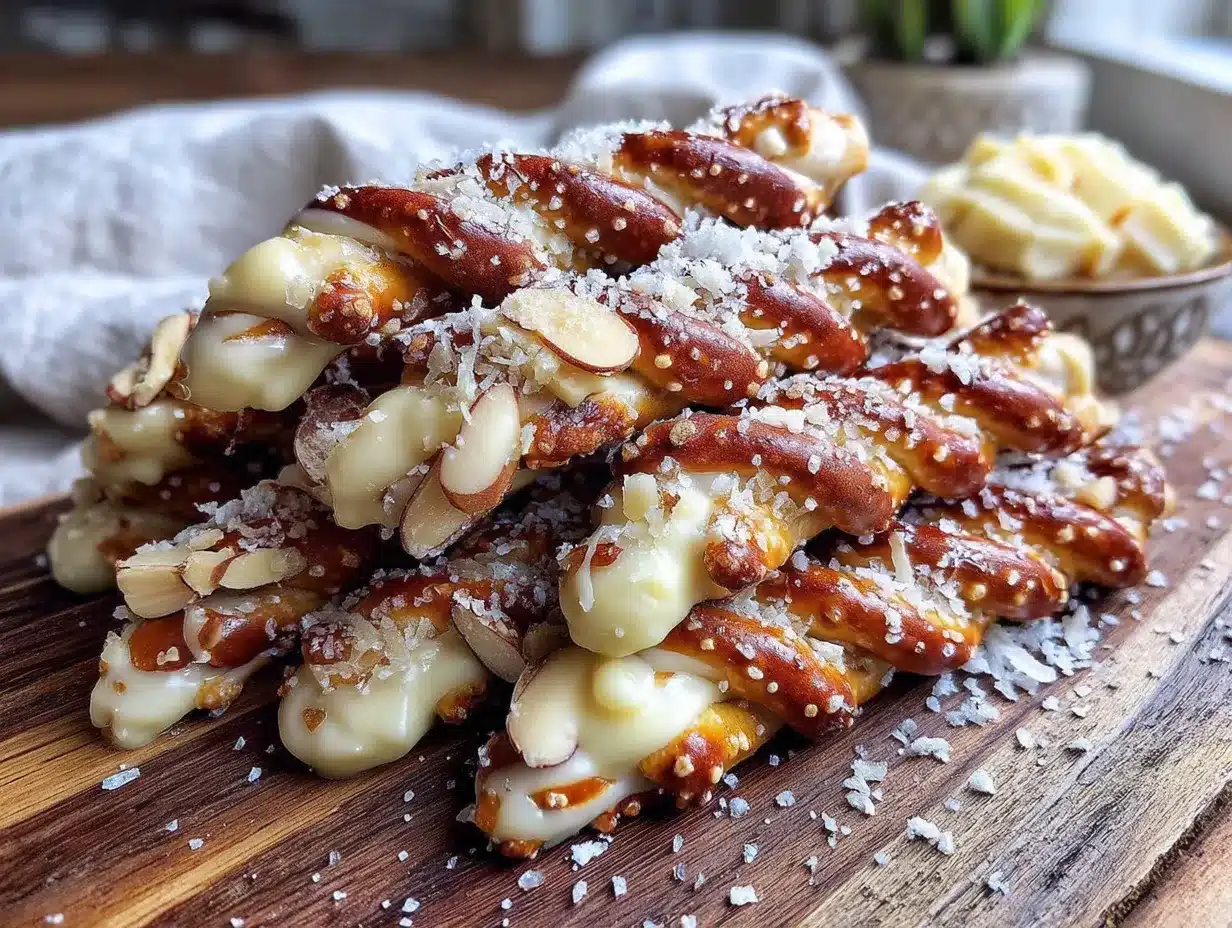
Making these witch finger pretzel rods is incredibly straightforward. I’ve broken it down into simple steps so even beginner bakers can nail it. Take your time with the decorating — that’s where the magic happens.
- Prep your workspace: Line a baking sheet with parchment paper or a silicone mat. Make sure it’s large enough to hold all your pretzel rods in a single layer. I usually clear off my counter and set everything up before I start melting — it makes the process so much smoother.
- Melt the green candy melts: Place the candy melts in a microwave-safe bowl. Microwave in 30-second intervals at 50% power, stirring well after each interval. It usually takes about 1-2 minutes total. Be careful not to overheat — candy melts can burn and become lumpy if you get them too hot. If they seem too thick, add 1 teaspoon of coconut oil or shortening and stir until smooth.
- Set up your decorating station: Arrange your sliced almonds and red decorating gel nearby. Have a small plate or bowl ready for the almonds so you can easily grab them. I like to lay out a few extra almonds in case some break — better to have too many than not enough.
- Dip the pretzel rods: Hold a pretzel rod by the top end (the end that won’t be the witch finger) and dip the bottom two-thirds into the melted green candy. Gently twist as you pull it out to let excess drip off. You want an even coating, but it doesn’t have to be perfect — a little unevenness adds to the creepy finger look. Place the dipped pretzel on the prepared baking sheet.
- Add the almond fingernail: While the candy coating is still wet, press a sliced almond onto the tip of the pretzel rod. The pointed end of the almond should face outward, like a fingernail. Press gently so it sticks, but don’t push it all the way in — you want it to look like a real nail. Repeat with the remaining pretzels.
- Add the red gel detail: Using the red decorating gel, add a small dot or line at the base of the almond “nail” to look like nail polish. You can also add a tiny red dot at the tip of the nail for a more detailed look. Don’t overdo it — a little goes a long way. I usually do one small dab at the base and one tiny dot at the tip.
- Let them set: Allow the pretzels to sit at room temperature until the candy coating is completely firm. This usually takes about 15-20 minutes. If you’re in a hurry, you can pop them in the refrigerator for 5-10 minutes, but make sure they’re on a flat surface so the coating doesn’t slide off.
- Add extra creepy details (optional): If you want to make them even spookier, you can add a small dot of green candy melt to the “knuckle” area of the pretzel to look like a wart. Or use a toothpick to create little lines that look like wrinkles on the finger. My kids love adding these extra details — it makes each pretzel unique.
Pro Tip: If the candy coating starts to harden while you’re working, simply pop it back in the microwave for 10-15 seconds to re-melt. Just be careful not to overheat it. And if you’re working with kids, it helps to have all the almonds pre-sorted and the red gel ready to go before you start dipping — it keeps the process moving and prevents chaos.
Cooking Tips & Techniques
After making these witch finger pretzel rods more times than I can count (and messing up plenty along the way), I’ve picked up some tricks that make the process easier and the results better. Here are my best tips:
- Don’t overheat the candy melts: This is the number one mistake people make. Candy melts are sensitive to heat, and if you get them too hot, they’ll seize up and become lumpy. Always use 50% power in the microwave and stir frequently. If they do seize, you can try adding a tiny bit of coconut oil, but sometimes it’s better to just start over with fresh melts.
- Work in small batches: If you’re making a large batch, melt the candy in stages. Candy melts thicken as they cool, and it’s harder to get a smooth coating when they’re too thick. I usually melt about 1/2 cup at a time and reheat as needed.
- Use the right dipping technique: Don’t just dunk the pretzel straight down. Instead, dip it at an angle and twist as you pull it out. This gives you a more even coating and prevents excess candy from pooling at the bottom. I learned this the hard way after making a batch that looked more like green blobs than witch fingers.
- Press the almond firmly but gently: You want the almond to stick, but you don’t want to push it so hard that it breaks the candy coating or the pretzel. A light press with your fingertip is perfect. If the almond doesn’t stick, the candy might have started to set — just add a tiny dab of melted candy to the back of the almond and try again.
- Let them set completely before moving: I know it’s tempting to check if they’re done, but moving them too early can smudge the coating or make the almonds fall off. Give them the full 20 minutes at room temperature, or use the refrigerator method if you’re in a rush.
My Biggest Failure: The first time I made these, I tried to speed things up by using the freezer to set the coating. Big mistake. The candy coating cracked and the almonds fell off. Plus, the condensation from the freezer made the green coating look blotchy. Room temperature or refrigerator only — never the freezer. Learn from my mistake!
Variations & Adaptations
One of the best things about this recipe is how easy it is to adapt. I’ve tried several variations over the years, and they’ve all been hits. Here are some ideas to make these witch finger pretzel rods your own:
- Color Variations: Who says witch fingers have to be green? Try purple candy melts for a more mystical look, or orange for a pumpkin spice vibe. Black candy melts make them look extra spooky. I made a batch with purple last year for a “magical” Halloween party, and they were a huge hit.
- Different Nail Shapes: Instead of sliced almonds, try using candy corn for a more colorful nail, or a small piece of white chocolate for a “French manicure” look. You can even use small candy eyeballs for a totally different effect — just press them into the coating before it sets.
- Spooky Sprinkles: Before the coating sets, sprinkle on some black or orange sprinkles, edible glitter, or crushed graham crackers for a “dirt” effect. My kids love adding spider web sprinkles on top of the green coating — it makes them look even creepier.
- Flavor Twists: Add a drop of peppermint extract to the melted candy for a minty witch finger, or use white chocolate with a splash of vanilla for a sweeter version. You can also use dark chocolate melts for a richer flavor — the green color won’t work, but they’ll still look spooky.
- Dietary Adaptations: For a gluten-free version, use gluten-free pretzel rods (they’re available at most health food stores). For a nut-free version, skip the almonds and use a small piece of white chocolate or a candy corn for the fingernail. Just be sure to check your candy melts for any allergen warnings.
My Personal Favorite Variation: I once made a batch with a mix of green and purple candy melts, swirling them together for a marbled effect. Then I added silver edible glitter on top. They looked like magical witch fingers from a fairy tale. The kids called them “sparkle witch fingers,” and they were gone in minutes. Sometimes the best discoveries come from just playing around with what you have.
Serving & Storage Suggestions
These witch finger pretzel rods are best enjoyed at room temperature, when the candy coating is firm but not too hard. The contrast between the crunchy pretzel and the smooth coating is perfect. Here’s how to serve and store them:
- Serving Temperature: Room temperature is ideal. If you’ve stored them in the refrigerator, let them sit out for about 10 minutes before serving. This softens the coating slightly and makes them easier to bite into.
- Presentation Ideas: Arrange them upright in a tall glass jar or a small vase for a creepy “witch finger bouquet” effect. You can also lay them on a platter with some fake spider webs or plastic spiders for a spooky display. For Halloween parties, I like to put them in a black cauldron with some dry ice for a smoky effect — the kids go crazy for it.
- Complementary Treats: These pair beautifully with other Halloween treats like pumpkin spice cupcakes, caramel apples, or ghost-shaped cookies. For a drink, serve them with warm apple cider or a creepy green punch. The salty-sweet combo works with just about anything.
- Storage Instructions: Store the finished pretzels in an airtight container at room temperature for up to 5 days. If your kitchen is warm, you can store them in the refrigerator, but let them come to room temperature before serving. Do not freeze them — the candy coating can crack and the almonds may fall off.
- How Flavors Develop: These are actually better the next day. The candy coating sets completely, and the flavors meld together beautifully. The pretzel stays crunchy, and the almond nail stays crisp. I’ve made them up to three days in advance for parties, and they’ve always been perfect.
Nutritional Information & Benefits
While these witch finger pretzel rods are definitely a treat, they’re not as bad for you as you might think. Here’s the breakdown for one pretzel rod (based on using standard ingredients):
- Calories: Approximately 120-150 calories per pretzel rod
- Carbohydrates: 18-22g (mostly from the pretzel and candy coating)
- Fat: 5-7g (from the candy melts and almonds)
- Protein: 2-3g (from the pretzel and almonds)
- Sugar: 10-12g (from the candy coating)
Health Benefits: Believe it or not, there are a few redeeming qualities here. The almonds provide healthy fats, vitamin E, and a bit of protein. Pretzels are lower in fat than many other snack options. And if you use dark chocolate candy melts, you’ll get some antioxidants too. Of course, these are still a treat — enjoy them in moderation as part of a balanced diet.
Dietary Considerations: This recipe contains gluten (from the pretzels) and tree nuts (from the almonds). It can be made gluten-free with GF pretzel rods, and nut-free by skipping the almonds. The candy melts may contain dairy, so check the label if you’re vegan or lactose intolerant. I’ve seen dairy-free candy melts at specialty baking stores.
Conclusion
These Easy Witch Finger Pretzel Rods have become a Halloween tradition in our house, and I have a feeling they’ll become one in yours too. They’re quick, they’re budget-friendly, and they’re so much fun to make with kids. The best part? They actually taste amazing — not just a gimmick that looks cool but disappoints when you bite into it. The salty-sweet combination with that crunchy almond finish is genuinely delicious.
I love that this recipe lets you get creative without any pressure. You can make them as simple or as elaborate as you want. Add extra details, try different colors, or keep them classic green with almond nails — there’s no wrong way to do it. That’s the kind of flexibility that makes cooking fun, especially with little helpers in the kitchen.
So grab some pretzel rods and candy melts, gather the kids, and make a batch of these creepy-cute treats. I promise you’ll have a blast, and you’ll end up with a Halloween snack that everyone will love. When you make them, I’d love to hear how they turned out — drop a comment below and share your spooky creations! Happy Halloween, and happy snacking!
Frequently Asked Questions
Can I make these witch finger pretzel rods ahead of time?
Absolutely! These are perfect for making ahead. Store them in an airtight container at room temperature for up to 5 days. I often make them 2-3 days before a Halloween party, and they’re always perfect. Just make sure they’re completely set before you store them.
My candy melts are too thick. What should I do?
This happens to me all the time. Add 1 teaspoon of coconut oil or shortening (not butter or regular oil) and stir until smooth. If that doesn’t work, you may have overheated the candy melts. In that case, it’s best to start over with fresh melts and use lower heat this time.
Can I use white chocolate instead of candy melts?
Yes, you can! Use white chocolate chips or almond bark, and add green gel food coloring to achieve the witch finger color. Just be careful not to overheat the white chocolate — it’s even more sensitive than candy melts. And remember to use gel coloring, not liquid, to avoid seizing.
How do I keep the almonds from falling off?
The key is to press the almond into the candy coating while it’s still wet. If the coating has started to set, the almond won’t stick properly. You can also dip the back of the almond in a tiny bit of melted candy before pressing it onto the pretzel — that acts like glue. And make sure you let them set completely before moving them.
Are these safe for kids with nut allergies?
If you’re serving these at a school party or event where nut allergies are a concern, skip the almonds. You can use a small piece of white chocolate, a candy corn, or even a green candy melt shaped into a nail as a substitute. Just be sure to check all your other ingredients for nut warnings too.
Pin This Recipe!

Best Easy Witch Finger Pretzel Rods for Halloween

These Easy Witch Finger Pretzel Rods are a quick, fun, and budget-friendly Halloween treat that looks genuinely creepy but tastes amazing. Made with just pretzel rods, green candy melts, sliced almonds, and red decorating gel, they come together in about 20 minutes and are perfect for parties, school events, or a spooky afternoon with the kids.
- Prep Time: 20 minutes
- Cook Time: 0 minutes
- Total Time: 20 minutes
- Yield: 12-16 servings 1x
- Category: Dessert
- Cuisine: American
Ingredients
- 12–16 pretzel rods
- 1 cup (about 6 ounces) green candy melts
- 24–32 sliced almonds (natural, unroasted)
- 1 small tube red decorating gel
- 1 teaspoon coconut oil or shortening (optional, for thinning candy melts)
Instructions
- Prep your workspace: Line a baking sheet with parchment paper or a silicone mat.
- Melt the green candy melts: Place in a microwave-safe bowl. Microwave in 30-second intervals at 50% power, stirring well after each interval, until smooth (about 1-2 minutes total). If too thick, stir in 1 teaspoon coconut oil or shortening.
- Set up your decorating station: Arrange sliced almonds and red decorating gel nearby.
- Dip the pretzel rods: Hold a pretzel rod by the top end and dip the bottom two-thirds into the melted green candy. Gently twist as you pull it out to let excess drip off. Place on the prepared baking sheet.
- Add the almond fingernail: While the candy coating is still wet, press a sliced almond onto the tip of the pretzel rod, pointed end outward. Press gently to stick.
- Add the red gel detail: Using the red decorating gel, add a small dot or line at the base of the almond ‘nail’ to look like nail polish. Optionally add a tiny dot at the tip.
- Let them set: Allow to sit at room temperature until firm, about 15-20 minutes. For faster setting, refrigerate for 5-10 minutes.
- Add extra creepy details (optional): Add a small dot of green candy melt to the ‘knuckle’ area for a wart, or use a toothpick to create wrinkle lines.
Notes
Don’t overheat candy melts; use 50% power in microwave. Work in small batches if making a large batch. Press almond firmly but gently. Let set completely before moving. Do not freeze. For nut-free version, skip almonds and use white chocolate or candy corn for fingernail. For gluten-free, use gluten-free pretzel rods.
Nutrition
- Serving Size: 1 pretzel rod
- Calories: 120150
- Sugar: 1012
- Sodium: 200250
- Fat: 57
- Saturated Fat: 34
- Carbohydrates: 1822
- Fiber: 1
- Protein: 23
Keywords: Halloween treats, witch finger pretzels, easy Halloween recipe, pretzel rods, candy melts, spooky snacks, kid-friendly Halloween


