Love this? Save it for later!
Share the inspiration with your friends
I wasn’t expecting lunchbox advice from my accountant, but there I was, knee-deep in tax receipts last April, listening to Carol describe exactly how to make turkey pinwheel wraps. She’d pulled out her phone to show me a photo—not of a spreadsheet, but of these perfect little spirals nestled in a bento box. “My kids won’t eat sandwiches,” she said, shrugging, “but they inhale these.” Honestly, I was so stressed about deductions that I almost didn’t write it down. But something about the way she talked about them—like they were her secret weapon against lunchtime boredom—stuck with me. I scribbled the basic idea on a napkin that still has coffee stains on it. Let me tell you, that napkin changed my lunch game forever.
These quick turkey pinwheel wraps are the kind of recipe you don’t realize you need until you’re staring at a sad, soggy sandwich at 11 AM. You know that feeling when the bread is just… wet? Yeah, these pinwheels solve that problem completely. They hold up beautifully, they’re fun to eat, and they take about ten minutes to throw together. I mean, I’ve made them on a Sunday night while half-watching a movie, and they were still the highlight of my week’s lunches. The first time I made them, I forgot to soften the cream cheese—rookie move—and ended up with lumpy spirals. But you know what? They still tasted fantastic. That’s the kind of forgiving recipe this is. It’s why I keep coming back to it, and why I think you will too.
Why You’ll Love This Recipe
After testing these wraps at least a dozen times (my neighbors have become very willing taste-testers), I can honestly say this is the version that works best. It’s not just another wrap recipe—it’s the one that actually delivers on flavor, texture, and convenience. Here’s why I think you’ll love it as much as I do:
- Quick & Easy: Comes together in under 15 minutes, perfect for busy weeknights or last-minute lunch prep. No cooking required!
- Simple Ingredients: No fancy grocery trips needed. You likely already have cream cheese, tortillas, and deli turkey in your fridge.
- Perfect for Lunchboxes: Great for school lunches, work lunches, picnics, or even a quick snack. They travel like a dream.
- Crowd-Pleaser: Always gets rave reviews from kids and adults alike. I’ve seen picky eaters go back for thirds.
- Unbelievably Delicious: The creamy filling, savory turkey, and fresh veggies create a flavor combo that’s next-level satisfying.
What makes this recipe different from the rest? It’s the technique. I spread the cream cheese mixture all the way to the edges of the tortilla, which seals everything in and prevents sogginess. Plus, the ratio of filling to turkey is perfectly balanced—not too much, not too little. This isn’t just another version of turkey pinwheel wraps; it’s my best version, tested and tweaked until every bite was just right. Trust me, one bite and you’ll understand why this recipe has become a staple in my kitchen.
What Ingredients You Will Need
This recipe uses simple, wholesome ingredients to deliver bold flavor and satisfying texture without the fuss. Most of these are pantry staples, but I’ve included a few notes to help you pick the best options.
For the Cream Cheese Spread
- 8 oz cream cheese, softened to room temperature (this is key for smooth spreading—trust me, cold cream cheese is a pain)
- 1/4 cup sour cream (adds tanginess and helps the spread stay creamy; Greek yogurt works too)
- 1 tablespoon ranch seasoning mix (I prefer Hidden Valley for that classic flavor, but any brand works)
- 1/4 cup finely chopped fresh chives (optional, but adds a lovely mild onion flavor)
- 1/4 teaspoon garlic powder (for a subtle savory kick)
- Salt and black pepper to taste
For the Wraps

- 4 large flour tortillas (burrito-sized, about 10 inches; use gluten-free if needed)
- 12 slices deli turkey breast (I like Boar’s Head oven-roasted turkey for its clean flavor, but any good-quality deli turkey works)
- 1 cup shredded lettuce (romaine or iceberg for crunch; avoid using wet lettuce)
- 1/2 cup thinly sliced cucumber (adds a refreshing crunch; you can also use bell peppers or shredded carrots)
- 1/4 cup thinly sliced red onion (optional, for a little bite)
Ingredient Selection Tips: For the best texture, look for cream cheese that’s full-fat—it spreads more smoothly and holds up better. If you’re using a dairy-free cream cheese, make sure it’s a firm block-style, not the whipped kind. For the tortillas, I recommend flour over corn because they’re more pliable and less likely to crack when rolled. In summer, swap in fresh spinach or arugula instead of lettuce for a peppery twist.
Substitution Guidance: Use dairy-free cream cheese and sour cream for a lactose-free version. Swap turkey with ham, roast beef, or even grilled chicken for variety. For a vegetarian option, use hummus as the spread and add roasted veggies. You can also use whole wheat or spinach tortillas for extra nutrients.
Equipment Needed
You don’t need much for this recipe, which is part of the beauty. Here’s what I use:
- Hand mixer or stand mixer (for whipping the cream cheese spread; a sturdy whisk works too, but it’ll take some elbow grease)
- Medium mixing bowl (I use a glass bowl so I can see if the cream cheese is fully blended)
- Rubber spatula (for scraping every last bit of the spread—don’t waste any!)
- Butter knife or offset spatula (for spreading the cream cheese evenly on the tortillas)
- Sharp knife (a serrated knife works best for clean slices through the wraps)
- Cutting board (a large one with a non-slip surface is ideal)
- Plastic wrap or beeswax wraps (for wrapping the pinwheels tightly before slicing)
- Bento box or airtight container (for storage; I love my Sistema lunchbox for keeping everything fresh)
If you don’t have a hand mixer, no worries—just let the cream cheese soften completely (leave it out for an hour) and mix by hand with a fork. It takes a minute longer, but it works fine. I’ve also used a food processor in a pinch, though it’s more cleanup than it’s worth for this simple spread.
Preparation Method
- Make the cream cheese spread: In a medium mixing bowl, combine the softened cream cheese, sour cream, ranch seasoning, chives (if using), garlic powder, and a pinch of salt and pepper. Beat with a hand mixer on medium speed until smooth and fluffy, about 2 minutes. Scrape down the sides of the bowl with a rubber spatula. The mixture should be light and spreadable—if it’s too thick, add a teaspoon of milk or water.
- Prep your work surface: Lay a large tortilla flat on a clean cutting board. If the tortilla seems stiff, microwave it for 10 seconds to make it more pliable. This is a trick I learned after my first batch cracked in the middle—total mess, but lesson learned!
- Spread the cream cheese mixture: Using a butter knife or offset spatula, spread about 3 tablespoons of the cream cheese mixture evenly over the entire surface of the tortilla, leaving a 1-inch border around the edges. This border is important—it helps seal the wrap when you roll it. Don’t skimp on the spread; it’s the glue that holds everything together.
- Layer the fillings: Place 3 slices of turkey on the lower third of the tortilla, slightly overlapping. Top with a small handful of shredded lettuce, a few cucumber slices, and a sprinkle of red onion (if using). Don’t overfill—you want a thin, even layer so the pinwheels roll tightly. I learned this the hard way after my first attempt exploded like a tortilla volcano.
- Roll tightly: Starting from the bottom edge, roll the tortilla away from you, tucking the filling in as you go. Keep it tight but not so tight that the fillings squish out the ends. Once rolled, press gently to seal the edge. The cream cheese border should act like glue—if it doesn’t stick, dab a little extra spread on the edge.
- Wrap and chill: Wrap each rolled tortilla tightly in plastic wrap or beeswax wrap. Place them seam-side down in the refrigerator for at least 30 minutes. This step is non-negotiable—chilling helps the wraps set so they slice cleanly. I’ve skipped this before and ended up with mushy, misshapen pinwheels. Trust me, the wait is worth it.
- Slice into pinwheels: After chilling, unwrap the tortillas and place them on a cutting board. Using a sharp serrated knife, slice each roll into 1-inch thick rounds. A gentle sawing motion works best—don’t press down too hard or the pinwheels will flatten. You should get about 6-8 pinwheels per tortilla.
- Arrange and serve: Arrange the pinwheels in a single layer in a bento box or airtight container. They’re ready to eat immediately or can be stored for up to 3 days. The pinwheels should look like perfect little spirals with the green lettuce and white cream cheese peeking through.
Cooking Tips & Techniques
After making these pinwheels more times than I can count, I’ve picked up a few tricks that make a real difference. Here are my top tips for perfect results every time:
- Soften the cream cheese properly: This is the most common mistake I see. Cold cream cheese creates a lumpy spread that tears the tortilla. Leave it on the counter for at least 30 minutes before mixing. If you’re short on time, cut it into small cubes and microwave for 10 seconds—but watch it carefully, you don’t want it melted.
- Don’t overfill: I know it’s tempting to pile on the turkey and veggies, but less is truly more here. A thin, even layer ensures the pinwheels roll tightly and hold their shape. Overfilled wraps are a disaster waiting to happen—they bulge, crack, and unravel. I learned this after my third attempt ended up looking like a tortilla explosion.
- Chill before slicing: This is the step I see people skip most often, and it’s a game-changer. Chilling firms up the cream cheese, making the rolls easier to slice without squishing. Thirty minutes is the minimum—I’ve left them overnight and they sliced like butter.
- Use a serrated knife: A sharp serrated knife cuts through the tortilla cleanly without crushing the layers. A straight-edge knife tends to drag and flatten the pinwheels. I ruined an entire batch with a dull knife once—never again.
- Keep the lettuce dry: Wet lettuce makes the pinwheels soggy. After washing, spin the lettuce in a salad spinner or pat it dry with paper towels. This one step makes a huge difference in texture the next day.
- Multitasking strategy: Make the cream cheese spread while the tortillas are warming (if needed). Then lay out all four tortillas at once and divide the fillings evenly. This assembly-line approach saves time and ensures consistency.
Variations & Adaptations
One of the best things about these turkey pinwheel wraps is how adaptable they are. Here are some variations I’ve tried and loved:
- Mediterranean Twist: Swap the ranch seasoning for 1 tablespoon of sun-dried tomato pesto. Use roasted red peppers, spinach, and crumbled feta instead of lettuce and cucumber. The flavors are bright and tangy—perfect for a summer lunch.
- Spicy Southwest: Mix 1 tablespoon of taco seasoning into the cream cheese spread. Use pepper jack cheese slices, black beans, corn, and diced jalapeños. This version has a nice kick and pairs beautifully with a side of salsa.
- Low-Carb Option: Use large lettuce leaves (like romaine or butter lettuce) instead of tortillas. Spread the cream cheese mixture on the lettuce, add the turkey and veggies, and roll tightly. These are lighter and keto-friendly, though they don’t hold up as long in the fridge.
- Gluten-Free: Use gluten-free tortillas (I like the ones from BFree or Siete Foods). They’re a bit more delicate, so handle them gently and don’t overfill. The rest of the recipe stays the same.
- Veggie-Packed: Add shredded carrots, thinly sliced bell peppers, or even roasted zucchini. I once added pickled red onions and it was a revelation—the tanginess cut through the creamy spread perfectly.
- My Personal Favorite: I tried a version with everything bagel seasoning mixed into the cream cheese spread, and honestly, it’s genius. The sesame, garlic, and onion flavors pair so well with the turkey. I’ve been making this version for months now.
Serving & Storage Suggestions
These pinwheel wraps are incredibly versatile when it comes to serving. Here’s how I like to enjoy them:
- Serving temperature: They’re best served chilled or at room temperature. Straight from the fridge, the cream cheese is firm and the veggies are crisp. If you’re packing them for lunch, they’ll be perfect by the time you eat.
- Presentation: Arrange the pinwheels cut-side up in a bento box or on a platter. I like to add a small container of extra ranch dressing or hummus for dipping. A few cherry tomatoes and baby carrots on the side make for a complete lunch.
- Complementary dishes: These pair beautifully with a simple side salad, fresh fruit, or a cup of soup. For a heartier meal, serve with sweet potato chips or a quinoa salad. They’re also great as an appetizer for parties—just double the recipe and arrange on a platter with toothpicks.
- Storage instructions: Store the uncut rolls or sliced pinwheels in an airtight container in the refrigerator for up to 3 days. I prefer to store them uncut and slice just before serving—this keeps them fresher longer. If you’ve already sliced them, place a slightly damp paper towel over the top to prevent drying out.
- Freezer tips: You can freeze the uncut rolls for up to 2 months. Wrap each roll tightly in plastic wrap, then place in a freezer bag. Thaw overnight in the refrigerator before slicing. The texture won’t be quite as crisp, but they’re still delicious for a quick lunch.
- How flavors develop: Honestly, these pinwheels taste even better the next day. The flavors meld together as the cream cheese absorbs the seasonings, and the tortilla softens just slightly. I often make them a day ahead on purpose.
Nutritional Information & Benefits
Here’s an estimated nutritional breakdown for one serving (about 6 pinwheels, assuming the recipe makes 4 servings):
- Calories: ~310
- Protein: 22g
- Fat: 14g
- Carbohydrates: 24g
- Fiber: 2g
- Sugar: 3g
- Sodium: 780mg
Health Benefits: Turkey is a lean source of protein that helps keep you full and satisfied. Cream cheese provides calcium for bone health, while the veggies add vitamins A and C, plus fiber for digestion. If you use whole wheat tortillas, you’ll get extra fiber and B vitamins. This is a balanced meal that’s moderate in calories and packed with nutrients—perfect for a busy day.
Dietary Considerations: This recipe is nut-free and can be made gluten-free and dairy-free with simple substitutions. It’s naturally low in added sugar. If you’re watching sodium, look for low-sodium deli turkey and reduced-sodium seasoning mix.
My Wellness Perspective: I love that these pinwheels feel like a treat but are actually really good for you. They’re proof that healthy eating doesn’t have to be boring or complicated. It’s the kind of lunch that makes you feel good—both while eating it and after.
Conclusion
These quick turkey pinwheel wraps have become a non-negotiable part of my weekly meal prep, and I honestly can’t imagine going back to sad sandwiches. They’re quick, they’re customizable, and they make lunch feel like something special—even on a random Tuesday. Whether you’re packing them for your kids, your partner, or yourself (no judgment, I do this all the time), they deliver every single time.
I’d love to hear how you make these your own. Do you add a special ingredient? Have you tried a variation I haven’t thought of? Drop a comment below and share your twist—I’m always looking for new ideas. And if you loved this recipe, please share it with a friend who needs a lunchbox win. Let’s make lunchtime delicious again, one little spiral at a time!
Frequently Asked Questions
Can I make these turkey pinwheel wraps ahead of time?
Absolutely! In fact, I recommend it. You can make the rolls up to 3 days in advance and slice them just before serving. The flavors actually meld together overnight, making them even more delicious the next day.
How do I keep the pinwheels from getting soggy?
The key is to dry your veggies thoroughly—especially the lettuce. Use a salad spinner or pat them dry with paper towels. Also, spreading the cream cheese all the way to the edges creates a barrier that prevents moisture from seeping into the tortilla.
Can I use a different type of meat?
Of course! Ham, roast beef, grilled chicken, or even salami work beautifully. For a vegetarian option, use hummus or mashed avocado as the base and add roasted veggies. The possibilities are endless.
How do I get clean slices without squishing the pinwheels?
Use a sharp serrated knife and a gentle sawing motion. Don’t press down hard—let the knife do the work. Chilling the rolls for at least 30 minutes before slicing is also crucial; it firms up the cream cheese so the layers stay intact.
Can I freeze these turkey pinwheel wraps?
Yes! Freeze the uncut rolls tightly wrapped in plastic wrap and then in a freezer bag. They’ll keep for up to 2 months. Thaw overnight in the refrigerator before slicing. The texture won’t be quite as crisp, but they’re still perfect for a quick lunch.
Pin This Recipe!
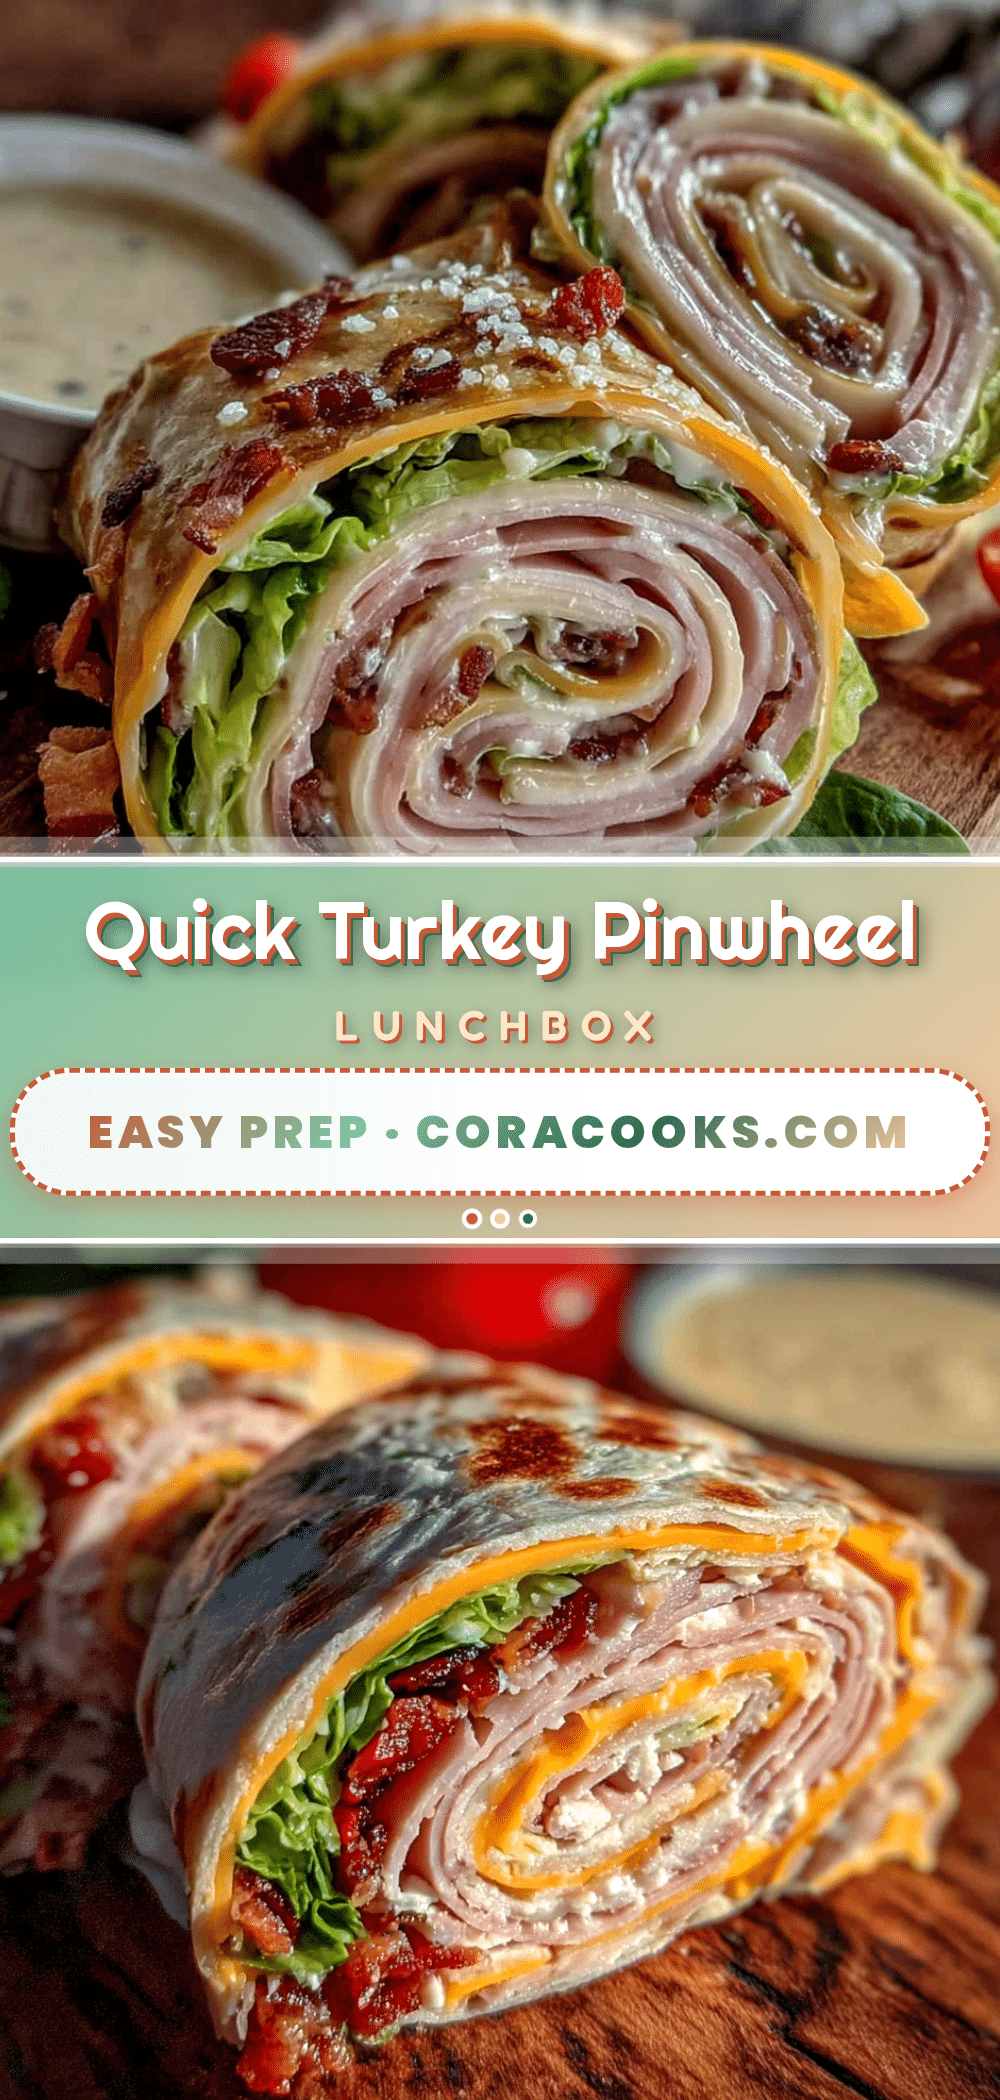
Quick Turkey Pinwheel Wraps for Easy Lunchbox Prep

These quick turkey pinwheel wraps are the perfect solution for lunchbox boredom. Made with a creamy ranch spread, deli turkey, and fresh veggies, they hold up beautifully and take about 10 minutes to assemble.
- Prep Time: 15 minutes
- Cook Time: 0 minutes
- Total Time: 45 minutes (includes 30 minutes chilling)
- Yield: 4 servings 1x
- Category: Lunch
- Cuisine: American
Ingredients
- 8 oz cream cheese, softened to room temperature
- 1/4 cup sour cream
- 1 tablespoon ranch seasoning mix
- 1/4 cup finely chopped fresh chives (optional)
- 1/4 teaspoon garlic powder
- Salt and black pepper to taste
- 4 large flour tortillas (burrito-sized, about 10 inches)
- 12 slices deli turkey breast
- 1 cup shredded lettuce (romaine or iceberg)
- 1/2 cup thinly sliced cucumber
- 1/4 cup thinly sliced red onion (optional)
Instructions
- Make the cream cheese spread: In a medium mixing bowl, combine the softened cream cheese, sour cream, ranch seasoning, chives (if using), garlic powder, and a pinch of salt and pepper. Beat with a hand mixer on medium speed until smooth and fluffy, about 2 minutes. Scrape down the sides of the bowl with a rubber spatula.
- Prep your work surface: Lay a large tortilla flat on a clean cutting board. If the tortilla seems stiff, microwave it for 10 seconds to make it more pliable.
- Spread the cream cheese mixture: Using a butter knife or offset spatula, spread about 3 tablespoons of the cream cheese mixture evenly over the entire surface of the tortilla, leaving a 1-inch border around the edges.
- Layer the fillings: Place 3 slices of turkey on the lower third of the tortilla, slightly overlapping. Top with a small handful of shredded lettuce, a few cucumber slices, and a sprinkle of red onion (if using).
- Roll tightly: Starting from the bottom edge, roll the tortilla away from you, tucking the filling in as you go. Keep it tight but not so tight that the fillings squish out the ends. Once rolled, press gently to seal the edge.
- Wrap and chill: Wrap each rolled tortilla tightly in plastic wrap or beeswax wrap. Place them seam-side down in the refrigerator for at least 30 minutes.
- Slice into pinwheels: After chilling, unwrap the tortillas and place them on a cutting board. Using a sharp serrated knife, slice each roll into 1-inch thick rounds. You should get about 6-8 pinwheels per tortilla.
- Arrange and serve: Arrange the pinwheels in a single layer in a bento box or airtight container. They’re ready to eat immediately or can be stored for up to 3 days.
Notes
Soften cream cheese properly for smooth spreading. Don’t overfill the tortillas. Chill before slicing for clean cuts. Use a serrated knife for best results. Keep lettuce dry to prevent sogginess.
Nutrition
- Serving Size: 6 pinwheels
- Calories: 310
- Sugar: 3
- Sodium: 780
- Fat: 14
- Saturated Fat: 7
- Carbohydrates: 24
- Fiber: 2
- Protein: 22
Keywords: turkey pinwheel wraps, lunchbox recipes, easy lunch, no-cook lunch, meal prep, turkey wraps, pinwheel sandwiches