Love this? Save it for later!
Share the inspiration with your friends
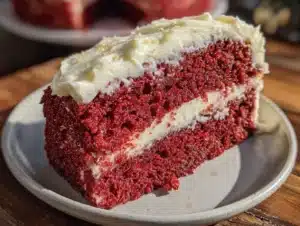
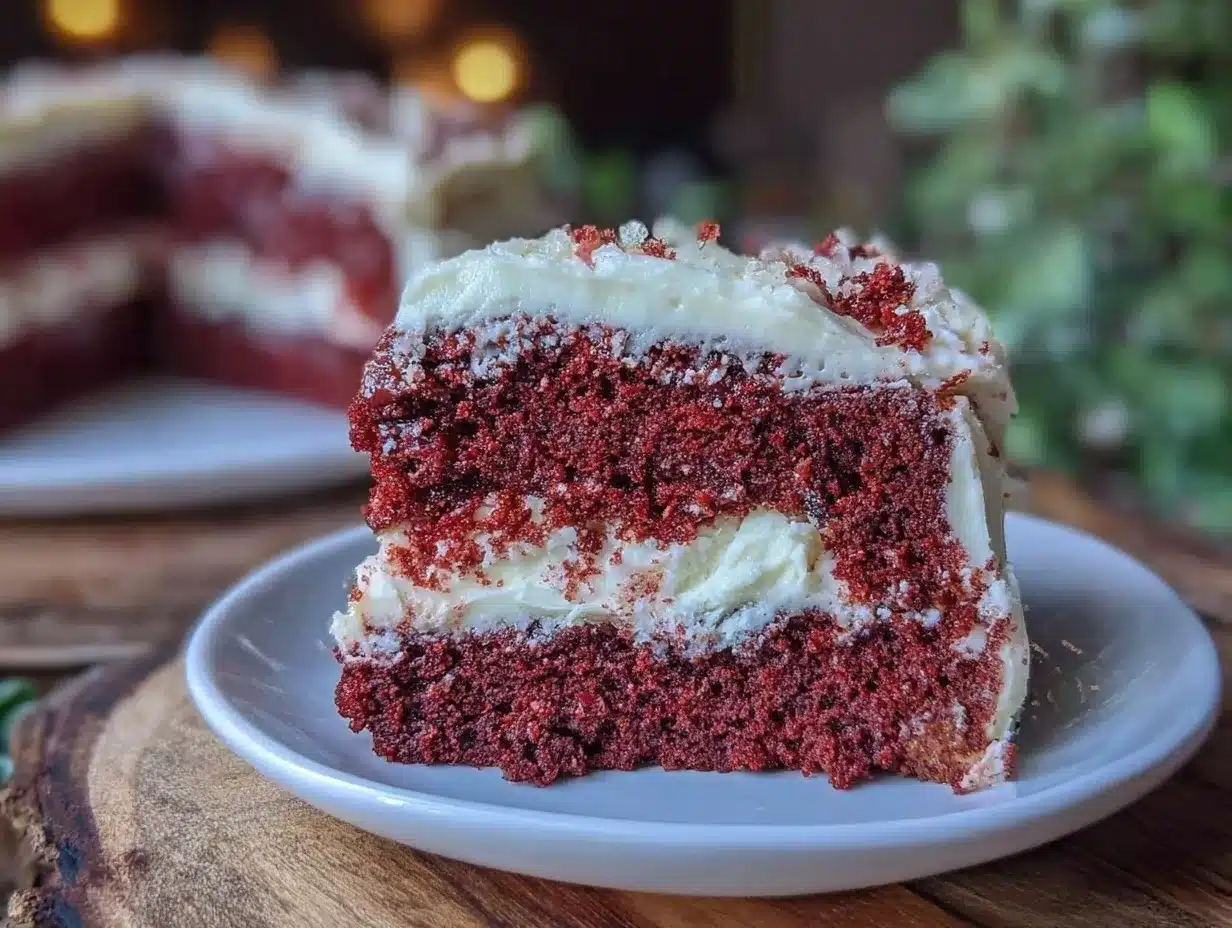
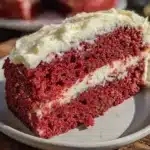
“I never thought a cake could stop me mid-conversation, but there I was, at Jenna’s place last spring, utterly speechless.” That’s how my love affair with this moist red velvet cake with creamy cream cheese frosting began. Jenna wasn’t even planning on baking anything special—just a quick dessert for her book club night. But the moment I caught a glimpse of the vibrant red layers and smelled that tangy cream cheese frosting, I knew this was something I had to recreate at home.
The thing is, I’ve tasted plenty of red velvet cakes before. Some were dry, others too sweet or cakey. But Jenna’s version? It was like biting into a velvet cloud—rich, tender, and perfectly balanced. Watching her whip up the frosting, I noticed she wasn’t following any fancy recipe, just a few simple ingredients and a lot of love. Of course, I forgot a key ingredient when I first tried to make it myself (can you believe I missed the vinegar?), but hey, those kitchen blunders often lead to the best learning moments.
Maybe you’re like me, craving a homemade cake that’s not only stunning with its deep red hue but also melts in your mouth with that luscious cream cheese frosting. Stick around—I’ll share everything you need to make this easy, crowd-pleasing red velvet cake that’s become my go-to for birthdays, cozy Sunday afternoons, and anytime I want to impress without stress.
Why You’ll Love This Recipe
- Quick & Easy: Comes together in under 90 minutes, perfect when you want a gorgeous dessert without spending all day in the kitchen.
- Simple Ingredients: No need for fancy or hard-to-find items; most are pantry staples you probably already have.
- Perfect for Celebrations: Whether it’s a birthday party, a potluck, or a festive holiday, this cake fits right in.
- Crowd-Pleaser: Kids, adults, picky eaters—everyone asks for seconds.
- Unbelievably Delicious: The moist crumb combined with the creamy, tangy frosting creates a flavor combo that’s hard to beat.
What sets this red velvet cake apart? Honestly, it’s the balance. Many recipes lean too heavily on the cocoa or the food coloring, but this one keeps the flavors mellow and smooth. Plus, the frosting is whipped just right—not too sweet, not too dense. I’ve tested this recipe countless times, tweaking the mixing method and frosting texture until it’s just right. It’s the kind of cake that makes you close your eyes on the first bite and say, “Yep, this is the one.”
What Ingredients You Will Need
This recipe uses straightforward ingredients that work together to create that iconic red velvet taste and texture. You’ll find most of these in your pantry or fridge, and there are a few handy substitutions if needed.
- All-purpose flour – The base for the cake’s tender crumb. I recommend using a trusted brand like King Arthur for consistent results.
- Cocoa powder (unsweetened) – Just a tablespoon for that subtle chocolate hint.
- Baking soda – Helps the cake rise and gives it a light texture.
- Salt – Enhances flavor depth; a pinch goes a long way.
- Granulated sugar – For sweetness; you can swap with coconut sugar for a warmer note.
- Vegetable oil – Keeps the cake moist; you can substitute with melted coconut oil if you prefer.
- Buttermilk (room temperature) – Adds tanginess and tenderizes the crumb. If you don’t have buttermilk, mix 1 tablespoon vinegar or lemon juice with 1 cup milk and let sit 5 minutes.
- Large eggs (room temperature) – Bind everything together; I always use fresh eggs for best texture.
- Red food coloring – The signature red; gel-based coloring works best for vibrant color without altering the batter’s consistency.
- Vanilla extract – Adds warmth and rounds out flavors.
- White vinegar – Reacts with baking soda for lift and helps set the crumb.
For the frosting:
- Cream cheese (full-fat, softened) – The star of the creamy frosting. I prefer Philadelphia brand for its smoothness.
- Unsalted butter (softened) – Adds richness and helps the frosting hold shape.
- Powdered sugar – Sweetens and thickens the frosting; sift before mixing to avoid lumps.
- Vanilla extract – Just a splash for extra flavor depth.
- Pinch of salt – Balances the sweetness and enhances the tanginess.
Equipment Needed
- Two 9-inch round cake pans: Non-stick or lined with parchment paper for easy release.
- Mixing bowls: Medium and large sizes for wet and dry ingredients.
- Electric mixer: Stand or handheld, for beating the batter and whipping the frosting. I’ve tried both; a stand mixer saves your arms but handheld works great too.
- Measuring cups and spoons: For precise ingredient amounts — this really matters with baking.
- Rubber spatula: Essential for folding ingredients and scraping bowls clean.
- Cooling racks: To let cakes cool evenly and avoid sogginess.
If you don’t have two cake pans, you can bake in one and slice the cake horizontally once cooled, but two pans save time and keep the layers even. Also, a good serrated knife helps when leveling the cake for stacking.
Preparation Method
- Preheat your oven to 350°F (175°C). Grease and flour two 9-inch round cake pans or line them with parchment paper. This little step prevents the cake from sticking, which I learned the hard way after one too many cracked layers.
- Mix the dry ingredients: In a medium bowl, sift together 2 ½ cups (312 g) all-purpose flour, 1 tablespoon (7.5 g) unsweetened cocoa powder, 1 teaspoon (5 g) baking soda, and ½ teaspoon (3 g) salt. Set aside.
- Combine the wet ingredients: In a large bowl, whisk 1 ½ cups (300 g) granulated sugar and 1 cup (240 ml) vegetable oil until smooth. Add 2 large eggs, one at a time, beating well after each addition.
- Add color and flavor: Stir in 2 tablespoons (30 ml) red food coloring, 1 teaspoon (5 ml) vanilla extract, and 1 teaspoon (5 ml) white vinegar. This mixture should look vibrant and smooth.
- Incorporate the dry and wet: Alternately add the dry ingredients and 1 cup (240 ml) buttermilk to the wet mixture, starting and ending with the dry. Mix gently but thoroughly after each addition. Overmixing can make the cake tough, so stop once combined.
- Pour batter evenly: Divide the batter between the prepared pans, smoothing tops with a spatula.
- Bake: Place pans in the oven and bake for 25-30 minutes. Check doneness by inserting a toothpick in the center—it should come out clean or with a few moist crumbs.
- Cool: Let the cakes rest in pans for 10 minutes, then turn out onto wire racks to cool completely. Patience here pays off; frosting a warm cake melts the frosting into a mess.
- Prepare the frosting: Beat 8 oz (225 g) softened cream cheese and ½ cup (113 g) softened unsalted butter together until creamy. Gradually add 3 cups (360 g) powdered sugar, mixing well after each addition. Stir in 1 teaspoon (5 ml) vanilla extract and a pinch of salt. Beat until smooth and fluffy.
- Assemble the cake: Level cakes if needed. Place one layer on your serving plate, spread a generous amount of frosting on top, then add the second layer. Frost the top and sides evenly.
- Chill: For best results, refrigerate the cake for at least 30 minutes before slicing. This helps the frosting firm up and makes cutting neater.
Cooking Tips & Techniques
Red velvet cake can be tricky if you’re new to it, but a few tricks make a world of difference. First, always use room temperature eggs and buttermilk to help everything mix smoothly. Cold ingredients can cause the batter to curdle or bake unevenly.
When mixing, don’t overdo it. Overmixing develops gluten in the flour, leading to a dense cake rather than that soft, tender crumb you want. I like to fold in the dry ingredients gently, just until no streaks remain.
About the red food coloring: gel-based colorants are your best bet because they give a vivid red without thinning the batter. Liquid food color can work but might require a bit more to achieve that signature color, which can affect texture.
For the frosting, always beat the cream cheese and butter until silky before adding powdered sugar. This prevents lumps and ensures a smooth, spreadable frosting. If your frosting feels too soft, pop it in the fridge for 10-15 minutes, then whip again before frosting.
Finally, don’t skip chilling the cake after assembly. It might be tempting to slice right away, but trust me—those clean, beautiful slices come from a little patience.
Variations & Adaptations
- Gluten-Free Option: Substitute the all-purpose flour with a gluten-free blend designed for baking. Just watch the texture; sometimes you need to add a teaspoon of xanthan gum for structure.
- Vegan Version: Use flax eggs (1 tablespoon ground flaxseed + 3 tablespoons water per egg), dairy-free cream cheese, plant-based butter, and almond milk with lemon juice for buttermilk.
- Chocolate Lover’s Twist: Add an extra tablespoon of cocoa powder and sprinkle mini chocolate chips between layers for a richer flavor.
- Seasonal Flavors: Mix in a teaspoon of orange zest to the batter or frosting for a fresh citrus hint, perfect for winter holidays.
- Personal Favorite: Once, I swapped the cream cheese frosting for a mascarpone-based one with a touch of honey—it gave the cake a silky texture and a subtle sweetness that was a nice change for summer gatherings.
Serving & Storage Suggestions
This moist red velvet cake tastes best served chilled or at room temperature. I like to slice it about 30 minutes after taking it out of the fridge, so the frosting softens just enough without losing its shape. It pairs beautifully with a cup of strong coffee or a glass of cold milk—simple but satisfying.
If you’re serving at a party, consider decorating the cake with fresh berries or edible flowers for a festive touch. For an extra cozy vibe, a dusting of cocoa powder or a drizzle of melted chocolate can make it feel special.
Store leftover cake tightly wrapped or in an airtight container in the refrigerator for up to 4 days. You can freeze uncut frosted cake for up to 3 months; just thaw overnight in the fridge. When reheating slices, let them warm at room temperature or pop them in the microwave for 10-15 seconds to bring back that soft, moist texture.
Fun fact: the flavors deepen after a day or two, so sometimes I make the cake a day ahead to let the taste mellow and marry beautifully.
Nutritional Information & Benefits
Each slice of this red velvet cake (about 1/12th of the cake) contains roughly 350-400 calories, with moderate amounts of fat and sugar. The cream cheese frosting adds a dose of calcium and protein, though this is still a dessert to enjoy in moderation.
Key ingredients like buttermilk provide beneficial probiotics and calcium, while the cocoa powder offers antioxidants. Using vegetable oil keeps the cake moist without the heaviness of butter, and you can reduce sugar slightly without a big impact on texture.
This recipe is naturally free from nuts and can be adapted to be gluten-free or vegan, making it accessible for many dietary needs.
Conclusion
This moist red velvet cake with creamy cream cheese frosting isn’t just a dessert—it’s a slice of comfort and celebration rolled into one. Whether you’re baking for a special occasion or just because the craving hits, this cake delivers a perfect balance of flavor, texture, and that wow factor without stress.
Feel free to tweak the frosting sweetness or try a seasonal twist to make it your own. Honestly, every time I make it, I remember Jenna’s kitchen and how something so simple can create such a memorable moment.
If you try this recipe, I’d love to hear how it turns out—drop a comment below or share your photos. Baking is always better when we share the love (and maybe the crumbs!). Happy baking!
Frequently Asked Questions
- Can I make this cake without red food coloring?
Yes, but the classic red velvet look won’t be the same. You can use natural alternatives like beet juice, but it may alter the flavor slightly. - What’s the best way to store leftover cake?
Keep it in an airtight container in the fridge for up to 4 days. You can also freeze it for longer storage. - Can I bake this cake in a different pan size?
You can use an 8-inch pan, but the baking time will increase. Check for doneness with a toothpick. - Is it okay to use substitute milk instead of buttermilk?
Yes, just add a tablespoon of vinegar or lemon juice to 1 cup of any milk and let it sit for 5 minutes to mimic buttermilk. - How do I avoid a dry cake?
Make sure not to overbake and use room temperature ingredients. Also, vegetable oil helps keep the crumb moist.
Pin This Recipe!
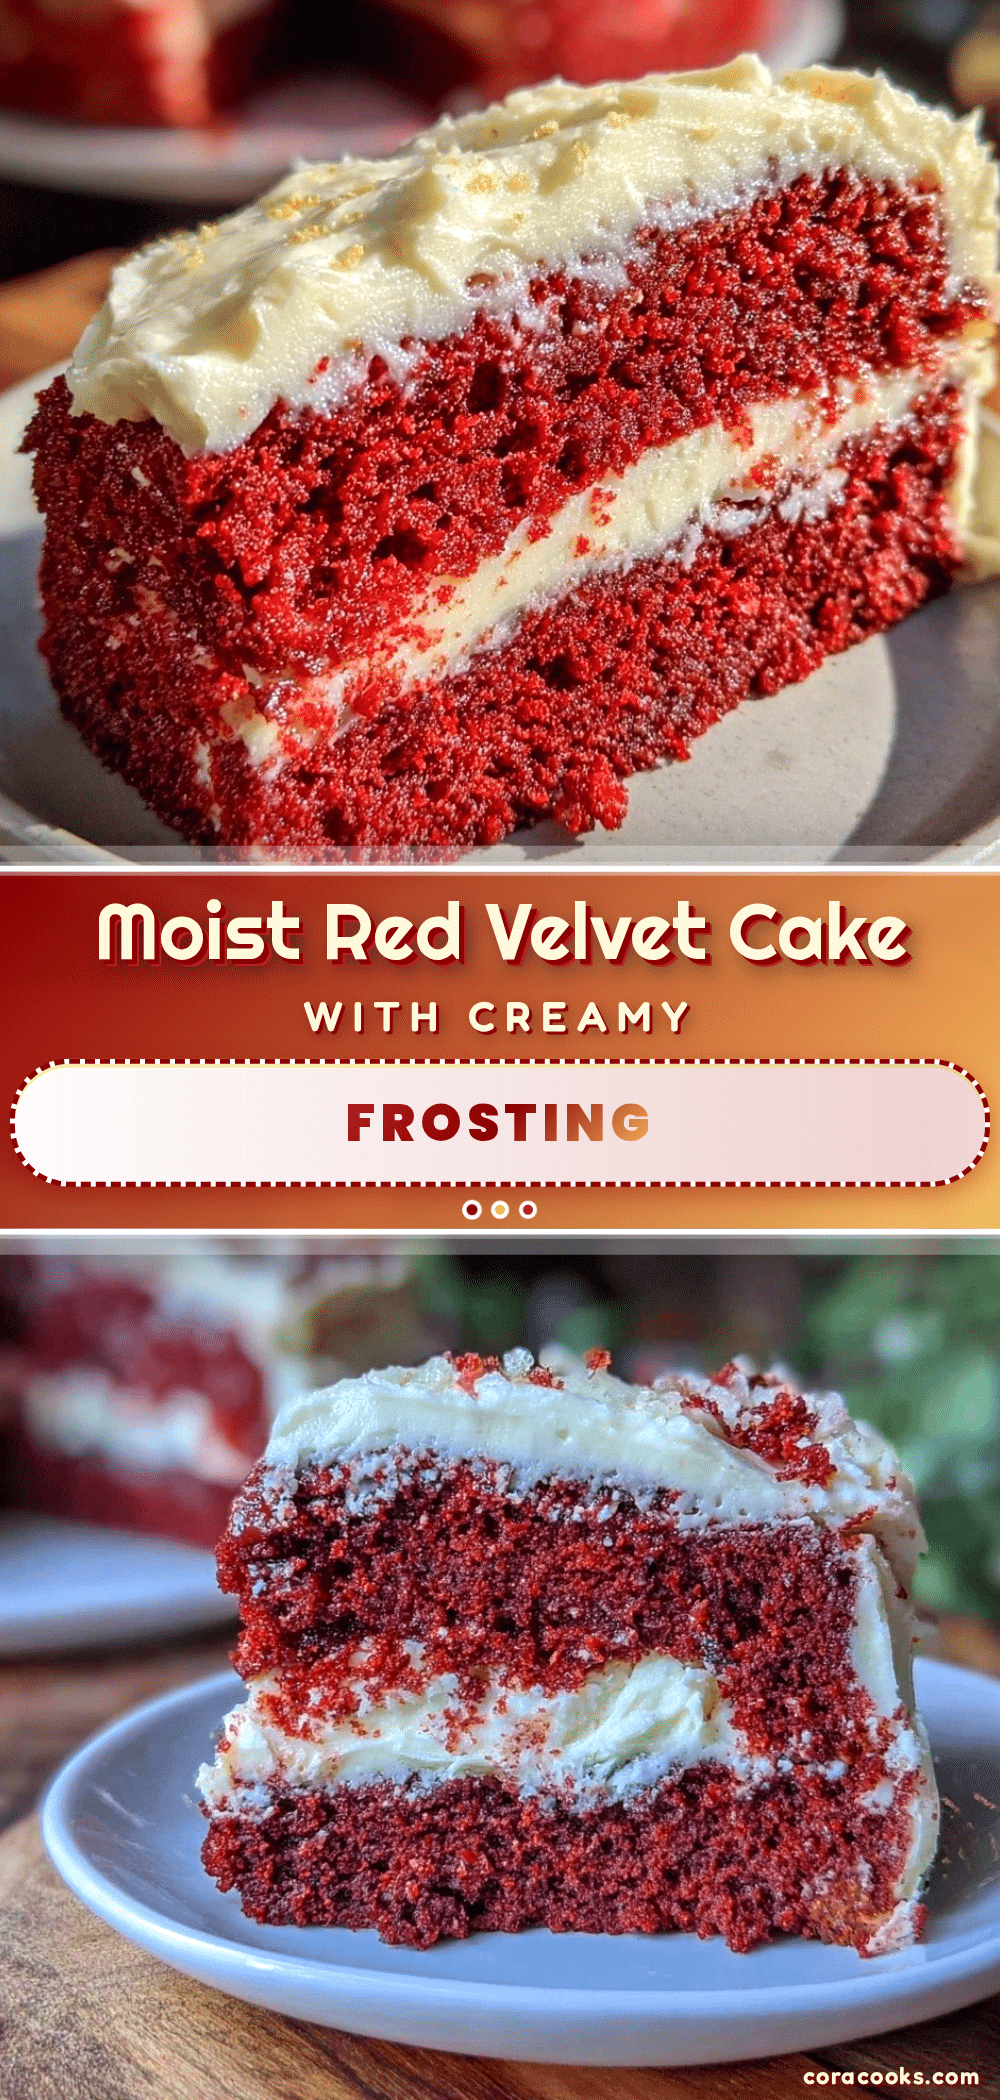
Moist Red Velvet Cake Recipe Easy Homemade Cream Cheese Frosting
A moist and tender red velvet cake with creamy, tangy cream cheese frosting that is quick and easy to make, perfect for celebrations and crowd-pleasing occasions.
- Prep Time: 20 minutes
- Cook Time: 30 minutes
- Total Time: 50 minutes
- Yield: 12 servings 1x
- Category: Dessert
- Cuisine: American
Ingredients
- 2 ½ cups (312 g) all-purpose flour
- 1 tablespoon (7.5 g) unsweetened cocoa powder
- 1 teaspoon (5 g) baking soda
- ½ teaspoon (3 g) salt
- 1 ½ cups (300 g) granulated sugar
- 1 cup (240 ml) vegetable oil
- 2 large eggs (room temperature)
- 2 tablespoons (30 ml) red food coloring (gel-based recommended)
- 1 teaspoon (5 ml) vanilla extract
- 1 teaspoon (5 ml) white vinegar
- 1 cup (240 ml) buttermilk (room temperature) or 1 cup milk + 1 tablespoon vinegar/lemon juice, let sit 5 minutes
- For the frosting:
- 8 oz (225 g) cream cheese (full-fat, softened)
- ½ cup (113 g) unsalted butter (softened)
- 3 cups (360 g) powdered sugar (sifted)
- 1 teaspoon (5 ml) vanilla extract
- Pinch of salt
Instructions
- Preheat your oven to 350°F (175°C). Grease and flour two 9-inch round cake pans or line them with parchment paper.
- In a medium bowl, sift together the flour, cocoa powder, baking soda, and salt. Set aside.
- In a large bowl, whisk the sugar and vegetable oil until smooth. Add eggs one at a time, beating well after each addition.
- Stir in red food coloring, vanilla extract, and white vinegar until the mixture is vibrant and smooth.
- Alternately add the dry ingredients and buttermilk to the wet mixture, starting and ending with the dry ingredients. Mix gently but thoroughly after each addition without overmixing.
- Divide the batter evenly between the prepared pans and smooth the tops with a spatula.
- Bake for 25-30 minutes or until a toothpick inserted in the center comes out clean or with a few moist crumbs.
- Let the cakes rest in the pans for 10 minutes, then turn out onto wire racks to cool completely.
- For the frosting, beat cream cheese and butter together until creamy. Gradually add powdered sugar, mixing well after each addition. Stir in vanilla extract and salt. Beat until smooth and fluffy.
- Level cakes if needed. Place one layer on a serving plate, spread frosting on top, then add the second layer. Frost the top and sides evenly.
- Refrigerate the assembled cake for at least 30 minutes before slicing to firm up the frosting.
Notes
Use room temperature eggs and buttermilk for best mixing results. Avoid overmixing to keep the cake tender. Gel-based red food coloring is preferred for vibrant color without thinning the batter. Chill the cake after frosting for cleaner slices. For gluten-free, substitute flour with gluten-free blend and add xanthan gum. Vegan adaptations include flax eggs, dairy-free cream cheese, plant-based butter, and almond milk with lemon juice.
Nutrition
- Serving Size: 1 slice (1/12th of c
- Calories: 375
- Sugar: 35
- Sodium: 280
- Fat: 18
- Saturated Fat: 7
- Carbohydrates: 50
- Fiber: 1
- Protein: 4
Keywords: red velvet cake, cream cheese frosting, moist cake, easy cake recipe, homemade dessert, celebration cake