Love this? Save it for later!
Share the inspiration with your friends
Introduction
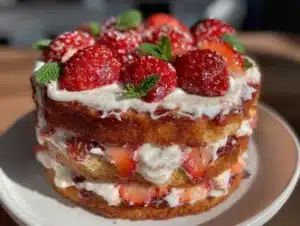
“I’m telling you, this cake is magic,” my neighbor Linda whispered as I watched her carefully spread the strawberry frosting on the layers. It was a lazy Sunday afternoon, and I had just stopped by to borrow some sugar—typical me, always running out at the worst time. Linda’s kitchen smelled of fresh strawberries and vanilla, a scent that instantly took me back to summers spent chasing fireflies and licking juice off my fingers. That day, she wasn’t trying to impress anyone. She was just baking the Classic Mom’s Famous Strawberry Layer Cake like it was no big deal. But honestly, what came out of her oven was anything but ordinary.
Maybe you’ve been there—sitting in someone’s kitchen, watching them make something that seems simple, yet tastes like pure happiness. I remember accidentally knocking over a bowl of flour right before she slid the cake into the oven, creating a mess that had us both laughing. Yet somehow, the cake turned out perfect, soft and bursting with fresh strawberry flavor. Since then, I’ve made it countless times, tweaking just a little here and there, but never straying far from what Linda taught me that afternoon.
This Classic Mom’s Famous Strawberry Layer Cake Recipe isn’t just a dessert; it’s a little time capsule of joy, tradition, and those unexpected moments that make cooking so special. Let me tell you, once you try this recipe, it’s likely to become your go-to for birthdays, celebrations, or just when you need a sweet pick-me-up.
Why You’ll Love This Recipe
Honestly, this strawberry layer cake has been tested in my kitchen more times than I can count, and every time, it delivers that perfect balance of moist cake and fresh, fruity sweetness. I’ve had friends tell me it instantly reminds them of their childhood, and I couldn’t agree more. Here’s why this recipe stands out:
- Quick & Easy: Comes together in under 90 minutes, perfect for busy weekends or last-minute dessert plans.
- Simple Ingredients: Pantry staples plus fresh strawberries—you likely already have everything on hand.
- Perfect for Celebrations: Ideal for birthdays, family dinners, or cozy get-togethers where you want something classic but impressive.
- Crowd-Pleaser: Kids and adults alike swoon over the soft cake layers and luscious strawberry frosting.
- Unbelievably Delicious: The texture is light yet rich, with a natural sweetness that’s not overpowering.
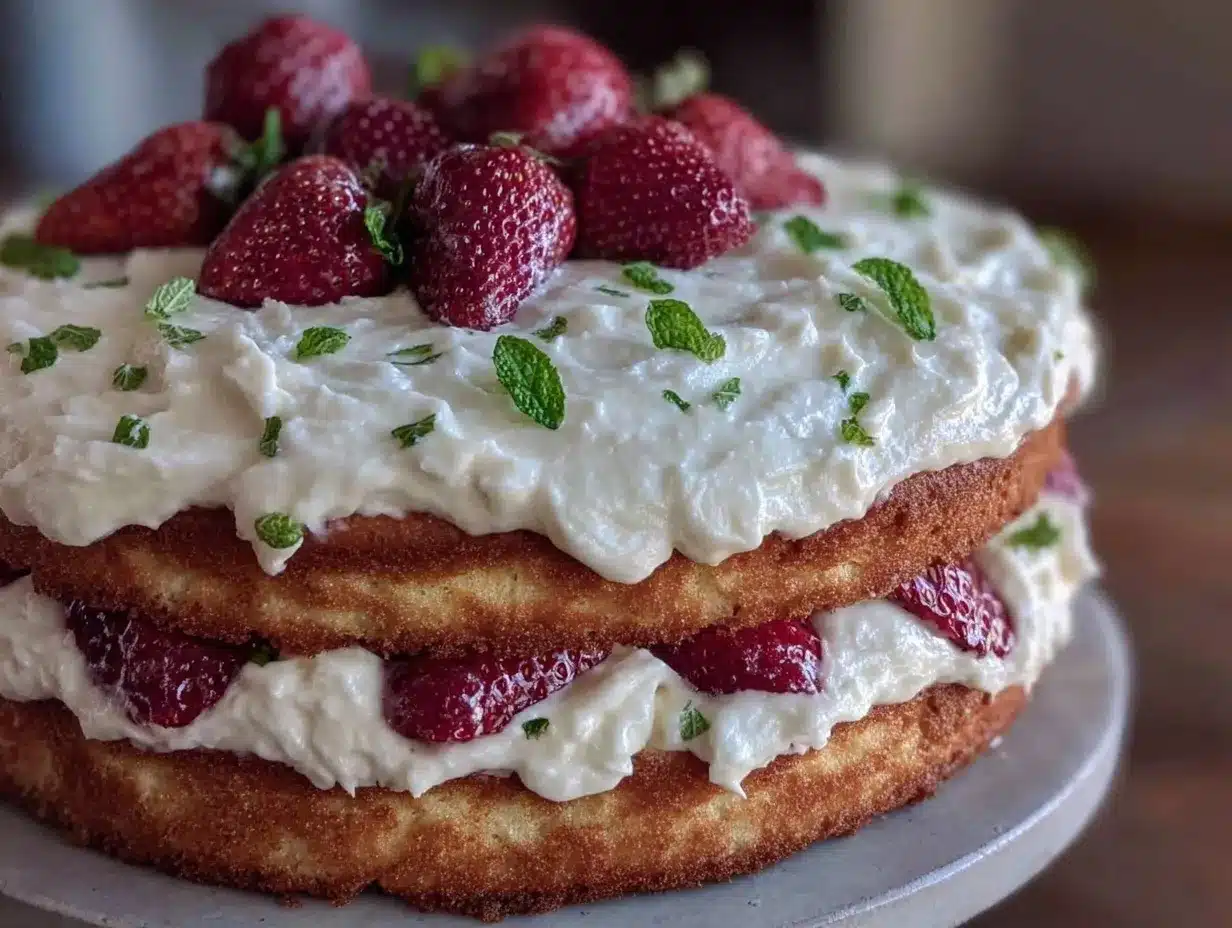
This isn’t your average strawberry cake. What sets it apart is the way the fresh strawberry puree is folded gently into the frosting, giving every bite a subtle, refreshing burst of flavor. Plus, the layers stay moist without being soggy, thanks to a little trick I learned from a professional baker friend (hint: it involves a simple syrup soak). The recipe feels like a hug wrapped in a dessert, and honestly, it’s the kind of cake you’ll want to make again and again.
What Ingredients You Will Need
This Classic Mom’s Famous Strawberry Layer Cake Recipe uses simple, wholesome ingredients to create a rich yet light dessert that sings with fresh strawberry flavor. Most of these are pantry staples, and the fresh strawberries are easy to find year-round in most grocery stores or farmers markets.
- For the Cake Layers:
- All-purpose flour, 2 ½ cups (320g) – I prefer King Arthur for consistent results
- Baking powder, 2 ½ teaspoons – makes the cake rise beautifully
- Salt, ½ teaspoon – balances the sweetness
- Unsalted butter, 1 cup (227g), softened – room temperature for easy mixing
- Granulated sugar, 1 ¾ cups (350g) – regular white sugar works best here
- Large eggs, 4, at room temperature – helps with texture and structure
- Pure vanilla extract, 2 teaspoons – adds depth to the flavor
- Whole milk, 1 cup (240ml), warmed slightly – enhances moistness
- Strawberry puree, ½ cup (120ml) – made from fresh strawberries, mashed and strained
- For the Strawberry Frosting:
- Unsalted butter, 1 cup (227g), softened – for that creamy base
- Powdered sugar, 4 cups (480g), sifted – for smooth frosting
- Fresh strawberry puree, ¾ cup (180ml) – packed with natural sweetness
- Heavy cream, 2 tablespoons (30ml) – adds fluffiness
- Pure vanilla extract, 1 teaspoon – complements the strawberries
- Pinch of salt – balances the sweetness
- Optional:
- Fresh strawberries, sliced, for decorating
- Simple syrup (¼ cup sugar dissolved in ¼ cup water) for brushing layers
If you’re looking for gluten-free options, you can swap the flour with a trusted gluten-free blend, though texture might vary slightly. For a dairy-free version, try using plant-based butter and coconut cream, but honestly, the classic butter and cream combo gives this cake its signature richness.
Equipment Needed
Before you start baking this classic strawberry layer cake, gather these kitchen tools to make the process smooth and enjoyable.
- Two 8-inch (20 cm) round cake pans – I find these perfect for even layers; alternatively, 9-inch pans work but adjust baking time slightly.
- Mixing bowls – one large for the batter and one for the frosting.
- Electric mixer or stand mixer – makes whipping the frosting easier, but a sturdy hand mixer will do fine.
- Measuring cups and spoons – for precise ingredient amounts.
- Rubber spatula – excellent for folding strawberry puree into the batter.
- Cooling racks – essential to cool the cake layers evenly.
- Fine mesh sieve – helpful if you want to strain the strawberry puree for a silky texture.
- Offset spatula or butter knife – for smooth frosting application.
If you don’t have a stand mixer, no worries! Using a hand mixer might take a little longer, but you’ll get great results. Also, I keep my pans well-greased and lined with parchment paper to avoid any sticky surprises. Plus, a quick tip: a kitchen scale can save you from measuring mishaps, especially with flour.
Preparation Method
- Preheat and Prep (10 minutes): Preheat your oven to 350°F (175°C). Grease two 8-inch round cake pans with butter and lightly dust with flour or line the bottoms with parchment paper for easy removal.
- Mix Dry Ingredients (5 minutes): In a medium bowl, sift together 2 ½ cups (320g) all-purpose flour, 2 ½ teaspoons baking powder, and ½ teaspoon salt. Set aside to keep everything evenly combined.
- Cream Butter and Sugar (6-7 minutes): Using an electric mixer, beat 1 cup (227g) softened unsalted butter with 1 ¾ cups (350g) granulated sugar on medium speed until light and fluffy. This step is crucial—it traps air, helping the cake rise beautifully. The mixture should look pale and creamy.
- Add Eggs and Vanilla (3 minutes): Add the eggs one at a time, beating well after each addition to keep the batter smooth. Then mix in 2 teaspoons pure vanilla extract.
- Combine Wet and Dry Ingredients (8-10 minutes): Alternately add the dry ingredients and 1 cup (240ml) warmed milk to the butter mixture, starting and ending with the dry ingredients. Mix gently after each addition until just combined—don’t overbeat! Now fold in ½ cup (120ml) fresh strawberry puree carefully with a spatula, so you keep the batter light and airy.
- Bake the Cake Layers (25-30 minutes): Divide the batter evenly between the prepared pans. Smooth the tops with a spatula. Bake for 25-30 minutes, or until a toothpick inserted in the center comes out clean. The cakes should spring back when lightly pressed.
- Cool Completely (30-40 minutes): Let the cakes cool in the pans for 10 minutes, then turn them out onto wire racks to cool completely. This prevents sogginess. If you want, brush layers lightly with simple syrup to add moisture and a hint of sweetness.
- Make the Strawberry Frosting (10 minutes): Beat 1 cup (227g) softened unsalted butter until creamy. Gradually add 4 cups (480g) sifted powdered sugar, alternating with ¾ cup (180ml) fresh strawberry puree, 2 tablespoons (30ml) heavy cream, and 1 teaspoon vanilla extract. Add a pinch of salt to balance sweetness. Beat until smooth, light, and fluffy.
- Assemble the Cake (15 minutes): Place one cake layer on your serving plate. Spread a thick layer of frosting on top. Add the second cake layer and cover the entire cake with the remaining frosting. Decorate with fresh strawberry slices if desired.
- Chill and Serve: For best results, chill the cake for at least 30 minutes before slicing. This helps the frosting set and flavors meld beautifully.
Pro tip: If your frosting feels too soft, pop it in the fridge for 10 minutes, then whip it again briefly. Also, don’t rush cooling the layers—warm cake and frosting don’t mix well and can lead to melting messes!
Cooking Tips & Techniques
Let me share some nuggets I’ve learned making this strawberry layer cake over the years. First, always use room temperature ingredients—cold eggs or butter can make the batter lumpy and slow down the creaming process. Patience here pays off big time!
When folding in the strawberry puree, be gentle. You want to keep the batter airy for that tender crumb. Overmixing is a rookie mistake that leads to dense cake (I’ve been there, trust me). Using fresh strawberries for puree gives the best flavor, but if you’re in a pinch, thawed frozen berries work fine—just strain seeds for smoothness.
Don’t skip sifting the powdered sugar for the frosting—it makes it silky and avoids graininess. If your kitchen feels warm, refrigerate the frosting briefly to keep it from getting too soft while you work.
Timing is everything. Start making the frosting once your cake layers are cooling, so you can assemble quickly. Multitasking here keeps the momentum going, and you avoid the frosting sitting out too long and melting.
Lastly, use an offset spatula for frosting. It helps get those smooth edges and clean layers without tearing the cake. My first layer cake looked like a disaster until I switched to this handy tool.
Variations & Adaptations
This classic strawberry layer cake is wonderful as is, but I’ve played around with a few tweaks that you might like to try:
- Dietary Variation: For a gluten-free twist, substitute the flour with a 1:1 gluten-free baking blend. The texture is slightly different but still delicious.
- Seasonal Adaptation: In winter, swap fresh strawberries for thawed frozen berries or use a strawberry jam swirl in the frosting for a cozy vibe.
- Flavor Boost: Add a tablespoon of fresh lemon zest to the batter for a bright, citrusy kick that pairs beautifully with strawberries.
- Dairy-Free Option: Use vegan butter and coconut cream instead of dairy for a rich, creamy frosting that’s friendly to dairy sensitivities.
- Personal Favorite: I once added a thin layer of cream cheese frosting between the cake layers along with the strawberry frosting for a tangy surprise that my family loved.
Also, this cake can be baked in cupcake form for parties—just reduce baking time to about 18-20 minutes. Or, if you want a quicker dessert, turn the batter into a sheet cake and top with the frosting and sliced strawberries.
Serving & Storage Suggestions
This strawberry layer cake is best served chilled or at room temperature. The frosting firms up nicely when cold, making slices neat and easy to handle. I like to plate each slice with a few extra fresh strawberry slices or a light dusting of powdered sugar for a pretty touch.
It pairs beautifully with a cup of Earl Grey tea or a glass of sparkling lemonade—perfect for afternoon gatherings or birthday treats. If you’re hosting brunch, serve alongside light fruit salads or creamy vanilla yogurt for a balanced spread.
Store leftover cake covered in the fridge for up to 3 days. The flavors actually deepen after a day or two, so don’t be afraid to make it ahead. For longer storage, slice and freeze individual pieces wrapped tightly in plastic wrap and foil—thaw overnight in the fridge. Reheat gently in a warm oven (300°F/150°C) for about 10 minutes to refresh the texture.
Nutritional Information & Benefits
Each slice (assuming 12 servings) of this strawberry layer cake contains approximately 350-400 calories, with moderate amounts of fat and sugar due to butter and powdered sugar. The fresh strawberries provide vitamin C and antioxidants, giving a slight health boost amidst the indulgence.
For those watching carbs, the cake is moderate but can be adapted by reducing sugar or using alternative flours as mentioned. It’s naturally gluten-free with substitutions and can be made dairy-free with simple swaps.
From my perspective, this cake balances comfort with a touch of freshness—perfect for when you want a treat that feels special but not overly heavy. Plus, there’s something genuinely nourishing about sharing a homemade dessert that brings smiles around the table.
Conclusion
If you’re searching for a dessert that combines nostalgia, simplicity, and pure strawberry bliss, this Classic Mom’s Famous Strawberry Layer Cake Recipe is a winner every time. It’s adaptable to your kitchen style, forgiving for beginners, and always impressive on the table.
Give this recipe a try and tweak it to your taste—you might find your own little tradition in the making. Personally, I love how it brings my family together, creating moments that feel like warm hugs. So, roll up your sleeves, grab some fresh strawberries, and bake a slice of happiness.
Don’t forget to share your thoughts or any fun twists you try in the comments below. Happy baking!
Frequently Asked Questions
Can I use frozen strawberries for the puree?
Yes, thaw frozen strawberries completely and strain out seeds for a smooth puree. The flavor will be slightly less fresh but still delicious.
How do I make sure my cake layers turn out moist?
Use room temperature ingredients, don’t overmix the batter, and consider brushing the baked layers with simple syrup before frosting.
Can I make this cake ahead of time?
Absolutely! Bake the layers a day ahead and store wrapped in plastic wrap. Assemble and frost the next day for best results.
What’s the best way to store leftover cake?
Keep it covered in the refrigerator for up to 3 days. For longer storage, freeze slices individually wrapped and thaw before serving.
Can I use a different fruit instead of strawberries?
Yes! Raspberries or fresh blueberries work well. Adjust the puree amount and sweetness to taste.
Pin This Recipe!
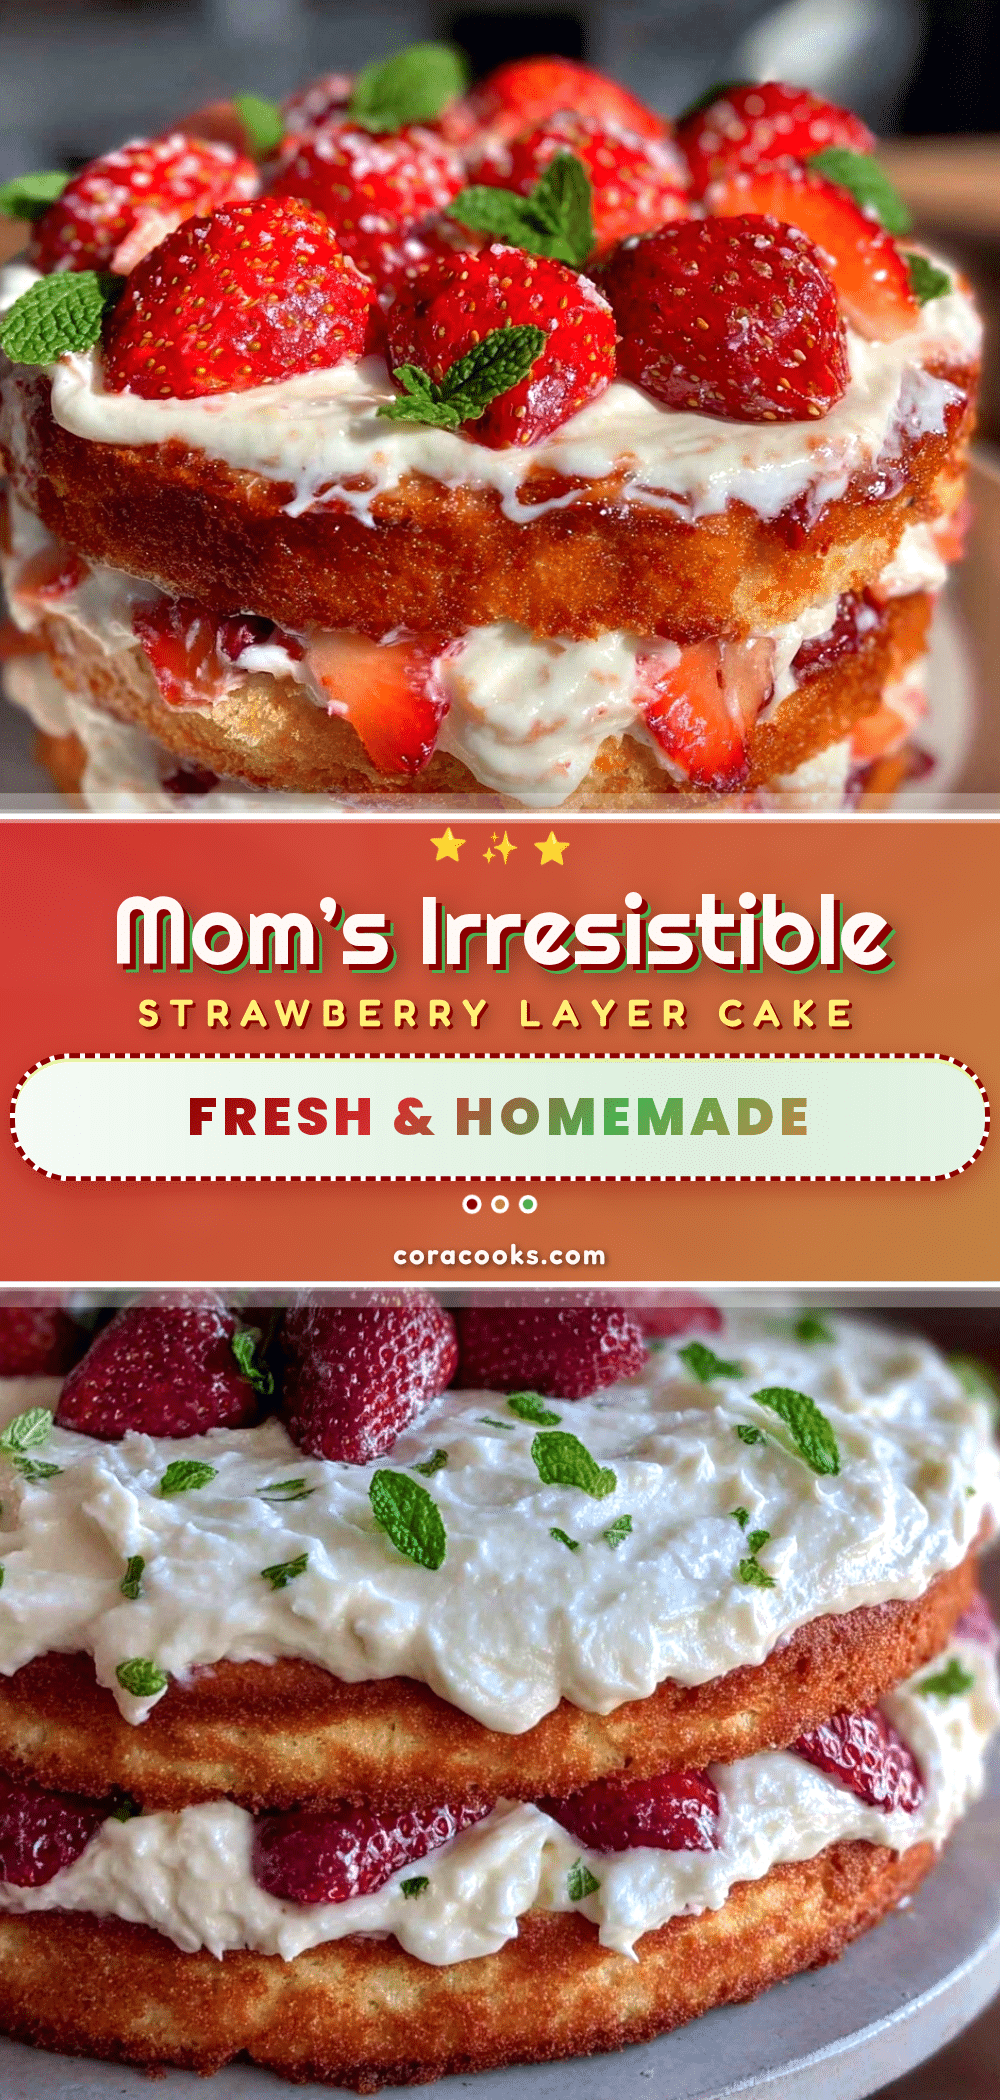
Classic Mom’s Famous Strawberry Layer Cake

A moist and light strawberry layer cake with fresh strawberry puree folded into the frosting, perfect for celebrations and everyday treats.
- Prep Time: 30 minutes
- Cook Time: 30 minutes
- Total Time: 1 hour
- Yield: 12 servings 1x
- Category: Dessert
- Cuisine: American
Ingredients
- 2 ½ cups (320g) all-purpose flour
- 2 ½ teaspoons baking powder
- ½ teaspoon salt
- 1 cup (227g) unsalted butter, softened
- 1 ¾ cups (350g) granulated sugar
- 4 large eggs, at room temperature
- 2 teaspoons pure vanilla extract
- 1 cup (240ml) whole milk, warmed slightly
- ½ cup (120ml) fresh strawberry puree
- 1 cup (227g) unsalted butter, softened (for frosting)
- 4 cups (480g) powdered sugar, sifted
- ¾ cup (180ml) fresh strawberry puree (for frosting)
- 2 tablespoons (30ml) heavy cream
- 1 teaspoon pure vanilla extract (for frosting)
- Pinch of salt
- Optional: fresh strawberries, sliced, for decorating
- Optional: simple syrup (¼ cup sugar dissolved in ¼ cup water) for brushing layers
Instructions
- Preheat oven to 350°F (175°C). Grease two 8-inch round cake pans and dust with flour or line with parchment paper.
- Sift together flour, baking powder, and salt in a medium bowl; set aside.
- Beat softened butter and granulated sugar on medium speed until light and fluffy, about 6-7 minutes.
- Add eggs one at a time, beating well after each addition, then mix in vanilla extract.
- Alternately add dry ingredients and warmed milk to the butter mixture, starting and ending with dry ingredients. Mix gently until just combined.
- Fold in ½ cup fresh strawberry puree carefully with a spatula to keep batter light.
- Divide batter evenly between prepared pans and smooth tops. Bake 25-30 minutes or until a toothpick comes out clean.
- Cool cakes in pans for 10 minutes, then turn out onto wire racks to cool completely. Optionally brush layers with simple syrup.
- For frosting, beat softened butter until creamy. Gradually add powdered sugar, alternating with strawberry puree, heavy cream, vanilla extract, and salt. Beat until smooth and fluffy.
- Assemble cake by placing one layer on a plate, spreading frosting on top, adding second layer, and covering entire cake with remaining frosting. Decorate with sliced strawberries if desired.
- Chill cake for at least 30 minutes before slicing to set frosting and meld flavors.
Notes
Use room temperature ingredients for best results. Be gentle when folding in strawberry puree to keep batter airy. Brush cake layers with simple syrup to keep moist. Chill frosting if too soft before applying. Use an offset spatula for smooth frosting application.
Nutrition
- Serving Size: 1 slice (1/12th of c
- Calories: 375
- Sugar: 38
- Sodium: 210
- Fat: 18
- Saturated Fat: 11
- Carbohydrates: 52
- Fiber: 1
- Protein: 4
Keywords: strawberry layer cake, classic strawberry cake, strawberry frosting, easy strawberry cake, celebration cake, homemade strawberry cake