Love this? Save it for later!
Share the inspiration with your friends
My neighbor Margaret watched me staring at her kitchen counter last October, completely mesmerized by the golden spiral sitting there. She didn’t say anything at first. Then she just laughed, wiped her hands on her apron, and said, “You know, the first time I tried this, the cake cracked so badly it looked like a map of the Mississippi River.” That was all it took. I was in.
Margaret is in her seventies now, and she’s been making pumpkin rolls for every family gathering since the 1980s. She didn’t hand me a recipe card that day. She just talked me through it while we drank coffee, and I scribbled notes on a napkin that I honestly still have tucked into my cookbook. There was flour on her cheek, and her cats kept weaving between our legs. It wasn’t a cooking class. It was just two people in a kitchen, one of them generously sharing something she’d perfected over decades.
That napkin recipe became the foundation for what I now consider the best homemade pumpkin roll with cream cheese filling. I’ve tweaked it over the years, adjusted the spice ratio, figured out the exact rolling technique that prevents cracks, and learned the hard way that patience with the cooling process is non-negotiable. Maybe you’ve been there, standing over a rolled cake, holding your breath, praying it doesn’t split when you unroll it. I’ve been there too. Let me tell you, it gets easier.
This pumpkin roll recipe has become my fall baking signature. I make it for Thanksgiving, for random October Sundays, and honestly, sometimes just because the house smells amazing when it’s baking. It’s the kind of dessert that looks impressive but secretly isn’t that complicated once you know the tricks. And I’m going to share every single one of them with you.
Why You’ll Love This Recipe
This isn’t just another pumpkin roll recipe floating around the internet. This is the version I’ve tested more times than I care to count, tweaking and adjusting until every element worked in harmony. Here’s why this particular recipe stands out:
- Foolproof Texture : The cake is tender and flexible, not dry or crumbly. You’ll actually look forward to rolling it because the texture cooperates beautifully.
- Perfectly Balanced Spices : Not too heavy on the cinnamon, not too shy on the ginger. The spice blend here lets the pumpkin flavor shine without overwhelming it.
- Luscious Cream Cheese Filling : It’s rich, tangy, and stays exactly where it should without oozing out the sides. I’ve perfected the butter-to-cream-cheese ratio through many, many taste tests.
- Make-Ahead Friendly : This pumpkin roll actually tastes better the next day. The flavors meld together, and the texture becomes even more luscious.
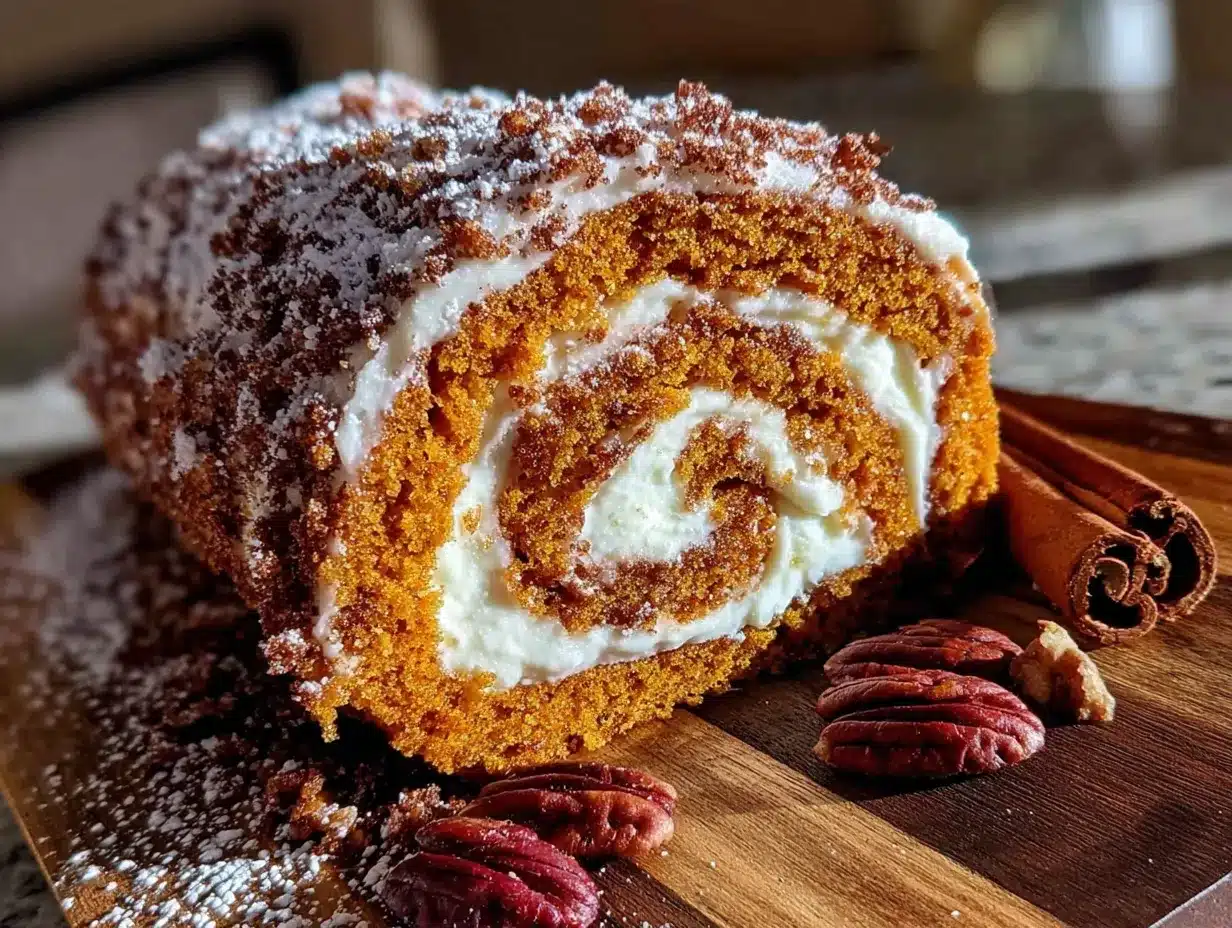
- Crowd-Pleasing Presentation : That beautiful spiral impresses everyone, and nobody needs to know it’s actually one of the easier desserts you can make.
- Freezer Stable : You can make this weeks ahead of Thanksgiving and just thaw it when ready. Total lifesaver during the holiday chaos.
What makes this recipe different from the rest? It’s the attention to the small details. The exact temperature for your cream cheese. The specific way you roll the cake while it’s warm. The trusty technique of using a clean kitchen towel dusted with powdered sugar. These aren’t just tips. They’re the difference between a pumpkin roll that cracks and one that looks like it came from a bakery.
Honestly, this is the kind of dessert that makes people close their eyes after the first bite. It’s comfort food reimagined for fall gatherings, holiday tables, or just a quiet evening when you want something special. Perfect for impressing guests without stress, or turning a simple Tuesday into something memorable.
What Ingredients You Will Need
This pumpkin roll recipe uses simple, wholesome ingredients that come together to create something truly special. Most of these are pantry staples, especially during fall baking season.
For the Pumpkin Cake
- ¾ cup all-purpose flour (spooned and leveled, not scooped from the bag)
- 1 teaspoon baking powder (check the expiration date, old baking powder ruins the texture)
- 1 teaspoon ground cinnamon (I prefer Saigon cinnamon for its warmth)
- ½ teaspoon ground ginger (adds that subtle zing)
- ½ teaspoon ground nutmeg (freshly grated if you have it, honestly worth the extra effort)
- ½ teaspoon salt (balances the sweetness beautifully)
- 3 large eggs (room temperature is crucial for proper incorporation)
- 1 cup granulated sugar (standard white sugar works perfectly)
- ⅔ cup pumpkin puree (not pumpkin pie filling, make sure it’s 100% pure pumpkin)
- 1 teaspoon vanilla extract (pure, not imitation)
- Powdered sugar (for dusting the towel and the finished roll)
For the Cream Cheese Filling
- 8 ounces cream cheese (full fat, softened to room temperature, I recommend Philadelphia brand for consistent results)
- ¼ cup unsalted butter (softened, not melted)
- 1 cup powdered sugar (sifted to avoid lumps)
- 1 teaspoon vanilla extract (pure vanilla makes a noticeable difference here)
Let’s talk about the pumpkin puree for a moment. I’ve tried several brands, and Libby’s consistently gives the best color and moisture content. If you’re using a different brand, just make sure it’s not watery. Sometimes organic pumpkin purees have a higher water content, which can make the cake too wet. If your puree looks thin, you can drain it slightly by placing it in a fine-mesh strainer for about 15 minutes.
For the cream cheese, please don’t use the low-fat version. The filling needs that full-fat richness to set properly and create that luscious texture we’re after. Trust me on this one. I learned that lesson the hard way with a filling that ended up more like soup than spread.
The butter in the filling should be unsalted so you control the salt level. If you only have salted butter, just reduce the added salt in the cake batter slightly.
Equipment Needed
You don’t need a fancy kitchen to make this pumpkin roll. Here’s what you’ll need:
- 15×10-inch jelly roll pan (also called a half-sheet pan, this is essential for the thin, even cake layer)
- Parchment paper (not wax paper, please, parchment is your friend here)
- Clean kitchen towel (a thin, lint-free one works best, I use an old flour sack towel)
- Electric mixer (hand mixer or stand mixer both work fine)
- Large mixing bowls (at least two)
- Rubber spatula (for folding and spreading)
- Cooling rack (for proper air circulation)
- Sharp knife or serrated knife (for clean slices)
- Sifter or fine-mesh strainer (for dusting powdered sugar)
If you don’t have a jelly roll pan, you could use a similar sized baking pan, but the depth matters. Too deep, and the cake will be too thick to roll properly. I bought my pan at a local kitchen supply store for about twelve dollars, and it’s one of my most-used baking tools during fall. A budget-friendly option is checking thrift stores. I’ve found several good jelly roll pans there for just a couple of dollars.
For the kitchen towel, avoid terry cloth or anything with texture. The cake will stick to it, and you’ll end up with a mess. A smooth, clean dish towel is ideal. I keep one specifically for pumpkin roll season, and it’s stained with powdered sugar and proud of it.
Preparation Method
Let’s walk through this step by step. Take your time, and don’t rush the cooling process. That’s where most people run into trouble.
- Preheat your oven to 375°F (190°C). Line your jelly roll pan with parchment paper, leaving a little overhang on the long sides. Lightly spray the parchment with non-stick spray. This ensures the cake releases cleanly.
- Whisk the dry ingredients together. In a medium bowl, combine the flour, baking powder, cinnamon, ginger, nutmeg, and salt. Whisk until everything is evenly distributed. Set this aside.
- Beat the eggs and sugar. In a large bowl, beat the eggs and granulated sugar together with your electric mixer on medium-high speed for about 2-3 minutes. The mixture should become thick, pale, and ribbon-like. When you lift the beaters, the batter should fall in a thick ribbon that sits on the surface for a moment before disappearing. This step is crucial for the cake’s structure.
- Add the pumpkin and vanilla. Reduce the mixer speed to low, and add the pumpkin puree and vanilla extract. Mix just until combined. Don’t overmix here, we just want everything incorporated.
- Fold in the dry ingredients. Add the flour mixture to the wet ingredients in two additions. Use a rubber spatula to gently fold everything together. Fold just until you can’t see any more flour streaks. A few small lumps are okay. Overmixing will make the cake tough.
- Spread the batter in the pan. Pour the batter into your prepared pan. Use an offset spatula or the back of a spoon to spread it evenly into all corners. The layer should be thin and uniform. Give the pan a gentle tap on the counter to release any air bubbles.
- Bake for 12-14 minutes. The cake is done when the top springs back when lightly touched and the edges are just starting to pull away from the pan. Don’t overbake, or the cake will be too dry to roll. Set a timer for 12 minutes and check from there.
- Prepare your rolling station. While the cake bakes, lay your clean kitchen towel flat on the counter. Dust it generously with powdered sugar. Use a sifter or fine-mesh strainer for even coverage. You want a nice, even layer, about 2 tablespoons worth.
- Roll the cake immediately. As soon as the cake comes out of the oven, run a knife around the edges to loosen it. Invert the cake onto the prepared towel. Carefully peel off the parchment paper. Starting from one short end, roll the cake and towel together into a tight spiral. Roll it while the cake is still warm, this is non-negotiable. If you wait, the cake will cool and crack when you try to roll it.
- Cool completely. Place the rolled cake on a cooling rack and let it cool completely. This takes about 1-2 hours. Don’t rush this. The cake needs to cool in its rolled shape so it “learns” to hold that curve. I’ve tried speeding this up in the refrigerator, and it just doesn’t work as well.
- Make the filling. While the cake cools, beat the softened cream cheese and butter together in a medium bowl until smooth and creamy. Add the sifted powdered sugar and vanilla extract. Beat on low speed until combined, then increase to medium and beat for about 2 minutes until the filling is light and fluffy. Don’t overbeat, or the filling can become too thin.
- Unroll and fill. Once the cake is completely cool, gently unroll it. It might try to curl back up, that’s normal. Spread the cream cheese filling evenly over the cake, leaving about a ½-inch border on all sides. I like to use an offset spatula for this.
- Roll again. Carefully reroll the cake, this time without the towel. Use the towel to help guide the roll if needed. Roll it as tightly as you can without squeezing the filling out the ends. Place the roll seam-side down on a serving platter or piece of plastic wrap.
- Chill before serving. Wrap the pumpkin roll tightly in plastic wrap and refrigerate for at least 1 hour before serving. This helps the filling set and makes slicing much easier. Overnight is even better.
- Slice and serve. Before serving, dust the top with additional powdered sugar. Use a sharp knife to slice into ½-inch to 1-inch rounds. Wipe the knife clean between slices for the prettiest presentation.
A quick note about the rolling process. When you roll the warm cake in the towel, it might feel awkward the first time. That’s completely normal. The towel will get powdered sugar all over it, and the cake might feel delicate. Just be gentle and confident. The cake is more flexible than you think.
Cooking Tips & Techniques
After making this pumpkin roll more times than I can count, I’ve collected some hard-won wisdom. Here are the tips that make the biggest difference.
Temperature matters. Your eggs should be at room temperature. Cold eggs don’t incorporate as well, and the batter won’t achieve that beautiful ribbon stage. Take them out of the refrigerator about 30 minutes before you start baking. Same goes for the cream cheese and butter in the filling. Cold cream cheese creates lumpy filling, and nobody wants that.
The towel trick is everything. The powdered sugar on the towel isn’t just for show. It creates a barrier that prevents the cake from sticking to the fabric. Be generous with it. I learned this the hard way when I skimped on the sugar and ended up peeling fabric fibers off my cake. Not my finest baking moment.
Don’t skip the parchment overhang. Those extra inches of parchment hanging over the edges of the pan are your handles. They make lifting the cake out of the pan so much easier. I’ve tried making this without parchment, and it’s a sticky disaster every single time.
Watch the clock carefully. That 12-14 minute baking window is narrow. Check at 12 minutes. The cake should be golden and spring back when touched. If you see any cracks forming on the surface, it’s already overbaked. Every oven runs differently, so get to know yours.
Roll while it’s warm, but not hot. The cake needs to be warm enough to be pliable but not so hot that it steams and becomes soggy in the towel. About 1-2 minutes out of the oven is the sweet spot. Use your hands to guide the initial roll, and the towel will do the rest.
Patience with cooling. I know it’s tempting to rush this step. But cooling the cake completely in its rolled shape is what creates that perfect spiral. If you unroll it too soon, the cake will crack. I’ve done this. It’s frustrating. Learn from my mistakes.
Slice with confidence. Use a sharp, thin-bladed knife. Wipe it clean between each cut. This gives you those beautiful, clean slices that look like they belong on a magazine cover. A serrated knife also works well, just use a gentle sawing motion.
Variations & Adaptations
One of the best things about this pumpkin roll recipe is how adaptable it is. Here are some variations I’ve tried and loved.
Gluten-Free Version : Substitute the all-purpose flour with a good quality 1:1 gluten-free baking flour blend. I’ve had great results with King Arthur’s measure-for-measure blend. The texture is slightly more delicate, so be extra gentle when rolling. Everything else stays the same.
Dairy-Free Filling : Use dairy-free cream cheese and vegan butter for the filling. Miyoko’s brand works really well here. The flavor is slightly different, but still delicious. The cake itself doesn’t contain dairy, so only the filling needs adjustment.
Spice It Up : Add ¼ teaspoon of cloves or allspice to the dry ingredients for a warmer, more complex spice profile. I do this when I’m making the roll for Thanksgiving because it pairs beautifully with the other holiday flavors. A pinch of cardamom is also lovely.
Chocolate Pumpkin Roll : Replace 2 tablespoons of the flour with unsweetened cocoa powder. This creates a beautiful chocolate-pumpkin swirl effect that’s stunning when sliced. The chocolate and pumpkin combination is surprisingly wonderful.
Nutty Addition : Sprinkle ½ cup of finely chopped pecans or walnuts over the filling before rolling. The crunch adds a lovely textural contrast. Toast the nuts first for deeper flavor. I do this for Christmas gatherings, and it always gets compliments.
Maple Cream Cheese Filling : Replace 2 tablespoons of the powdered sugar with pure maple syrup. Reduce the powdered sugar slightly to compensate for the extra liquid. The maple flavor pairs beautifully with the pumpkin spices. This is my personal favorite variation for cozy fall evenings.
For all variations, the basic technique remains the same. The rolling and cooling process is the foundation. Once you master that, you can experiment freely with flavors.
Serving & Storage Suggestions
This pumpkin roll is incredibly versatile when it comes to serving. Here’s how to make the most of it.
Serving Temperature : Serve the pumpkin roll chilled or at room temperature. I prefer it slightly chilled because the filling firms up nicely and the slices hold their shape better. If you prefer room temperature, let it sit out for about 15-20 minutes before slicing.
Presentation Ideas : Dust the top generously with powdered sugar just before serving. For extra flair, add a drizzle of caramel sauce and a few candied pecans on the plate. A dollop of whipped cream on the side never hurts. During the holidays, I sometimes sprinkle a little cinnamon on top of the powdered sugar for a festive look.
Complementary Pairings : This pumpkin roll pairs beautifully with hot coffee, spiced chai, or a warm apple cider. For a dessert spread, serve it alongside a pumpkin pie or apple crisp. The cream cheese filling also makes it a great companion to a cup of black tea.
Refrigerator Storage : Wrap the pumpkin roll tightly in plastic wrap and store it in the refrigerator for up to 5 days. The flavors actually improve after a day or two as the spices meld with the filling. Just make sure it’s well wrapped to prevent it from drying out or absorbing other odors in the fridge.
Freezer Storage : This pumpkin roll freezes beautifully. Wrap it tightly in plastic wrap, then again in aluminum foil. Freeze for up to 3 months. To thaw, transfer it to the refrigerator overnight. Don’t unwrap it while it’s thawing, as condensation can make the cake soggy. Once thawed, dust with fresh powdered sugar before serving.
Make-Ahead Tips : This is my go-to make-ahead dessert for Thanksgiving. I make it two days before, keep it wrapped in the fridge, and just dust with powdered sugar before serving. It’s one less thing to worry about on the big day.
Nutritional Information & Benefits
While this is definitely a treat, it does offer some nutritional benefits worth noting. Here’s a rough estimate per slice (based on 10 slices per roll):
- Calories : Approximately 280-320 per slice
- Fat : 14-16 grams (mostly from cream cheese and butter)
- Carbohydrates : 35-40 grams
- Protein : 5-6 grams
- Fiber : 1-2 grams
- Sugar : 25-30 grams
Health Benefits : Pumpkin is rich in vitamin A, which supports eye health and immune function. It’s also a good source of fiber and antioxidants. The eggs provide high-quality protein and essential nutrients like choline. The cinnamon in this recipe has anti-inflammatory properties and can help regulate blood sugar levels.
Dietary Considerations : This recipe contains gluten, dairy, and eggs. For gluten-free and dairy-free options, check the variations section above. It’s not suitable for vegans in its current form, but the filling can be adapted with plant-based alternatives.
Allergen Information : Contains wheat, dairy, and eggs. May contain traces of nuts depending on variations chosen. Always check your ingredients if serving to someone with allergies.
I personally love that this dessert lets me enjoy a seasonal treat while still getting some nutritional value from the pumpkin. It’s not health food, but it’s not empty calories either. Everything in moderation, right?
Conclusion
This pumpkin roll with cream cheese filling has become more than just a recipe in my kitchen. It’s the dessert I turn to when I want to capture the essence of fall in every bite. The tender pumpkin cake, the luscious cream cheese filling, that beautiful spiral that never fails to impress. It’s a showstopper that secretly isn’t that hard to pull off.
I hope you give this recipe a try. Don’t be intimidated by the rolling process. The first time might feel a little awkward, but honestly, it gets easier with practice. And even if your first roll isn’t perfect, it will still taste absolutely amazing. That’s the beauty of homemade baking. Every imperfection tells a story.
I’d love to hear how your pumpkin roll turns out. Did you try any of the variations? Did you discover a new trick that made the process easier? Drop a comment below and share your experience. Your insights might help someone else who’s nervous about trying their first pumpkin roll.
Happy baking, friends. May your rolls be tight, your filling be creamy, and your kitchen smell like autumn itself.
Frequently Asked Questions
Why did my pumpkin cake crack when I rolled it?
This usually happens for one of three reasons. The cake was overbaked and became too dry, or it cooled too much before rolling. Make sure you roll the cake while it’s still warm, right after it comes out of the oven. Also, ensure you’re using enough powdered sugar on the towel to prevent sticking.
Can I use pumpkin pie filling instead of pumpkin puree?
No, please don’t. Pumpkin pie filling already contains sugar and spices, which will throw off the balance of this recipe. The texture will also be different, and the cake may not set properly. Always use 100% pure pumpkin puree for the best results.
How do I get clean slices without the filling squishing out?
Chill the pumpkin roll for at least 1 hour before slicing. Use a sharp knife and wipe it clean between each cut. A serrated knife with a gentle sawing motion works particularly well. If the filling is still too soft, refrigerate it for another 30 minutes.
Can I make this pumpkin roll ahead of time for a party?
Absolutely. This is one of the best make-ahead desserts. Prepare the pumpkin roll completely, wrap it tightly in plastic wrap, and refrigerate for up to 5 days. The flavors actually improve after a day or two. Just dust with fresh powdered sugar before serving.
My cream cheese filling turned out runny. What went wrong?
This usually happens when the cream cheese or butter is too soft or slightly melted. Make sure both are softened to room temperature, not warm or melted. Also, don’t overbeat the filling. Beat just until smooth and fluffy. If your kitchen is very warm, chill the filling for 10-15 minutes before spreading it on the cake.
Pin This Recipe!
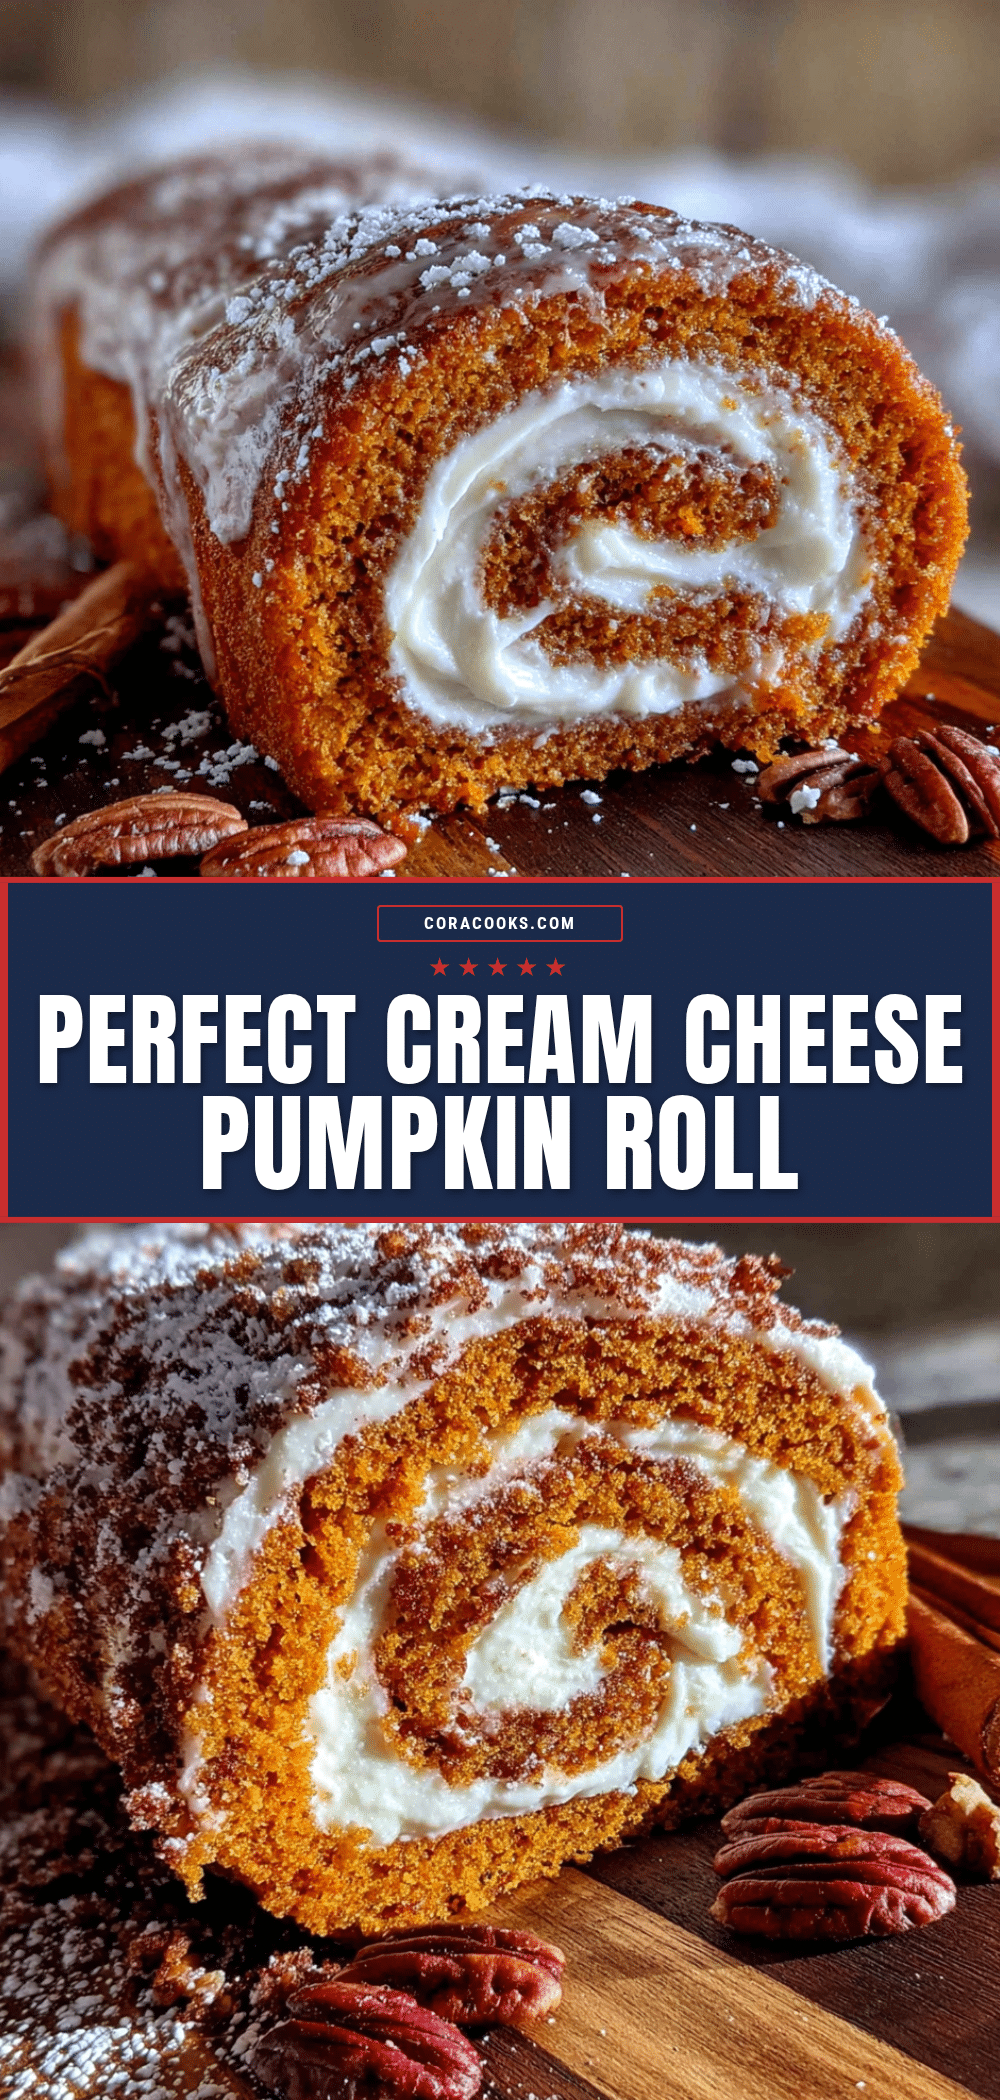
Best Homemade Pumpkin Roll Recipe with Cream Cheese Filling

A foolproof pumpkin roll with a tender, flexible cake and luscious cream cheese filling. Perfect for fall gatherings, Thanksgiving, or any time you want a showstopping dessert that’s surprisingly easy to make.
- Prep Time: 30 minutes
- Cook Time: 14 minutes
- Total Time: 2 hours 44 minutes (including cooling and chilling)
- Yield: 10 servings 1x
- Category: Dessert
- Cuisine: American
Ingredients
- ¾ cup all-purpose flour (spooned and leveled)
- 1 teaspoon baking powder
- 1 teaspoon ground cinnamon (preferably Saigon cinnamon)
- ½ teaspoon ground ginger
- ½ teaspoon ground nutmeg (freshly grated if possible)
- ½ teaspoon salt
- 3 large eggs (room temperature)
- 1 cup granulated sugar
- ⅔ cup pumpkin puree (100% pure pumpkin, not pumpkin pie filling)
- 1 teaspoon vanilla extract (pure)
- Powdered sugar (for dusting)
- 8 ounces cream cheese (full fat, softened to room temperature)
- ¼ cup unsalted butter (softened)
- 1 cup powdered sugar (sifted)
- 1 teaspoon vanilla extract (pure)
Instructions
- Preheat your oven to 375°F (190°C). Line a 15×10-inch jelly roll pan with parchment paper, leaving overhang on the long sides. Lightly spray the parchment with non-stick spray.
- In a medium bowl, whisk together flour, baking powder, cinnamon, ginger, nutmeg, and salt until evenly distributed. Set aside.
- In a large bowl, beat eggs and granulated sugar with an electric mixer on medium-high speed for 2-3 minutes until thick, pale, and ribbon-like.
- Reduce mixer speed to low and add pumpkin puree and vanilla extract. Mix just until combined.
- Add the flour mixture to the wet ingredients in two additions, folding gently with a rubber spatula until just combined. Do not overmix.
- Pour batter into the prepared pan and spread evenly into all corners. Tap the pan gently on the counter to release air bubbles.
- Bake for 12-14 minutes, until the top springs back when lightly touched and edges start to pull away from the pan. Do not overbake.
- While the cake bakes, lay a clean kitchen towel flat on the counter and dust generously with powdered sugar (about 2 tablespoons).
- Immediately after baking, run a knife around the edges to loosen the cake. Invert the cake onto the prepared towel. Carefully peel off the parchment paper. Starting from one short end, roll the cake and towel together into a tight spiral. Roll while the cake is still warm.
- Place the rolled cake on a cooling rack and let it cool completely, about 1-2 hours. Do not rush this step.
- While the cake cools, make the filling: Beat softened cream cheese and butter together until smooth and creamy. Add sifted powdered sugar and vanilla extract. Beat on low until combined, then increase to medium and beat for about 2 minutes until light and fluffy. Do not overbeat.
- Once the cake is completely cool, gently unroll it. Spread the cream cheese filling evenly over the cake, leaving a ½-inch border on all sides.
- Carefully reroll the cake without the towel, using the towel to help guide if needed. Roll as tightly as possible without squeezing filling out the ends. Place seam-side down on a serving platter or piece of plastic wrap.
- Wrap the pumpkin roll tightly in plastic wrap and refrigerate for at least 1 hour before serving (overnight is even better).
- Before serving, dust the top with additional powdered sugar. Slice into ½-inch to 1-inch rounds using a sharp knife, wiping the knife clean between slices.
Notes
Roll the cake while it’s still warm to prevent cracking. Use full-fat cream cheese for the best filling texture. The pumpkin roll tastes even better the next day. For gluten-free, use a 1:1 gluten-free flour blend. For dairy-free, use dairy-free cream cheese and vegan butter. Freezes well for up to 3 months.
Nutrition
- Serving Size: 1 slice (1/10 of rol
- Calories: 300
- Sugar: 28
- Sodium: 220
- Fat: 15
- Saturated Fat: 8
- Carbohydrates: 38
- Fiber: 1.5
- Protein: 5.5
Keywords: pumpkin roll, pumpkin dessert, cream cheese filling, fall baking, Thanksgiving dessert, pumpkin cake roll, easy pumpkin roll