Love this? Save it for later!
Share the inspiration with your friends
My husband had sworn off stuffing for a solid decade. Ten Thanksgivings came and went, and he’d politely slide the bowl past his plate without a glance. “It’s just wet bread,” he’d say with a shrug. I stopped arguing about it years ago. Then, last November, I was testing this recipe on a random Tuesday—not even a holiday, just a cold, gray afternoon when I needed something warm. I pulled the baking dish out of the oven, set it on the counter to cool, and walked away to answer my phone. When I came back, he was standing at the counter with a fork in his hand, mid-bite, with this look on his face like he’d been caught doing something wrong. “This is different,” he mumbled, reaching for another forkful. And honestly? That moment made my whole month. That’s the kind of recipe this is—the one that changes minds without even trying.
Why You’ll Love This Recipe
Let me tell you, I have tested more stuffing recipes than I care to count. Some were soggy disasters. Others were so dry they crunched like croutons. This one? It’s the Goldilocks of the stuffing world. The brown butter and sage situation is honestly next-level, and the sourdough brings this tangy chew that regular bread just can’t match.
- Incredibly Crispy Edges: The top gets golden and crackly while the inside stays tender. That contrast is everything.
- Brown Butter Magic: Nutty, rich, and deeply savory—brown butter does the heavy lifting here so you don’t need a ton of other fats.
- Simple Ingredients: No weird cream-of-anything cans. Just real food that comes together beautifully.
- Make-Ahead Friendly: You can prep this the day before and just bake it off when you’re ready. Total lifesaver for busy holidays.
- Crowd-Pleaser: Even the stuffing skeptics (yes, you know who I’m talking about) will go back for seconds.
What makes this version different from all the rest is the technique. Instead of just tossing everything in a dish, you toast the sourdough first, brown the butter until it smells like hazelnuts, and layer the sage in at just the right moment. It sounds fussy, but I promise it’s not. And the payoff? Worth every extra minute.
This is the kind of dish that makes people close their eyes after the first bite. It’s comfort food that feels special without being pretentious—perfect for Thanksgiving, Christmas, or honestly, a random Tuesday when you need something warm.
What Ingredients You Will Need
This recipe relies on simple, wholesome ingredients that work together to create something truly special. Most of these are pantry staples, which makes this dish surprisingly easy to pull together even on short notice.
- Sourdough bread, 1 large loaf (about 500g), cut into 1-inch cubes: Day-old or slightly stale bread works best here. It soaks up the broth without turning to mush. I prefer a hearty, crusty loaf from a local bakery—the tanginess pairs beautifully with the brown butter.
- Unsalted butter, ½ cup (1 stick or 113g): Don’t use salted butter here because you want to control the salt level yourself. I always use Kerrygold for the best flavor, but any good-quality unsalted butter works.
- Fresh sage leaves, ¼ cup packed (about 15-20 leaves), roughly chopped: Fresh is non-negotiable here. Dried sage has its place, but it won’t give you that aromatic, woodsy punch that makes this recipe sing. Look for leaves that are bright green and fragrant.
- Yellow onion, 1 large (about 200g), diced: Sweet onions like Vidalia work too, but yellow onions give a more balanced savory flavor that holds up to the brown butter.
- Celery stalks, 3 large (about 150g), diced: This adds that classic stuffing crunch and freshness. Don’t skip it—it’s more important than you think.
- Chicken or vegetable broth, 2 cups (480ml): Low-sodium is your friend here. You can always add more salt later, but you can’t take it out. I like Swanson’s low-sodium chicken broth for consistency.
- Large eggs, 2: These help bind everything together so the stuffing holds its shape when you cut into it. Room temperature eggs incorporate more evenly.
- Kosher salt, 1½ teaspoons: Diamond Crystal is my go-to. If you’re using Morton’s, reduce to 1 teaspoon because it’s saltier.
- Black pepper, 1 teaspoon, freshly ground: Don’t use pre-ground pepper here. Freshly cracked makes a noticeable difference in depth of flavor.
- Fresh parsley, ¼ cup chopped (optional for garnish): Adds a pop of color and freshness right before serving. Not mandatory, but pretty.
Substitution Notes: For a gluten-free version, use a good-quality gluten-free sourdough (I like Bread Srsly). For dairy-free, swap the butter with a plant-based butter that browns well—Miyoko’s works beautifully. You can also add cooked crumbled sausage or diced mushrooms for extra heartiness.
Equipment Needed
You don’t need a fancy kitchen to pull this off. Here’s what you’ll actually use:
- Large baking dish (9×13-inch or similar): Glass or ceramic works best for even heat distribution. I’ve used metal pans before, and the edges tend to over-brown.
- Large skillet or sauté pan: For browning the butter and cooking the vegetables. A light-colored pan helps you see when the butter turns that perfect amber color.
- Large mixing bowl: Big enough to toss all the ingredients without spilling everywhere. I learned that one the hard way.
- Baking sheet: For toasting the bread cubes. A rimmed sheet prevents them from rolling off.
- Whisk: For combining the eggs and broth smoothly.
- Sharp knife and cutting board: A dull knife makes dicing onions and celery feel like a workout.
- Rubber spatula: For scraping every last drop of that brown butter goodness out of the pan.
Budget Tip: If you don’t have a 9×13 dish, a 10-inch cast iron skillet works beautifully and actually gives you even crispier edges. Just make sure it’s well-seasoned so nothing sticks.
Preparation Method

Let’s walk through this step by step. I’ve made this recipe more times than I can count, so I’m including all the little details I wish someone had told me the first time.
- Preheat your oven to 350°F (175°C). Give it a full 15-20 minutes to come to temperature. A properly preheated oven makes all the difference for toasting the bread evenly.
- Toast the sourdough cubes. Spread the bread cubes in a single layer on a large baking sheet. Bake for 12-15 minutes, tossing halfway through, until they’re lightly golden and dry to the touch. They should feel crisp on the outside but still have a little give in the center. Don’t over-toast them—they’ll continue cooking later. Set aside to cool slightly.
- Brown the butter. In a large skillet over medium heat, melt the butter. Swirl the pan occasionally as it melts. After about 3-4 minutes, you’ll see the butter start to foam and turn golden. Watch carefully—it can go from perfect to burnt in seconds. When you see brown specks forming at the bottom and the butter smells nutty and toasty (like hazelnuts), immediately remove it from the heat. This usually takes about 5-6 minutes total.
- Cook the aromatics. Add the diced onion and celery to the skillet with the brown butter. Return to medium heat and cook for 6-8 minutes, stirring occasionally, until the onions are translucent and the celery has softened. The brown butter will coat everything beautifully. Add the chopped sage and cook for another minute until fragrant. Your kitchen should smell incredible at this point.
- Prepare the liquid mixture. In a small bowl or measuring cup, whisk together the eggs and broth until well combined. Season with the salt and pepper. The eggs should be fully incorporated—no streaks of white floating around.
- Combine everything. Place the toasted sourdough cubes in your large mixing bowl. Pour the brown butter-vegetable mixture over the top and toss gently to coat. Then pour the egg-broth mixture over the bread and toss again until every cube is evenly moistened. Don’t overmix—you want the bread to absorb the liquid without breaking apart.
- Let it rest. This is the step nobody talks about, but it’s crucial. Let the mixture sit for 10-15 minutes before baking. This allows the bread to fully absorb the liquid, which prevents dry spots. Trust me on this one—I skipped it once and regretted it.
- Transfer to baking dish. Pour the mixture into your greased 9×13 baking dish and spread it into an even layer. Don’t press it down too firmly—you want some air pockets for those crispy edges to form.
- Bake. Bake uncovered at 350°F (175°C) for 35-40 minutes, until the top is golden brown and crispy. The edges should look dark and crackly, and the center should feel set when you gently shake the dish. If you want extra crispy edges, broil for 1-2 minutes at the end—but watch it like a hawk.
- Rest and serve. Let the stuffing cool in the dish for 5-10 minutes before serving. This helps it set so it doesn’t fall apart when you scoop it. Garnish with fresh parsley if you’re feeling fancy.
Cooking Tips & Techniques
After making this recipe more times than I care to admit, here are the things I’ve learned the hard way so you don’t have to.
Brown butter is patient, then impatient. The first time I made brown butter, I walked away for “just a second” and came back to a black, smoky mess. Stay by the stove. Swirl the pan constantly. The moment you see those brown specks, pull it off the heat. It keeps cooking in the hot pan, so don’t wait until it looks perfect in the pan—it’ll be past perfect by the time you add the vegetables.
Dry bread is your best friend. Soggy stuffing happens when the bread is too fresh and soft. That’s why toasting the cubes first is non-negotiable. If you’re short on time, you can leave the bread out on the counter overnight to stale, but toasting gives you more control and better texture.
Don’t skip the rest time. I know it’s tempting to just throw it in the oven and get it over with. But that 10-minute rest allows the liquid to fully absorb into the bread. Without it, you’ll end up with pockets of dry bread and pools of broth at the bottom of the dish. Not ideal.
Layer for maximum crispiness. If you’re a crispy-edge lover like me, spread the stuffing in a thinner layer (use two smaller dishes instead of one big one). More surface area equals more crispy bits. You’re welcome.
Temperature matters. Make sure your eggs and broth are at room temperature before mixing. Cold liquid shocks the brown butter and can cause it to seize up. Just let them sit on the counter for 20 minutes before you start.
Variations & Adaptations
One of the best things about this recipe is how flexible it is. Here are some ways to make it your own:
- Sausage and Apple Stuffing: Brown ½ pound of Italian sausage (casings removed) in the skillet before adding the vegetables. Remove the sausage, then proceed with the recipe. Add one diced apple (Honeycrisp or Granny Smith) along with the celery. The sweetness balances the savory brown butter beautifully.
- Mushroom and Thyme Version: Sauté 8 ounces of sliced cremini mushrooms with the onions and celery. Swap the sage for fresh thyme (about 2 teaspoons). This version is earthy and deeply savory—perfect for vegetarians.
- Gluten-Free Adaptation: Use a good gluten-free sourdough or rustic bread. Toast it a little longer since gluten-free bread tends to be more delicate. Everything else stays the same.
- Herb-Forward Variation: Add 2 tablespoons each of fresh chopped rosemary and fresh thyme along with the sage. This gives the stuffing a more complex, almost floral herb profile that pairs beautifully with roast chicken.
- Extra-Crispy Version: After baking, turn on the broiler for 2-3 minutes. Watch it like a hawk—it goes from golden to burnt fast. But those extra-crispy bits? Totally worth the risk.
I personally love the sausage and apple variation for Thanksgiving. Something about that sweet-savory combo just feels right for the season.
Serving & Storage Suggestions
This stuffing is best served hot out of the oven, when the top is still crackly and the inside is steamy and tender. Spoon it onto plates alongside roast turkey, roasted chicken, or even a simple pan-seared pork chop. It also pairs beautifully with a dollop of cranberry sauce on the side—the tartness cuts through the richness.
For leftovers: Store in an airtight container in the refrigerator for up to 4 days. The texture will soften slightly, but the flavor actually gets better as it sits. To reheat, spread it on a baking sheet and warm in a 350°F oven for 10-15 minutes. This brings back some of that crispy texture. Microwaving works in a pinch, but you’ll lose the crunch.
To freeze: Assemble the stuffing in the baking dish but don’t bake it. Cover tightly with foil and freeze for up to 3 months. When you’re ready to bake, thaw overnight in the refrigerator, then bake as directed, adding 10-15 minutes to the cooking time since you’re starting from cold.
I actually prefer the flavor of day-old stuffing. The herbs and brown butter have more time to meld together, and the texture becomes almost custard-like in the center while the edges stay crisp. It’s a beautiful thing.
Nutritional Information & Benefits
Here’s the approximate nutritional breakdown per serving (based on 8 servings):
- Calories: 285
- Total Fat: 14g
- Saturated Fat: 8g
- Carbohydrates: 32g
- Fiber: 2g
- Sugar: 4g
- Protein: 7g
- Sodium: 520mg
Sourdough bread is naturally easier to digest than regular bread thanks to the fermentation process, which breaks down some of the gluten and phytic acid. Sage is packed with antioxidants and has anti-inflammatory properties—so you’re basically eating a health food here (just go with it). Brown butter contains vitamin A and healthy fats that help your body absorb fat-soluble vitamins from the other ingredients.
This recipe is vegetarian-friendly if you use vegetable broth. For a lower-sodium version, reduce the added salt and use low-sodium broth. It’s not gluten-free in its standard form, but the gluten-free adaptation works beautifully.
Conclusion
This crispy brown butter sage sourdough stuffing is honestly the recipe that made me believe in second chances—for dishes, for ingredients, and for the people who think they don’t like something. It’s crispy where it should be, tender where it counts, and packed with so much flavor that you’ll wonder why you ever settled for anything less.
Whether you’re making it for a holiday feast, a Sunday dinner, or just because it’s Tuesday and you need something warm, this stuffing delivers. Play with the variations, make it your own, and don’t be surprised if someone you love ends up standing at the counter with a fork in their hand, caught red-handed.
I’d love to hear how it turns out for you. Drop a comment below and let me know your favorite variation, or tag me in your photos if you share them online. Happy cooking, friends!
Frequently Asked Questions
Can I make this stuffing ahead of time?
Absolutely. Assemble the stuffing completely, cover the dish, and refrigerate for up to 24 hours before baking. Add about 10 minutes to the baking time since you’re starting from cold. This is actually my preferred method for holidays—it takes so much stress off the day-of cooking.
Why is my stuffing soggy?
Soggy stuffing usually happens for two reasons: the bread wasn’t dried out enough, or you added too much liquid. Make sure your bread cubes are thoroughly toasted before mixing, and measure your broth carefully. If you’re using a very moist bread, reduce the broth by ¼ cup.
Can I use dried sage instead of fresh?
You can, but the flavor won’t be the same. Fresh sage has a bright, almost citrusy quality that dried sage lacks. If you must substitute, use 1 tablespoon of dried sage and crumble it between your fingers before adding to release the oils. Add it earlier in the cooking process so it has time to rehydrate.
How do I get extra crispy edges?
Spread the stuffing in a thinner layer (use two smaller dishes), and broil for 2-3 minutes at the end of baking. You can also drizzle a little melted butter over the top before baking for extra browning. Just watch it carefully under the broiler—things happen fast.
Can I add meat to this stuffing?
Absolutely. Cooked crumbled sausage, diced bacon, or shredded roast chicken all work beautifully. Brown the meat first, then proceed with the recipe using the rendered fat instead of (or in addition to) the butter. Just drain off any excess grease so the stuffing doesn’t get greasy.
Pin This Recipe!
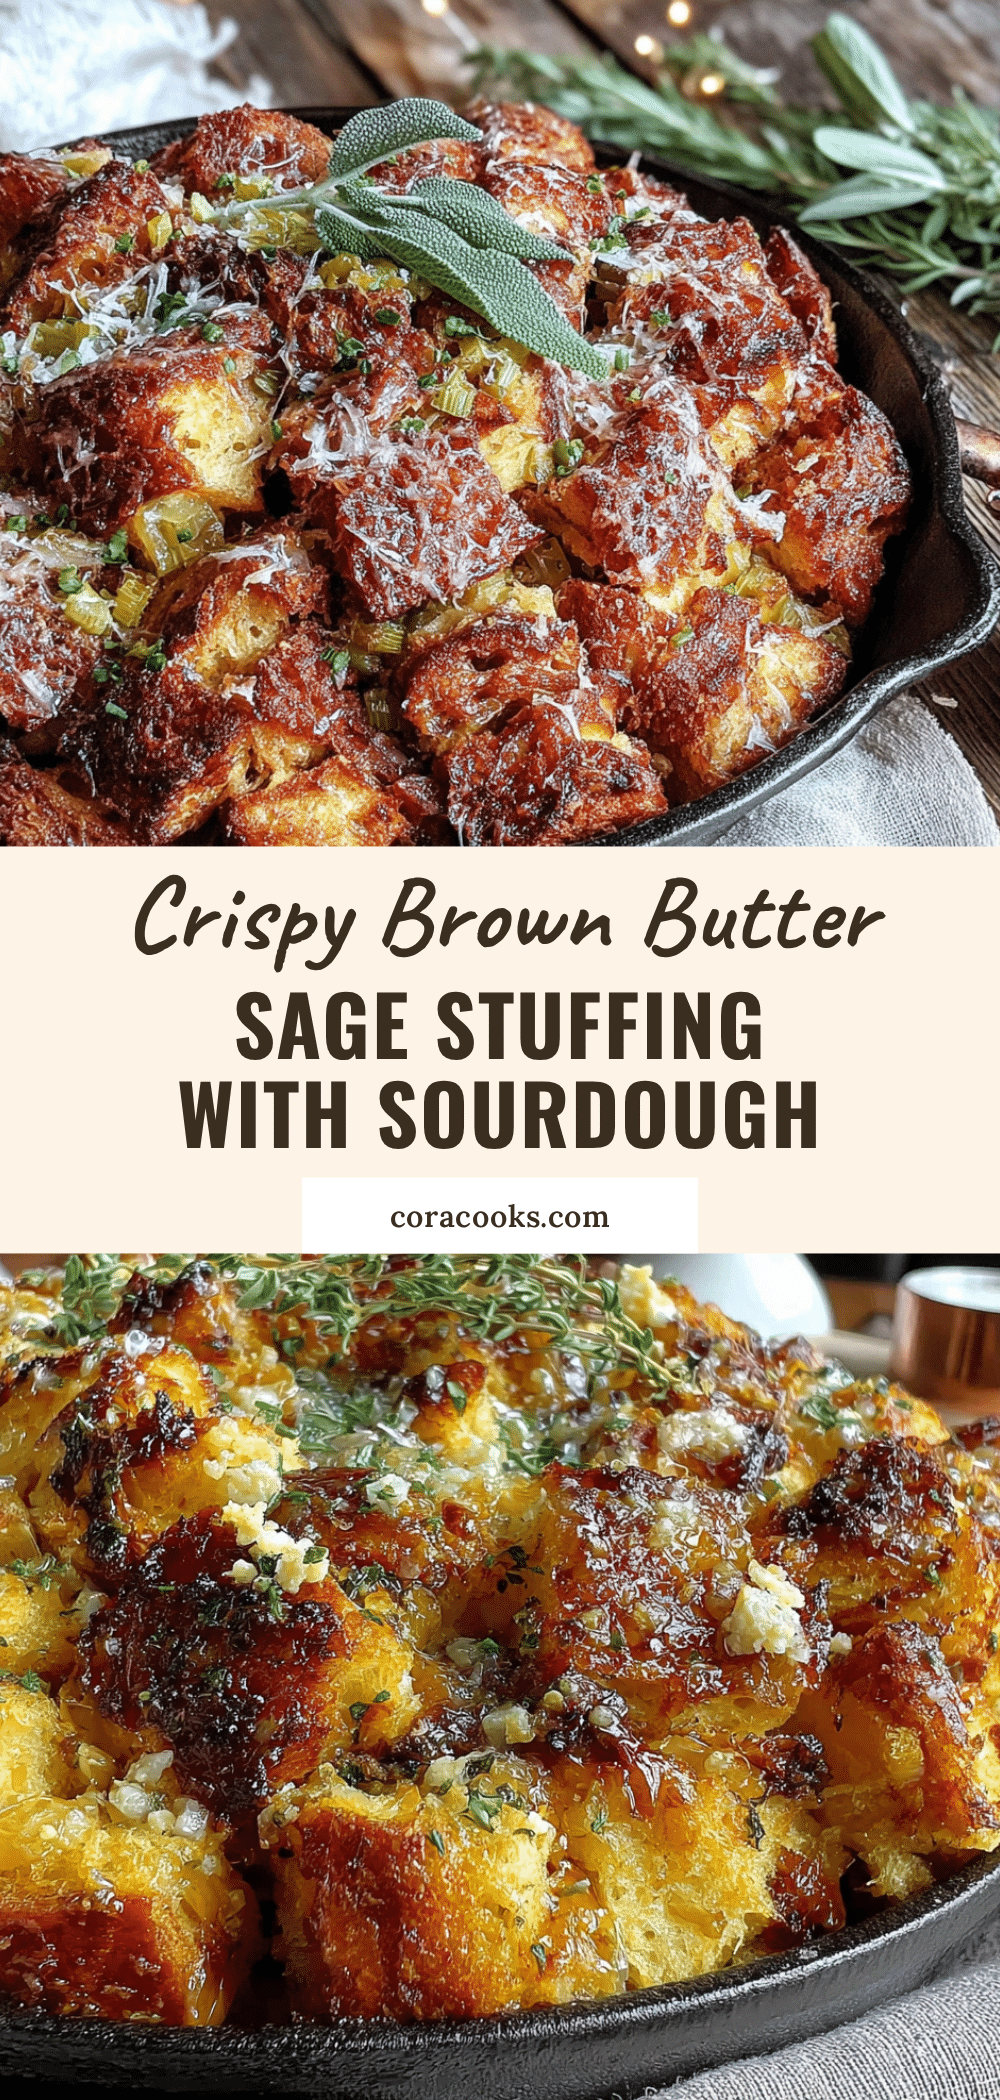
The Best Crispy Brown Butter Sage Sourdough Stuffing Recipe

This crispy brown butter sage sourdough stuffing is the recipe that changes minds. With golden, crackly edges, a tender interior, and nutty, savory brown butter, it’s the perfect side dish for Thanksgiving, Christmas, or any cozy meal.
- Prep Time: 20 minutes
- Cook Time: 40 minutes
- Total Time: 1 hour 10 minutes
- Yield: 8 servings 1x
- Category: Side Dish
- Cuisine: American
Ingredients
- 1 large loaf sourdough bread (about 500g), cut into 1-inch cubes
- ½ cup (1 stick or 113g) unsalted butter
- ¼ cup packed fresh sage leaves (about 15–20 leaves), roughly chopped
- 1 large yellow onion (about 200g), diced
- 3 large celery stalks (about 150g), diced
- 2 cups (480ml) low-sodium chicken or vegetable broth
- 2 large eggs, room temperature
- 1½ teaspoons kosher salt (Diamond Crystal; reduce to 1 teaspoon if using Morton’s)
- 1 teaspoon freshly ground black pepper
- ¼ cup chopped fresh parsley (optional for garnish)
Instructions
- Preheat your oven to 350°F (175°C).
- Toast the sourdough cubes: Spread the bread cubes in a single layer on a large baking sheet. Bake for 12-15 minutes, tossing halfway through, until lightly golden and dry to the touch. Set aside to cool slightly.
- Brown the butter: In a large skillet over medium heat, melt the butter. Swirl the pan occasionally. After about 3-4 minutes, the butter will start to foam and turn golden. When brown specks form at the bottom and it smells nutty (like hazelnuts), immediately remove from heat (about 5-6 minutes total).
- Cook the aromatics: Add the diced onion and celery to the skillet with the brown butter. Return to medium heat and cook for 6-8 minutes, stirring occasionally, until onions are translucent and celery has softened. Add the chopped sage and cook for another minute until fragrant.
- Prepare the liquid mixture: In a small bowl or measuring cup, whisk together the eggs and broth until well combined. Season with salt and pepper.
- Combine everything: Place the toasted sourdough cubes in a large mixing bowl. Pour the brown butter-vegetable mixture over the top and toss gently to coat. Then pour the egg-broth mixture over the bread and toss again until every cube is evenly moistened. Do not overmix.
- Let it rest: Let the mixture sit for 10-15 minutes before baking to allow the bread to fully absorb the liquid.
- Transfer to baking dish: Pour the mixture into a greased 9×13-inch baking dish and spread into an even layer. Do not press down too firmly.
- Bake: Bake uncovered at 350°F (175°C) for 35-40 minutes, until the top is golden brown and crispy. For extra crispy edges, broil for 1-2 minutes at the end, watching carefully.
- Rest and serve: Let the stuffing cool in the dish for 5-10 minutes before serving. Garnish with fresh parsley if desired.
Notes
For gluten-free version, use gluten-free sourdough. For dairy-free, use plant-based butter that browns well (like Miyoko’s). Can add cooked crumbled sausage or diced mushrooms for extra heartiness. Make-ahead: Assemble completely, cover, and refrigerate up to 24 hours before baking; add 10 minutes to baking time. To freeze: Assemble in dish, cover tightly with foil, freeze up to 3 months; thaw overnight in fridge before baking.
Nutrition
- Serving Size: 1 serving (about 1 c
- Calories: 285
- Sugar: 4
- Sodium: 520
- Fat: 14
- Saturated Fat: 8
- Carbohydrates: 32
- Fiber: 2
- Protein: 7
Keywords: stuffing, sourdough stuffing, brown butter, sage, Thanksgiving, Christmas, side dish, crispy stuffing, holiday recipe