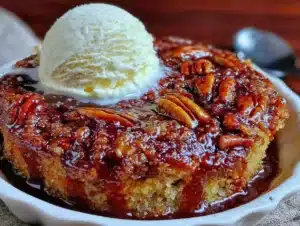
Love this? Save it for later!
Share the inspiration with your friends
My neighbor Carol swore she hated banana bread. For three years, every time a batch came out of my oven—walnut-studded, chocolate-flecked, the classic kind my grandmother made—she’d wave it away with a polite but firm “no thank you.” She claimed it was the texture, that mushy-soft thing that happens when bananas get too ripe and the whole loaf turns into something she called “baby food for adults.” I stopped offering after a while. Honestly, it stung a little, but I figured she just had weird taste.
Then last October, I had a counter full of spotty bananas and a can of pumpkin puree that needed using up before Thanksgiving. I threw them together in a single bowl—no mixer, no fuss, just a fork and some elbow grease—and slid the loaf into the oven while I cleaned up the kitchen. The smell that filled the hallway was different. Warm and spiced, almost like pie, but with that familiar sweet-banana undertone. I didn’t even think to offer Carol a slice. I mean, why would I?
I found her standing in my kitchen an hour later, holding a piece she’d cut herself, chewing with her eyes half-closed. “This doesn’t count,” she said, mouth still full. “This is pumpkin bread.” I didn’t argue. I just handed her the rest of the loaf and watched her walk back to her apartment, victorious. That’s when I knew this recipe was something special. It didn’t just convert a banana bread hater—it caught her sneaking a slice before I could even offer one. Maybe you’ve been there, with a recipe that proves someone wrong without you even trying.
Why You’ll Love This Recipe
This Easy One-Bowl Pumpkin Banana Bread is the kind of recipe that makes you look like a baking hero with almost zero effort. Let me tell you why it’s earned a permanent spot in my rotation.
- One Bowl, Zero Fuss: No stand mixer, no separate bowls for wet and dry ingredients. Just one bowl, a fork, and about ten minutes of your time. The cleanup is practically nonexistent.
- Perfectly Moist Every Time: The combination of pumpkin puree and mashed banana creates a texture that’s tender, dense, and never dry. It stays moist for days—if it lasts that long.
- Pantry-Friendly Ingredients: You probably have everything already. Canned pumpkin, overripe bananas, flour, sugar, eggs, oil, and basic spices. No fancy trips to specialty stores required.
- Fall Flavors Year-Round: Sure, it screams autumn, but I make this in July too. Pumpkin puree is available all year, and the warm spices make any day feel cozy.
- Crowd-Pleasing Magic: Kids love it, adults devour it, and even self-proclaimed banana bread haters (like Carol) can’t resist. It disappears at every potluck and brunch I bring it to.
What makes this version different from every other pumpkin banana bread out there? It’s the ratio. After about six test loaves, I landed on the perfect balance where neither flavor overwhelms the other. The pumpkin adds richness and moisture without making it taste like a vegetable loaf, and the banana provides natural sweetness and that unmistakable aroma. Plus, the one-bowl method means you’re less likely to overmix, which keeps the crumb tender instead of tough. This isn’t just another quick bread recipe—it’s the one that makes you close your eyes after the first bite. Comfort food, reimagined.
What Ingredients You Will Need
This recipe relies on simple, everyday ingredients that work together to create something surprisingly complex. Most of these are probably in your kitchen right now, which is exactly how I like my baking to go.
For the Bread
- 1 cup pumpkin puree (not pumpkin pie filling—make sure it’s 100% pure pumpkin. Libby’s is my go-to for consistent texture)
- 1 cup mashed ripe banana (about 2 large or 3 medium bananas. The spotter, the better. Seriously, if they’re not freckled, they’re not ready)
- 1/2 cup granulated sugar (adds sweetness and helps with browning)
- 1/2 cup packed light brown sugar (for moisture and that deeper, caramel-like sweetness)
- 1/3 cup vegetable oil (or melted coconut oil. Keeps the bread tender without using butter)
- 2 large eggs, room temperature (cold eggs can seize the batter, so let them sit out for 20 minutes)
- 1 teaspoon vanilla extract (pure, not imitation, if you have it)
- 1 1/2 cups all-purpose flour (spooned and leveled—don’t scoop directly from the bag or you’ll pack in too much)
- 1 teaspoon baking soda (fresh baking soda is crucial for proper rise)
- 1/2 teaspoon baking powder (adds extra lift)
- 1/2 teaspoon salt (balances sweetness and enhances flavors)
- 2 teaspoons pumpkin pie spice (or make your own: 1 teaspoon cinnamon, 1/2 teaspoon ginger, 1/4 teaspoon nutmeg, 1/4 teaspoon cloves)
- 1 teaspoon ground cinnamon (because you can never have too much cinnamon)
Optional Add-Ins
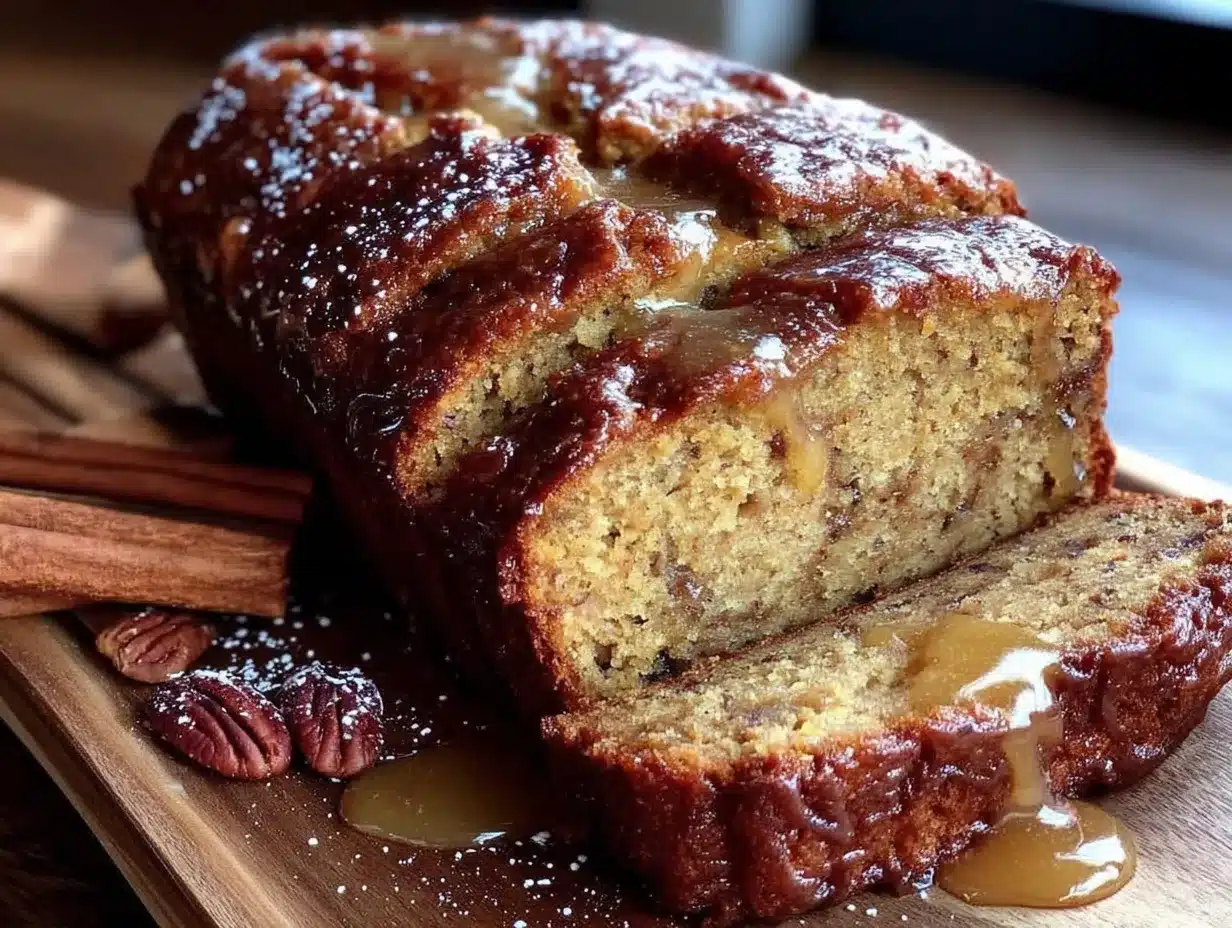
- 1/2 cup chopped walnuts or pecans (toasted first for extra flavor. Toast them in a dry pan for 3-4 minutes until fragrant)
- 1/2 cup chocolate chips (semi-sweet or dark. The bitterness plays beautifully with the sweet pumpkin and banana)
- 1/4 cup dried cranberries (adds a tart pop that cuts through the richness)
Substitution note: For a dairy-free version, this recipe is already dairy-free since it uses oil instead of butter. For a gluten-free option, substitute the all-purpose flour with a 1:1 gluten-free baking blend that contains xanthan gum. For a lower-sugar version, reduce the granulated sugar to 1/4 cup and the brown sugar to 1/4 cup—the banana and pumpkin provide plenty of natural sweetness.
Equipment Needed
One of the best things about this recipe is how little equipment it demands. Here’s what you’ll need:
- Large mixing bowl (any size works, but a 3-quart bowl gives you enough room to mix without splattering)
- Fork or whisk (a fork works perfectly for mashing the banana and mixing the batter. I actually prefer it to a whisk—less to clean)
- 9×5-inch loaf pan (standard size. If you only have an 8×4-inch pan, the bake time will increase by about 10 minutes)
- Measuring cups and spoons (dry measuring cups for flour and sugar, liquid measuring cup for the oil and pumpkin)
- Rubber spatula (for scraping every last bit of batter into the pan. Don’t waste a drop)
- Parchment paper (optional but highly recommended for easy removal. Cut a strip that hangs over the long sides like handles)
- Cooling rack (essential for even cooling. If you don’t have one, you can use the inverted loaf pan to prop up one end)
- Toothpick or cake tester (for checking doneness)
I’ve made this bread with a cheap dollar-store bowl and a bent fork, and it turned out just fine. Don’t let fancy equipment stop you. That said, a good-quality loaf pan distributes heat more evenly and prevents burnt edges. I use a USA Pan and swear by it.
Preparation Method
Preheat your oven to 350°F (175°C). Grease your 9×5-inch loaf pan with butter or nonstick spray, or line it with parchment paper for the easiest cleanup. Set it aside while you make the batter.
- Mash the bananas first. In your large mixing bowl, add the peeled bananas and mash them with a fork until mostly smooth. A few small lumps are fine—they add texture. You want about 1 cup of mashed banana. Don’t over-mash into a liquid; it should still have some body.
- Add the wet ingredients. To the same bowl, add the pumpkin puree, granulated sugar, brown sugar, vegetable oil, eggs, and vanilla extract. Stir with your fork or a whisk until everything is combined. The mixture will look a little thick and glossy, with a beautiful orange-brown color. Take a second to smell it—the pumpkin and vanilla together are intoxicating.
- Mix the dry ingredients on top. Sprinkle the flour, baking soda, baking powder, salt, pumpkin pie spice, and cinnamon over the wet mixture. Don’t stir yet. This is my little trick—it helps distribute the dry ingredients evenly before mixing, which means less stirring later and a more tender crumb.
- Fold until just combined. Use your spatula or fork to fold the dry ingredients into the wet. Stir gently, scraping from the bottom of the bowl. Stop as soon as you don’t see any more streaks of flour. Overmixing at this stage develops gluten and makes the bread tough. A few small lumps are perfectly fine. The batter will be thick and slightly shaggy.
- Fold in any add-ins. If you’re using nuts, chocolate chips, or dried cranberries, gently fold them in now with just a few turns of the spatula. Don’t overdo it.
- Transfer to the pan. Scrape the batter into your prepared loaf pan and spread it into an even layer. The batter will be thick, so take a moment to smooth the top with your spatula. Give the pan a gentle tap on the counter to release any air bubbles.
- Bake for 50-60 minutes. Place the pan in the center of the preheated oven. Bake until a toothpick inserted into the center comes out clean or with just a few moist crumbs. The top should be golden brown and cracked beautifully. If the top is browning too quickly after 40 minutes, loosely tent it with aluminum foil.
- Cool in the pan for 10 minutes. Set the pan on a cooling rack. Let it rest for exactly 10 minutes—this allows the bread to set and makes it easier to remove. Don’t skip this step or the bread might crumble.
- Remove and cool completely. Run a knife around the edges if you didn’t use parchment, then lift the bread out using the parchment handles or carefully invert it onto the rack. Let it cool completely before slicing. I know, the smell is torture, but slicing too early will give you a gummy, falling-apart mess. Trust me, I’ve learned this the hard way at least four times.
Cooking Tips & Techniques
After making this bread more times than I can count, I’ve picked up a few tricks that make the difference between good and unforgettable.
Don’t skip the banana mashing step. I used to just toss whole bananas into the bowl and try to mix everything together, thinking it would all work out in the oven. It doesn’t. Uneven banana chunks create soggy pockets in the bread. Take the extra two minutes to mash them properly before adding anything else.
Room temperature eggs matter. Cold eggs can cause the oil to seize up slightly, creating a denser, less tender crumb. If you forgot to take them out of the fridge, place them in a bowl of warm water for 5 minutes. Problem solved.
The toothpick test is your friend, but use it wisely. Check at 50 minutes, but don’t open the oven door repeatedly—temperature fluctuations can cause the bread to sink in the middle. One quick peek is enough. If the toothpick comes out wet with batter, give it 5 more minutes and check again.
Let it cool completely. I cannot stress this enough. The first time I made this, I cut into it after 20 minutes because I couldn’t wait. The center was gummy, the slices fell apart, and I was devastated. The bread continues to set as it cools. Patience pays off.
For a bakery-style domed top, let the batter rest in the pan for 10 minutes before baking. This allows the baking soda to start activating and creates a more dramatic rise. I stumbled onto this by accident when I got distracted by a phone call, and now I do it every time.
Variations & Adaptations
This recipe is wonderfully flexible. Here are some of my favorite ways to change it up:
- Chocolate Chip Pumpkin Banana Bread: Fold in 1/2 cup of semi-sweet chocolate chips. The warm, melty chocolate against the spiced bread is pure heaven. I make this version when I need a little extra comfort.
- Vegan Version: Replace the eggs with two flax eggs (2 tablespoons ground flaxseed mixed with 6 tablespoons water, let sit for 5 minutes). Use coconut oil instead of vegetable oil. The texture is slightly denser but still incredibly moist and delicious.
- Spiced Maple Variation: Reduce the granulated sugar to 1/4 cup and add 1/4 cup maple syrup. Add an extra 1/2 teaspoon of ginger and a pinch of cardamom. The maple flavor pairs beautifully with the pumpkin and banana.
- Gluten-Free Option: Substitute the all-purpose flour with a 1:1 gluten-free baking blend. I’ve had great success with Bob’s Red Mill. Add 1 tablespoon of apple cider vinegar to help with the rise—it reacts with the baking soda for better lift.
- Muffin Version: Divide the batter among a 12-cup muffin tin lined with paper cups. Bake at 350°F for 18-22 minutes. Perfect for grab-and-go breakfasts. My kids love these in their lunchboxes.
I once made a version with leftover candied ginger from a holiday baking project, and it was surprisingly incredible. The spicy-sweet chunks added little bursts of heat that cut through the richness. Don’t be afraid to experiment—that’s half the fun.
Serving & Storage Suggestions
This bread is wonderful served warm or at room temperature. For the ultimate experience, toast a slice and spread it with a generous pat of butter. The butter melts into the warm crumb and takes it to another level. A drizzle of honey or maple syrup is also lovely, especially if you’re serving it for breakfast.
It pairs beautifully with a hot cup of coffee, chai tea, or a tall glass of cold milk. For a brunch spread, serve it alongside scrambled eggs and fresh fruit—the sweetness balances savory dishes perfectly.
Storage: Wrap the cooled bread tightly in plastic wrap or aluminum foil and store at room temperature for up to 4 days. The moisture actually improves over the first 24 hours, so day-old bread is often even better. I actually prefer it on day two.
Freezer instructions: This bread freezes beautifully. Wrap the completely cooled loaf (or individual slices) tightly in plastic wrap, then in a layer of aluminum foil. Freeze for up to 3 months. To thaw, leave it at room temperature for a few hours or pop a slice in the microwave for 20 seconds. I always keep a loaf in the freezer for unexpected guests or lazy Sunday mornings.
Reheating: For that fresh-from-the-oven experience, warm individual slices in a 300°F oven for 5-7 minutes, or toast them in a toaster. The edges get slightly crisp while the center stays soft and tender.
Nutritional Information & Benefits
Here’s the approximate nutritional breakdown for one slice (based on 10 slices per loaf, without add-ins):
| Nutrient | Amount per Slice |
|---|---|
| Calories | 245 |
| Total Fat | 9g |
| Saturated Fat | 1.5g |
| Cholesterol | 37mg |
| Sodium | 280mg |
| Total Carbohydrates | 38g |
| Dietary Fiber | 2g |
| Sugars | 20g |
| Protein | 4g |
| Vitamin A | 95% DV |
| Vitamin C | 6% DV |
| Potassium | 210mg |
The pumpkin puree is a powerhouse of vitamin A, which supports eye health and immune function. Bananas provide potassium and vitamin B6, which help with heart health and energy metabolism. The oil provides healthy fats that keep you satisfied. While this is still a treat, it’s one that offers more nutritional value than your average quick bread. I feel good about serving it to my family for breakfast or an afternoon snack.
This recipe is naturally dairy-free and can easily be made vegan or gluten-free with the substitutions listed above. It contains eggs, wheat (gluten), and nuts if you add them.
Conclusion
This Easy One-Bowl Pumpkin Banana Bread has become my most-requested recipe, and I honestly didn’t see it coming. It started as a way to use up ingredients, turned into a neighbor-converting miracle, and ended up as the thing I bring to every gathering. The best part? It takes almost no effort. One bowl, a fork, and about an hour of your time, and you have something that tastes like you spent all afternoon in the kitchen.
I hope you give this recipe a try and make it your own. Add chocolate chips if that’s your thing. Swap in pecans for walnuts. Double the cinnamon. The beauty of a simple recipe like this is that it welcomes your personal touch. Don’t be shy about experimenting—some of my best discoveries came from happy accidents.
When you make it—and I hope you do—come back and let me know how it turned out. Did you try a variation? Did your family fight over the last slice? Did you convert a banana bread hater of your own? I’d love to hear your story. Leave a comment below, share a photo, or tag me on social media. Happy baking, friend!
Frequently Asked Questions
Can I use fresh pumpkin instead of canned?
Yes, you can. Roast a small sugar pumpkin until tender, scoop out the flesh, and puree it in a food processor. Just make sure to drain any excess liquid—fresh pumpkin can be more watery than canned. You want a thick puree, not a runny one. If your fresh puree seems wet, let it sit in a fine-mesh strainer for 30 minutes before using.
Why did my bread sink in the middle?
This usually happens for one of three reasons: the oven temperature was too low, the batter was overmixed, or you opened the oven door too often during baking. Make sure your oven is properly preheated to 350°F and resist the urge to peek. Overmixing develops gluten and creates a weak structure that can’t support the rise. Mix until just combined, no more.
Can I make this without eggs?
Absolutely. Replace each egg with a flax egg (1 tablespoon ground flaxseed mixed with 3 tablespoons water, let sit for 5 minutes). The texture will be slightly denser, but the flavor remains fantastic. I’ve made this vegan version for friends and they couldn’t tell the difference.
How do I know when the bananas are ripe enough?
The perfect banana for baking is covered in brown spots, almost to the point of looking unappetizing. The peel should be mostly brown or even black in places. The banana inside should be soft and fragrant. If your bananas aren’t ripe enough, place them on a baking sheet in a 300°F oven for 15-20 minutes until the skins blacken. They’ll soften right up.
Can I double this recipe?
Yes, this recipe doubles beautifully. Use a larger bowl and mix everything as directed. You can bake it in two loaf pans side by side in the oven, or use one 9×13-inch baking dish for a sheet cake version. If using a 9×13 pan, bake for 30-35 minutes and check for doneness with a toothpick.
Pin This Recipe!
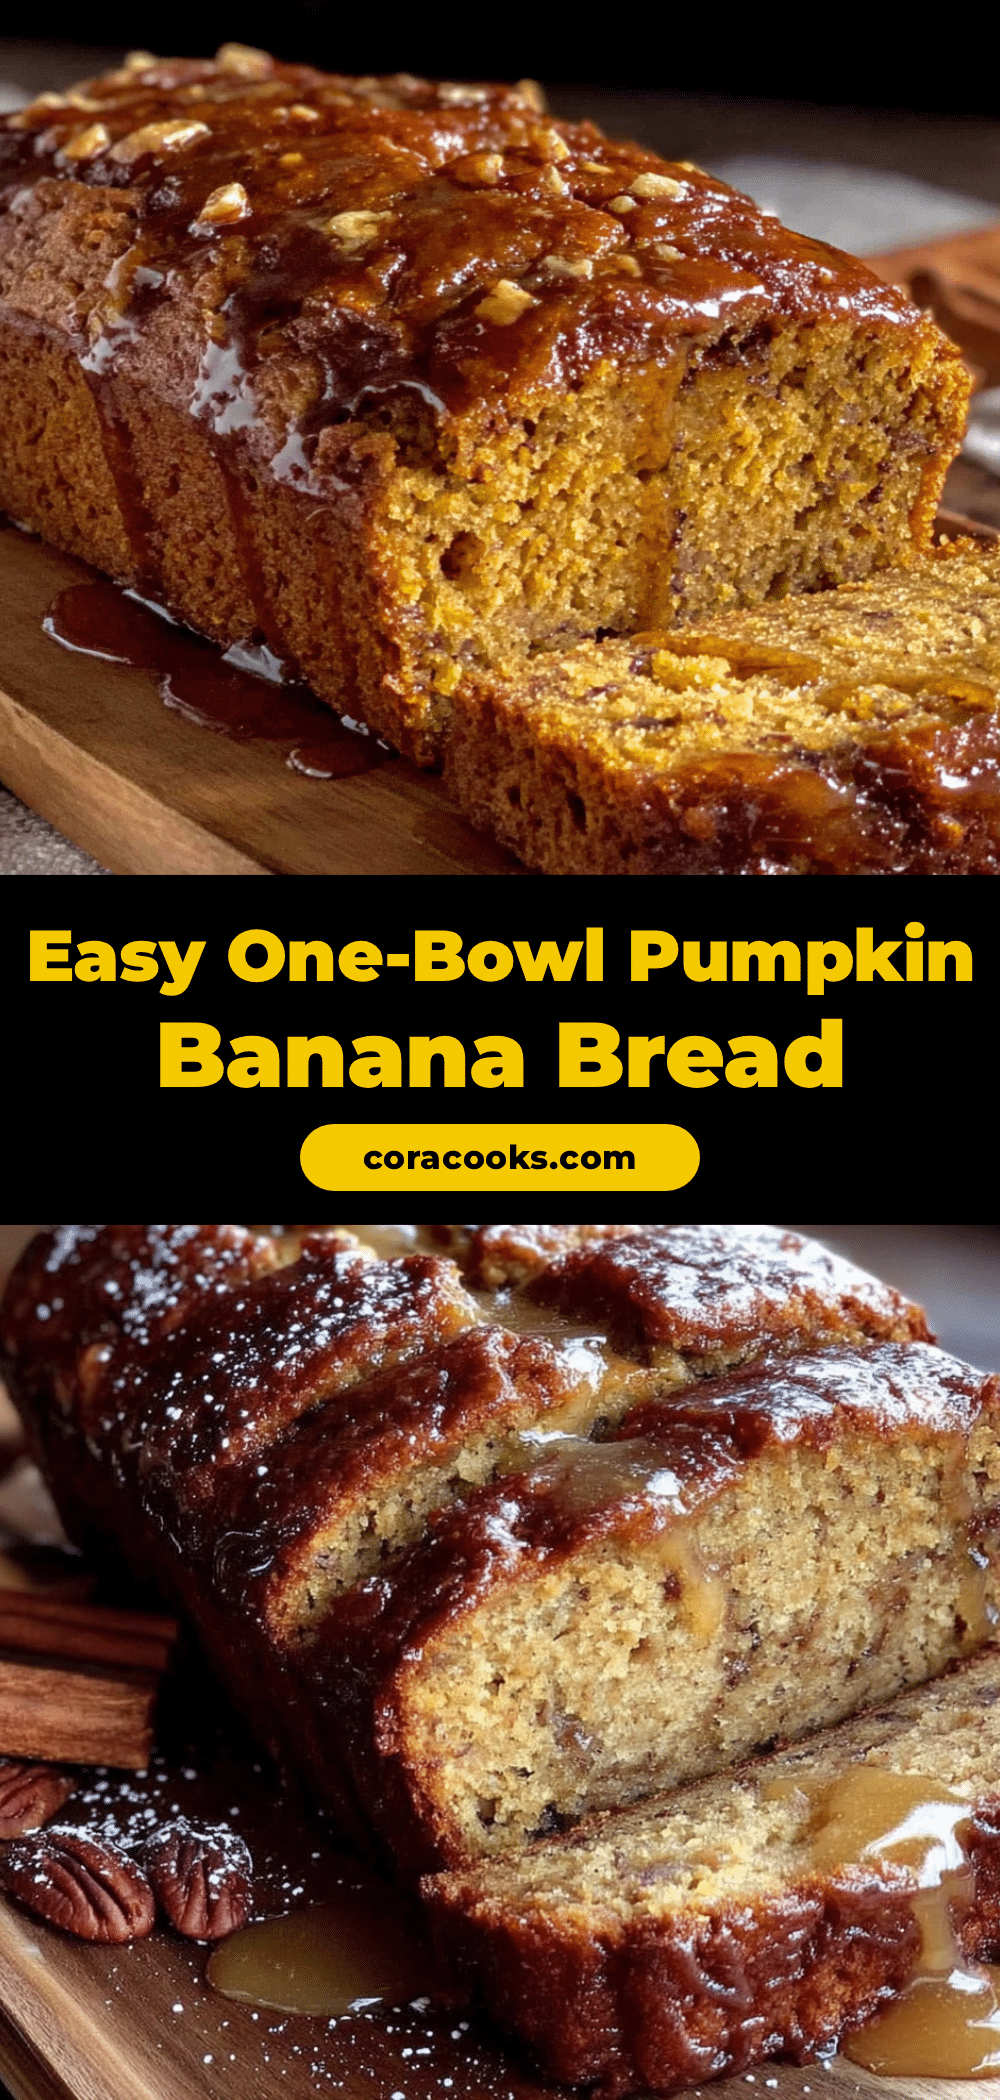
Easy One-Bowl Pumpkin Banana Bread (Best Moist Recipe)
This Easy One-Bowl Pumpkin Banana Bread is the kind of recipe that makes you look like a baking hero with almost zero effort. The combination of pumpkin puree and mashed banana creates a texture that’s tender, dense, and never dry, with warm fall spices that make any day feel cozy.
- Prep Time: 10 minutes
- Cook Time: 55 minutes
- Total Time: 1 hour 5 minutes
- Yield: 10 servings 1x
- Category: Quick Bread
- Cuisine: American
Ingredients
- 1 cup pumpkin puree (not pumpkin pie filling)
- 1 cup mashed ripe banana (about 2 large or 3 medium bananas)
- 1/2 cup granulated sugar
- 1/2 cup packed light brown sugar
- 1/3 cup vegetable oil (or melted coconut oil)
- 2 large eggs, room temperature
- 1 teaspoon vanilla extract
- 1 1/2 cups all-purpose flour (spooned and leveled)
- 1 teaspoon baking soda
- 1/2 teaspoon baking powder
- 1/2 teaspoon salt
- 2 teaspoons pumpkin pie spice (or 1 teaspoon cinnamon, 1/2 teaspoon ginger, 1/4 teaspoon nutmeg, 1/4 teaspoon cloves)
- 1 teaspoon ground cinnamon
- 1/2 cup chopped walnuts or pecans (optional)
- 1/2 cup chocolate chips (optional)
- 1/4 cup dried cranberries (optional)
Instructions
- Preheat your oven to 350°F (175°C). Grease your 9×5-inch loaf pan with butter or nonstick spray, or line it with parchment paper for the easiest cleanup. Set it aside while you make the batter.
- In your large mixing bowl, add the peeled bananas and mash them with a fork until mostly smooth. A few small lumps are fine—they add texture. You want about 1 cup of mashed banana.
- To the same bowl, add the pumpkin puree, granulated sugar, brown sugar, vegetable oil, eggs, and vanilla extract. Stir with your fork or a whisk until everything is combined.
- Sprinkle the flour, baking soda, baking powder, salt, pumpkin pie spice, and cinnamon over the wet mixture. Don’t stir yet.
- Use your spatula or fork to fold the dry ingredients into the wet. Stir gently, scraping from the bottom of the bowl. Stop as soon as you don’t see any more streaks of flour. The batter will be thick and slightly shaggy.
- If you’re using nuts, chocolate chips, or dried cranberries, gently fold them in now with just a few turns of the spatula.
- Scrape the batter into your prepared loaf pan and spread it into an even layer. Give the pan a gentle tap on the counter to release any air bubbles.
- Bake for 50-60 minutes. Place the pan in the center of the preheated oven. Bake until a toothpick inserted into the center comes out clean or with just a few moist crumbs. If the top is browning too quickly after 40 minutes, loosely tent it with aluminum foil.
- Set the pan on a cooling rack. Let it rest for exactly 10 minutes.
- Run a knife around the edges if you didn’t use parchment, then lift the bread out using the parchment handles or carefully invert it onto the rack. Let it cool completely before slicing.
Notes
Don’t skip the banana mashing step—uneven banana chunks create soggy pockets. Room temperature eggs matter; cold eggs can cause the oil to seize up. Let the bread cool completely before slicing to avoid a gummy texture. For a bakery-style domed top, let the batter rest in the pan for 10 minutes before baking. The bread stays moist for up to 4 days at room temperature and freezes beautifully for up to 3 months.
Nutrition
- Serving Size: 1 slice
- Calories: 245
- Sugar: 20
- Sodium: 280
- Fat: 9
- Saturated Fat: 1.5
- Carbohydrates: 38
- Fiber: 2
- Protein: 4
Keywords: pumpkin banana bread, one bowl banana bread, moist banana bread, fall baking, easy quick bread, pumpkin bread recipe