Love this? Save it for later!
Share the inspiration with your friends
It was 8:47 PM on a random Thursday in late August, and I was staring into my fridge like it owed me money. The air conditioner had given up the ghost that afternoon, and the whole apartment felt like a convection oven set to low. I was supposed to be meal-prepping for a Labor Day cookout the following weekend, but honestly, I just wanted something cold and something that didn’t require turning on the stove. Then I saw it — a half-opened bag of tortilla chips, a sad block of cheddar, a can of black beans, and a jar of pickled jalapeños that had been loitering in the door for months. The idea hit me like a heatwave: what if I just built the whole party around this pile of random stuff?
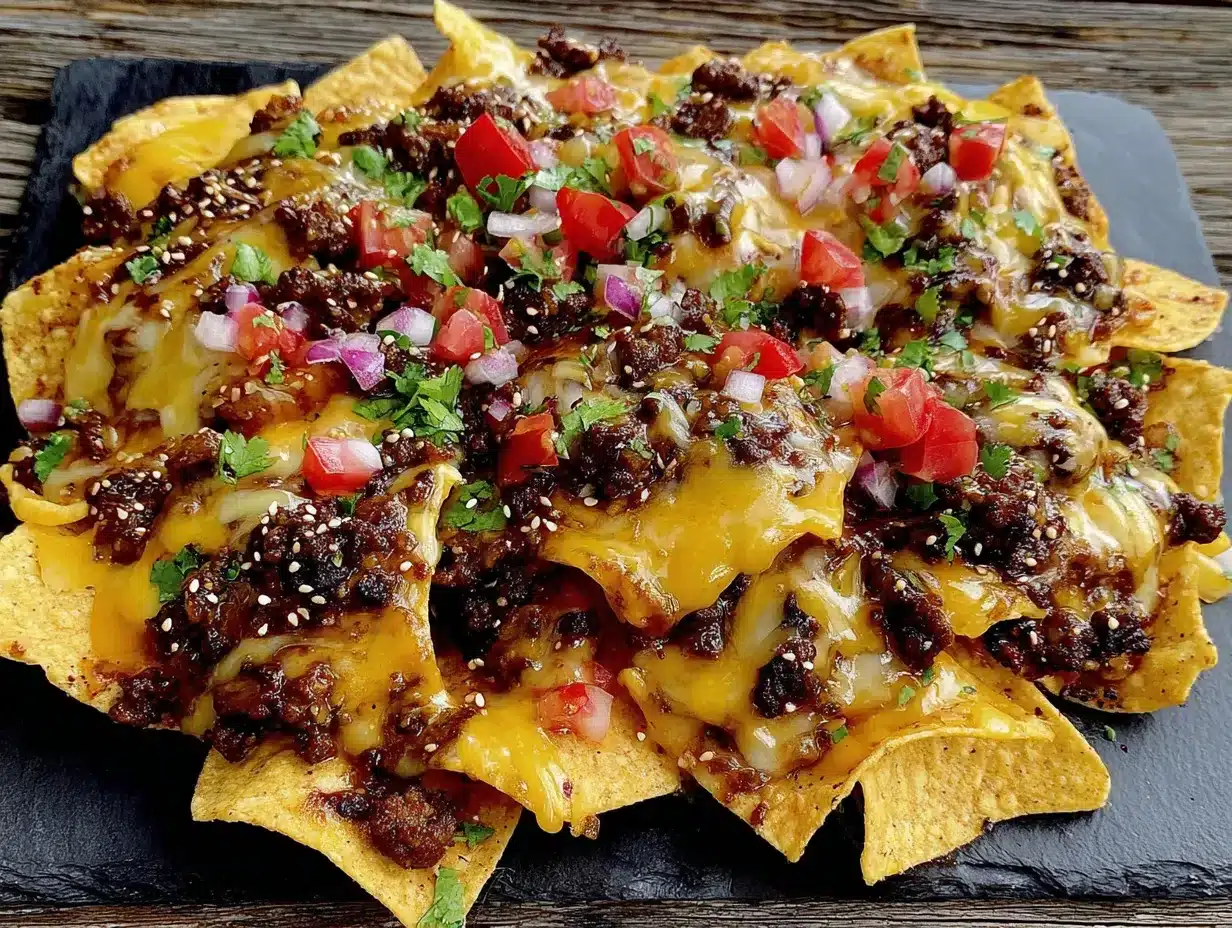
I mean, let’s be real — nachos are usually an afterthought at cookouts. You grill the burgers, you burn the hot dogs, and then someone dumps a bag of chips on a paper plate with some jarred salsa and calls it a day. But that night, I decided to go rogue. I layered those chips on a sheet pan, piled on every leftover I could find, and threw it under the broiler. The cheese bubbled up in that way that makes you forget all your problems, and I stood there in my kitchen, eating directly off the pan, thinking — this is it. This is the move.
So for Labor Day, I didn’t bring a boring pasta salad. I brought a full-blown nacho bar setup, and it was the first thing to disappear. Maybe you’ve been there — looking for that one dish that feeds a crowd without making you sweat over the grill for hours. This ultimate loaded nacho bar for Labor Day cookouts is that dish. It’s messy, it’s customizable, and it’s the kind of thing that makes people stand around the table and just keep grabbing handfuls. It stayed with me because it proved that you don’t need a fancy recipe to win at a cookout — you just need a good idea and a little bit of late-night desperation.
Why You’ll Love This Recipe
I’ve tested this nacho bar setup at three different cookouts now, and let me tell you — it’s never let me down. There’s something about a self-serve nacho station that brings out the kid in everyone. People love building their own plate, piling on their favorite toppings, and going back for seconds without any guilt. Here’s why this recipe works so well for your Labor Day gathering:
- Quick & Easy: This whole setup comes together in about 20 minutes. No marinating, no basting, no complicated techniques. Just layer, bake, and let people go wild.
- Simple Ingredients: You probably already have most of this stuff in your pantry. Chips, cheese, beans, and whatever else is hanging around. No fancy grocery trips needed for this one.
- Perfect for Cookouts: It’s the ultimate shareable dish. Set it out on a big platter or let everyone build their own mini tray. It works for kids, picky eaters, and the uncle who claims he doesn’t like Mexican food.
- Crowd-Pleaser: I’ve watched people who swore they were “full” go back for a third helping. The combination of crunchy chips, melty cheese, and fresh toppings is basically irresistible.
- Unbelievably Delicious: The secret is in the layering. You don’t just dump cheese on top — you build it so every chip gets some love. The texture is next-level comfort food.
What makes this nacho bar different from the rest? It’s the balance. I spent a whole afternoon figuring out the perfect cheese-to-chip ratio, the ideal baking time so nothing gets soggy, and the best way to keep the toppings fresh without making everything a soupy mess. This isn’t just another version of nachos — it’s your best version. The one you’ll bring to every cookout from now on because people will ask for it.
Honestly, this recipe is the kind that makes you close your eyes after the first bite. It’s comfort food reimagined for a crowd — faster, easier, but with the same soul-soothing satisfaction. Perfect for impressing guests without stress, or turning a simple cookout into something memorable.
What Ingredients You Will Need
This recipe uses simple, everyday ingredients that come together to create something way bigger than the sum of their parts. The key is choosing the right stuff — not all chips are created equal, and not all cheese melts the same way. Here’s what you’ll need to build the ultimate loaded nacho bar for Labor Day cookouts.
For the Base Nachos
- 1 large bag (16-18 oz) restaurant-style tortilla chips — I prefer the thicker, sturdier chips that can hold up to all the toppings. Thin chips get soggy too fast. Look for “restaurant style” or “cantina” chips.
- 3 cups shredded Mexican blend cheese (about 12 oz) — You can use pre-shredded in a pinch, but freshly shredded melts so much better. I like a mix of cheddar, Monterey Jack, and asadero.
- 1 cup shredded sharp cheddar cheese — Adds that extra punch of flavor. I recommend Tillamook or Cabot for the best melt.
- 1 can (15 oz) black beans, drained and rinsed — Don’t skip the rinsing. It washes away the excess sodium and that weird canned liquid texture.
- 1 can (15 oz) pinto beans, drained and rinsed — Or refried beans if you want a creamier layer.
- 1 cup canned corn, drained — Fire-roasted corn adds a smoky flavor that’s amazing with the cheese.
- 1/2 cup pickled jalapeños — Adjust to your heat tolerance. I use about half a cup for a mild kick.
For the Toppings Bar
- 1 cup sour cream — Full-fat works best for richness, but Greek yogurt is a fine substitute.
- 1 cup fresh salsa or pico de gallo — Store-bought is fine, but homemade takes it to another level. Drain excess liquid to avoid soggy chips.
- 1 avocado, diced — Or guacamole if you’re feeling fancy. Toss with a little lime juice to prevent browning.
- 1/2 cup chopped fresh cilantro — Adds a bright, fresh finish.
- 1/2 cup sliced green onions — Both white and green parts.
- 1/4 cup sliced black olives — Optional, but some people love ’em.
- 1 lime, cut into wedges — For squeezing over the top.
- Optional proteins: 1 lb cooked ground beef seasoned with taco seasoning, or shredded chicken, or carnitas. I usually do a double batch of seasoned ground beef because it’s the crowd favorite.
Ingredient Selection Tips
For the best results, use block cheese and shred it yourself. The pre-shredded stuff has anti-caking agents that prevent it from melting smoothly — you’ll end up with a grainy texture. Trust me on this one. I learned the hard way when I brought a tray of sad, clumpy nachos to a party once. Never again.
For the chips, avoid the super thin “restaurant style” that comes in the little bags. Go for the hearty, scoopable chips that can hold a lot of weight. And if you’re feeding a crowd, buy two bags. You’ll thank me later.
Equipment Needed
You don’t need a ton of fancy equipment for this recipe, which is part of the beauty. Here’s what you’ll need to pull off the ultimate loaded nacho bar for Labor Day cookouts:
- Large rimmed baking sheet (half-sheet pan) — This is non-negotiable. A rimmed sheet keeps everything contained and prevents cheese from dripping onto your oven floor. I’ve used a cookie sheet without edges before, and let’s just say it was a smoky disaster.
- Parchment paper or aluminum foil — Line your baking sheet for easy cleanup. Trust me, baked-on cheese is a nightmare to scrub off.
- Cheese grater — If you’re shredding your own cheese (and you should be), a box grater works perfectly. A food processor with a shredding disc makes it even faster.
- Small serving bowls or ramekins — For the toppings bar. I use little ceramic bowls I picked up at a thrift store. Anything small works.
- Spatula or tongs — For serving the nachos. Tongs work better because you can grab a whole cluster of cheesy chips without breaking them.
- Oven or toaster oven — A regular oven is ideal, but a toaster oven works if you’re making a smaller batch. Just watch the time — toaster ovens run hot.
- Cutting board and knife — For prepping the fresh toppings.
If you don’t have a rimmed baking sheet, you can use a large oven-safe skillet or even a disposable aluminum pan from the grocery store. They’re cheap and perfect for cookouts because you can just toss them afterward.
Preparation Method
Alright, let’s get into the nitty-gritty. This method is designed to give you perfectly crispy, evenly loaded nachos without any sogginess or burnt edges. Follow these steps, and you’ll be the hero of your Labor Day cookout.
- Preheat your oven to 400°F (200°C). While it’s heating up, line your rimmed baking sheet with parchment paper or aluminum foil. This step is crucial — melted cheese is sticky stuff, and you don’t want to be scrubbing pans when you could be eating nachos.
- Spread half the tortilla chips in an even layer on the baking sheet. Don’t just dump them — arrange them so they overlap slightly but aren’t stacked too thick. You want every chip to have a chance at getting some cheese. I usually do a single layer with a few extra scattered on top. About 6-7 cups of chips should do it for a half-sheet pan.
- Sprinkle half the shredded cheese mixture evenly over the chips. Don’t be shy here. The cheese is the glue that holds everything together. Use about 1.5 cups of the Mexican blend and half a cup of the sharp cheddar for this first layer.
- Add a layer of beans and corn. Dollop small spoonfuls of the black beans, pinto beans, and corn over the cheese layer. You don’t want huge clumps — just distribute them evenly so every bite gets a little something. About a third of each can should work for this layer.
- Add the remaining chips in a second layer. This is where the magic happens. By layering instead of just dumping everything on top, you ensure that even the chips at the bottom get some love. Arrange them so they’re slightly offset from the first layer.
- Sprinkle the remaining cheese over the top. Use the rest of the Mexican blend and sharp cheddar. Make sure the chips are well-covered. If you’re using pickled jalapeños, scatter them over the cheese now — they’ll get slightly roasted and mellow out in the oven.
- Bake for 10-12 minutes, or until the cheese is fully melted and bubbly. Keep an eye on it after the 8-minute mark. Ovens vary, and you don’t want burnt edges. The cheese should be fully melted with a few golden brown spots — that’s the good stuff.
- While the nachos bake, prep your toppings bar. Dice the avocado, chop the cilantro, slice the green onions, and portion out the sour cream and salsa into small bowls. If you’re using a protein like seasoned ground beef, have it ready in a separate bowl.
- Remove the nachos from the oven and let them rest for 2-3 minutes. This is important — the cheese needs a minute to set so it doesn’t slide off the chips when you move them. The residual heat will keep everything warm.
- Transfer the baking sheet to your serving area. Set out the bowls of toppings and let everyone build their own plate. I like to put out small plates or trays so people can grab a cluster of cheesy chips and then add their preferred toppings on top.
Sensory cues to watch for: The cheese should be fully liquid and stretchy when you pull two chips apart. The edges of the chips should be lightly toasted but not burnt. The beans should be heated through — if they’re cold in the center, the nachos need another minute or two. The kitchen should smell like a combination of toasted corn, melted cheese, and warm spices. That’s how you know you’re on the right track.
Pro tip for efficiency: If you’re making a double batch for a big crowd, bake the nachos in batches. Don’t overcrowd the pan — it leads to soggy, unevenly melted results. Two half-sheet pans baked one after the other is way better than one giant, sad tray.
Cooking Tips & Techniques
I’ve made a lot of nachos in my day, and I’ve definitely made some mistakes along the way. Here are the tips I’ve picked up through trial and error — so you don’t have to learn the hard way.
The biggest mistake people make is using too many toppings. I know it’s tempting to pile on everything you’ve got, but overloaded nachos turn into a soggy, sad mess. Stick to 3-4 toppings max, plus cheese and beans. Less is more, honestly. You can always add more fresh stuff after baking.
Don’t skip the parchment paper. I once thought I could get away with just greasing the pan. I was wrong. The cheese fused to the metal like it was welded on. I spent 20 minutes scrubbing that pan, and I still found bits of baked-on cheddar weeks later. Line your pan — future you will be grateful.
Layer strategically. The order matters. Chips, cheese, toppings, more chips, more cheese. This prevents the toppings from making the bottom chips soggy and ensures every layer gets melted goodness. I’ve tried just dumping everything on top, and the bottom chips end up sad and limp.
Watch the oven like a hawk. Nachos go from perfectly melted to burnt in about 30 seconds. Set a timer for 8 minutes and check every minute after that. The cheese should be bubbly and starting to brown in spots, but the chips should still be crunchy.
Serve immediately. Nachos are a now-food. They don’t hold well, and they definitely don’t reheat. Plan to bake them right before you’re ready to eat. If you’re cooking for a party, bake the first batch as guests arrive and have a second batch ready to go in the oven.
Keep the toppings bar fresh. Don’t put out the sour cream and salsa until right before serving. They can sit out for a bit, but the cold ingredients will cool down your hot nachos. I usually set out the dry toppings first and add the cold stuff at the last minute.
Variations & Adaptations
One of the best things about this ultimate loaded nacho bar for Labor Day cookouts is how customizable it is. Here are some variations I’ve tried and loved:
Vegetarian Version
Skip the meat and double up on the beans. I like to use a mix of black beans, pinto beans, and refried beans for different textures. Add some sautéed bell peppers and onions for extra flavor. Roasted sweet potatoes also work surprisingly well — they add a sweet, earthy note that pairs beautifully with the cheese.
Spicy Lover’s Version
If you like heat, this one’s for you. Use pepper jack cheese instead of the Mexican blend. Add diced habaneros or serranos to the topping bar. Drizzle with hot sauce before serving — I like Cholula or Valentina for a smoky kick. You can also mix some cayenne or chipotle powder into the beans before layering.
Breakfast Nachos
Yes, this is a thing, and yes, it’s amazing. Skip the beans and add scrambled eggs, crumbled bacon or chorizo, and shredded hash browns. Use the same cheese blend and bake as directed. Top with salsa verde and a dollop of sour cream. It’s a brunch game-changer.
Seafood Nachos
For a coastal twist, swap the ground beef for grilled shrimp or blackened fish. Use a white cheese like queso blanco or Monterey Jack. Add a squeeze of lime and some fresh mango salsa on top. This version is lighter and perfect for summer cookouts.
Low-Carb Version
Use pork rinds or cheese crisps instead of tortilla chips. Layer with the same cheese, beans, and toppings. It’s not exactly the same texture, but it scratches the nacho itch without the carbs. I’ve made this for keto friends, and they always ask for the recipe.
Serving & Storage Suggestions
This is where the nacho bar really shines. The setup is half the fun — people love building their own plates and customizing every bite.
Serving temperature: Serve the nachos straight from the oven while the cheese is still hot and stretchy. The toppings should be at room temperature or slightly chilled — the contrast between hot, melty cheese and cool, fresh toppings is what makes this dish so satisfying.
Presentation: I like to serve the baked nachos on the same sheet pan I baked them on. It looks rustic and casual, which is perfect for a cookout. Set the pan on a trivet or a cutting board to protect your table. Arrange the topping bowls around the pan so people can grab what they want.
Complementary dishes: This nacho bar pairs beautifully with grilled meats like burgers, hot dogs, or chicken. It also goes well with a simple side salad or some fresh fruit to balance out the richness. For drinks, I recommend a cold beer (lager or pale ale works great) or a margarita. For non-alcoholic options, try a limeade or horchata.
Storage: Nachos don’t store well, honestly. The chips get soggy, and the cheese hardens. If you have leftovers, scrape the toppings off the chips and store them separately in an airtight container in the fridge for up to 2 days. The chips themselves are best tossed — they won’t re-crisp.
Reheating: If you absolutely must reheat leftover nachos, spread them on a baking sheet and pop them in a 350°F (175°C) oven for 5-7 minutes. Don’t use the microwave — it turns the chips into sad, rubbery messes. Even with the oven method, they won’t be as good as fresh, so it’s best to make only what you’ll eat.
How flavors develop: The nachos are best fresh, but the toppings actually get better after sitting for a bit. The salsa releases its juices, the sour cream softens, and everything melds together. If you’re making the toppings ahead of time, they’ll taste even better the next day.
Nutritional Information & Benefits
Let’s be real — nachos aren’t health food. But that doesn’t mean they can’t have some redeeming qualities. Here’s a rough estimate of what you’re looking at per serving (about 1 cup of nachos with toppings):
- Calories: approximately 350-450
- Protein: 12-15 grams
- Fat: 20-25 grams
- Carbohydrates: 30-40 grams
- Fiber: 5-7 grams
- Sodium: 600-800 mg
Health benefits: The black beans and pinto beans are packed with fiber and plant-based protein, which helps keep you full and supports digestive health. The avocado adds healthy monounsaturated fats and potassium. The tomatoes in the salsa provide lycopene, an antioxidant linked to heart health. And the cheese — well, it’s a good source of calcium and protein. Everything in moderation, right?
Dietary considerations: This recipe can be made vegetarian by using plant-based protein or extra beans. For a gluten-free option, use certified gluten-free tortilla chips and check your seasoning packets. For a dairy-free version, use vegan cheese shreds and dairy-free sour cream — the texture won’t be exactly the same, but it still hits the spot.
Potential allergens: This recipe contains dairy (cheese, sour cream) and corn (tortilla chips). If you’re serving a crowd, consider labeling the toppings bar so guests with allergies can make informed choices.
I personally love that this recipe lets you control what goes on your plate. You can load up on veggies and beans for a healthier option, or go all-in on the cheese and sour cream for a decadent treat. It’s flexible, and that’s what makes it work for a crowd.
Conclusion
So there you have it — the ultimate loaded nacho bar for Labor Day cookouts. It’s messy, it’s customizable, and it’s the kind of dish that makes people stand around the table and just keep grabbing handfuls. I’ve brought this to three different cookouts now, and every single time, it’s the first thing to disappear. There’s something about a self-serve nacho station that brings out the kid in everyone.
I want you to take this recipe and make it your own. Swap in your favorite toppings, adjust the spice level, experiment with different proteins. That’s the beauty of a nacho bar — it’s never the same twice. And honestly, that’s how cooking should be. Flexible, forgiving, and fun.
If you try this recipe, I’d love to hear about it. Drop a comment below and let me know what toppings you used, how it turned out, or if you discovered a new favorite combination. And if you have a go-to cookout dish that always steals the show, share that too. We’re all in this together, figuring out how to feed the people we love without losing our minds.
Now go forth and make some nachos. Your Labor Day cookout is about to get a whole lot better.
Frequently Asked Questions
Can I make this nacho bar ahead of time?
You can prep the toppings ahead of time — chop the veggies, cook the meat, shred the cheese — and store them in the fridge. But don’t assemble or bake the nachos until right before serving. They’re best straight out of the oven while the chips are still crunchy and the cheese is hot.
What’s the best cheese for nachos?
A blend of cheeses works best. I like a Mexican blend (cheddar, Monterey Jack, asadero) plus some extra sharp cheddar for flavor. Avoid pre-shredded cheese if you can — it has anti-caking agents that prevent smooth melting. Shred your own from a block for the best results.
How do I keep nachos from getting soggy?
Layer strategically. Put cheese between the chips and the wet toppings (beans, salsa) to create a barrier. Don’t overload the chips — stick to a moderate amount of toppings. And serve immediately after baking. The longer they sit, the soggier they get.
Can I make this recipe in a slow cooker or Instant Pot?
This recipe is designed for the oven because it gives you crispy chips and evenly melted cheese. A slow cooker or Instant Pot won’t achieve the same texture. However, you can keep the toppings warm in a slow cooker if you’re serving buffet-style. Just bake the nachos in the oven and transfer them to a serving platter.
What’s the best way to serve nachos for a crowd?
Set up a toppings bar with small bowls of sour cream, salsa, guacamole, cilantro, green onions, and any other toppings. Bake the nachos on a large sheet pan and let people grab clusters of cheesy chips with tongs. They can then add their preferred toppings on their own plate. It’s interactive, fun, and everyone gets exactly what they want.
Pin This Recipe!
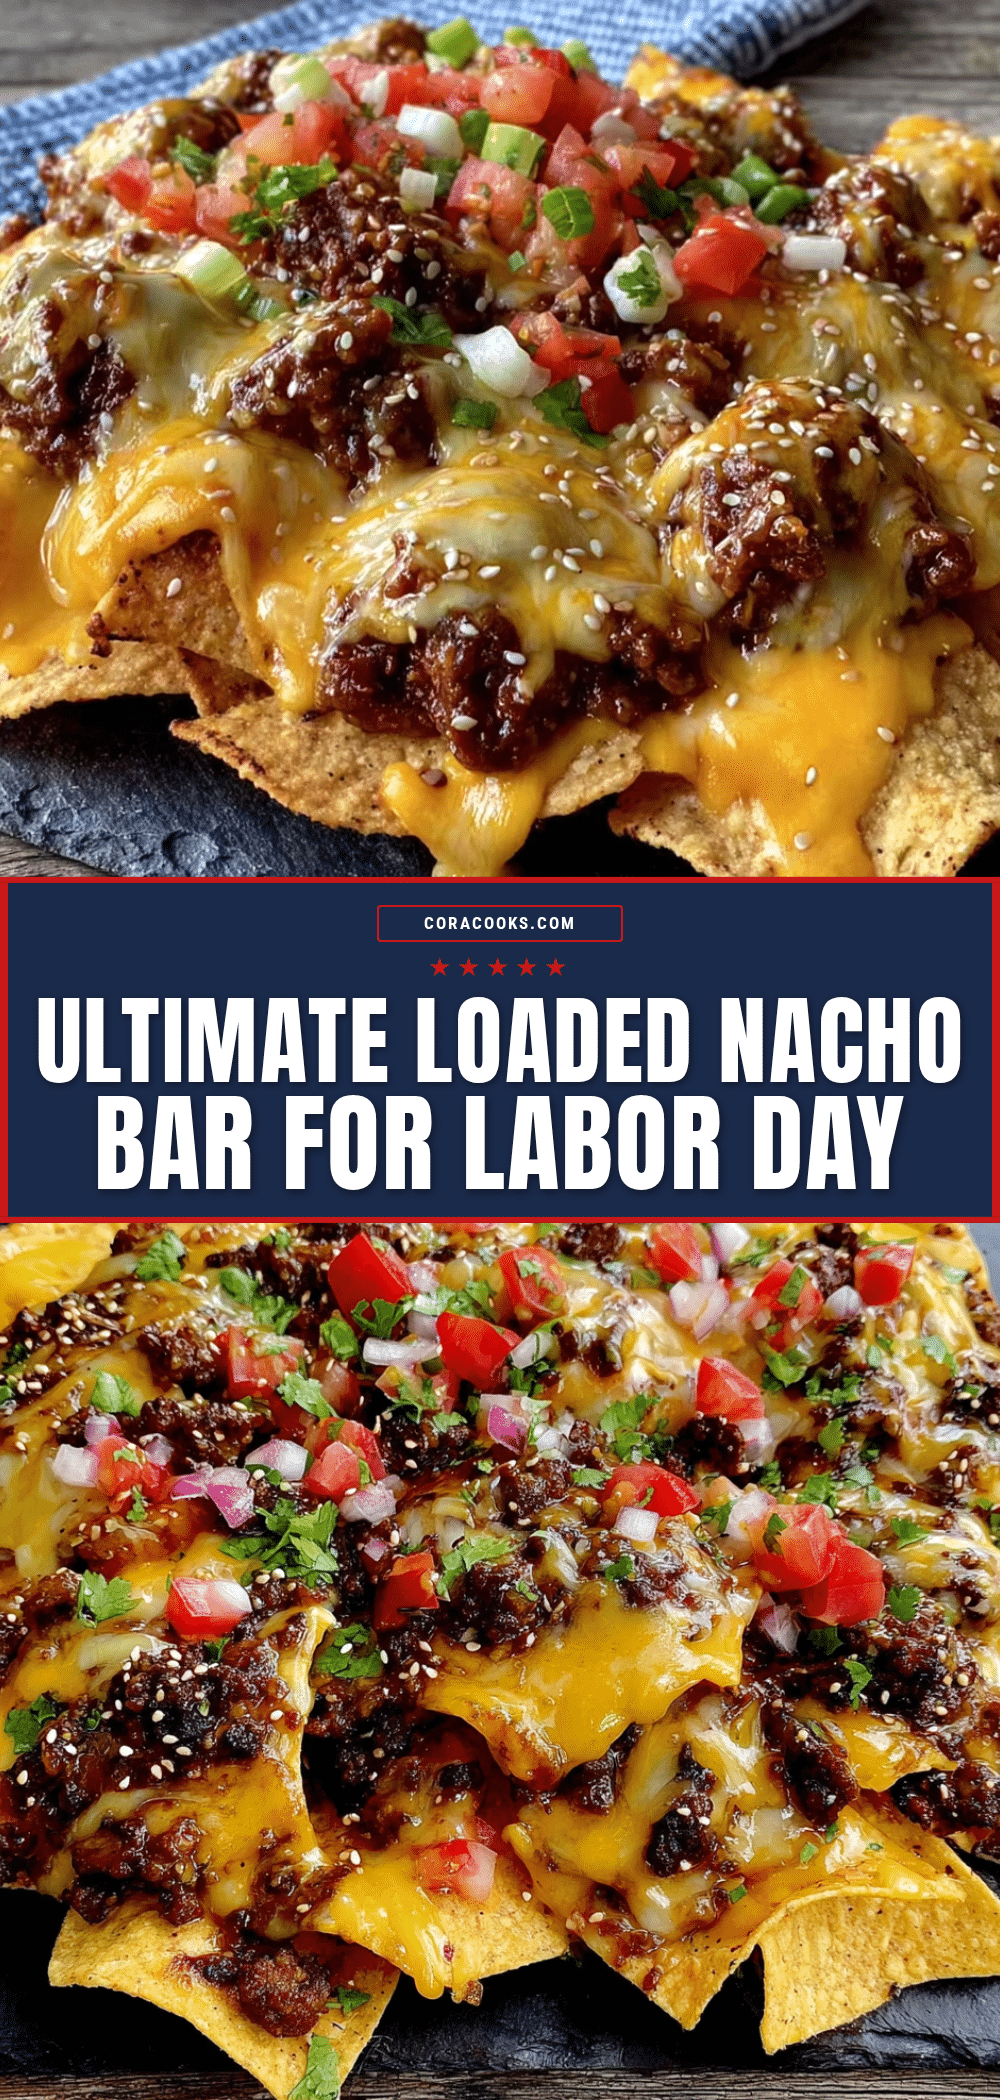
Ultimate Loaded Nacho Bar for Labor Day Cookouts
A customizable, crowd-pleasing nacho bar perfect for Labor Day cookouts. Quick to assemble with simple ingredients, it features layers of crispy chips, melted cheese, beans, and fresh toppings for a fun, self-serve experience.
- Prep Time: 10 minutes
- Cook Time: 12 minutes
- Total Time: 22 minutes
- Yield: 8 servings 1x
- Category: Appetizer
- Cuisine: Mexican-American
Ingredients
- 1 large bag (16–18 oz) restaurant-style tortilla chips
- 3 cups shredded Mexican blend cheese (about 12 oz)
- 1 cup shredded sharp cheddar cheese
- 1 can (15 oz) black beans, drained and rinsed
- 1 can (15 oz) pinto beans, drained and rinsed
- 1 cup canned corn, drained
- 1/2 cup pickled jalapeños
- 1 cup sour cream
- 1 cup fresh salsa or pico de gallo
- 1 avocado, diced
- 1/2 cup chopped fresh cilantro
- 1/2 cup sliced green onions
- 1/4 cup sliced black olives (optional)
- 1 lime, cut into wedges
- 1 lb cooked ground beef seasoned with taco seasoning (optional)
Instructions
- Preheat your oven to 400°F (200°C). Line a rimmed baking sheet with parchment paper or aluminum foil.
- Spread half the tortilla chips in an even layer on the baking sheet.
- Sprinkle half the shredded cheese mixture evenly over the chips.
- Add a layer of beans and corn by dolloping small spoonfuls over the cheese.
- Add the remaining chips in a second layer, slightly offset from the first.
- Sprinkle the remaining cheese over the top. Scatter pickled jalapeños over the cheese.
- Bake for 10-12 minutes, until the cheese is fully melted and bubbly.
- While the nachos bake, prep the toppings bar: dice avocado, chop cilantro, slice green onions, and portion sour cream and salsa into small bowls.
- Remove the nachos from the oven and let them rest for 2-3 minutes.
- Transfer the baking sheet to your serving area. Set out the bowls of toppings and let everyone build their own plate.
Notes
For best results, shred cheese from a block instead of using pre-shredded. Layer strategically to prevent sogginess. Serve immediately for optimal crunch. Nachos do not store or reheat well.
Nutrition
- Serving Size: 1 cup
- Calories: 400
- Sugar: 3
- Sodium: 700
- Fat: 22
- Saturated Fat: 10
- Carbohydrates: 35
- Fiber: 6
- Protein: 14
Keywords: nachos, loaded nachos, nacho bar, Labor Day, cookout, party food, easy appetizer, crowd-pleaser