Love this? Save it for later!
Share the inspiration with your friends
The woman at the next stall in the Santa Fe farmers’ market watched me sniffing a paper bag full of roasted Hatch chiles like I was trying to memorize them. I was, honestly. I had driven six hours for this exact moment, and I wanted to bottle the smell of smoke and green heat. She didn’t say anything at first. Then she reached into her own basket and pulled out a cast iron skillet, blackened from decades of use. “You’re gonna put those in cornbread, right?” she asked. I hadn’t planned on it, but the way she said it—like it was the most obvious thing in the world—made me nod before I could think.
She told me her grandmother made cornbread every Sunday, and that the trick was never to apologize for the heat. “If you want sweet cornbread, eat cake,” she said, laughing. “This is for sopping up chili and beans.” I scribbled notes on a napkin while she talked about ratios and butter and why you should never, ever use a nonstick pan for cornbread if you want that crust. I forgot my wallet at her stall and had to run back, red-faced, and she just waved me off like it happened all the time. That napkin is still tucked into my recipe box, stained and crumpled, and it means more to me than any cookbook I own.
This Savory Hatch Chili Cheddar Skillet Cornbread is my version of that conversation. It’s got the smoky heat of roasted green chiles, sharp cheddar melted into every bite, and that crispy, golden crust you can only get from a hot cast iron pan. Maybe you’ve had cornbread that was dry or crumbly or, let’s face it, just plain boring. This one is different. It’s moist, it’s savory, and it has just enough kick to wake you up without sending you running for a glass of milk. I keep making it because it reminds me of that afternoon—the smell of roasting chiles, the weight of that old skillet, and a stranger who treated me like an old friend.
Why You’ll Love This Recipe
I’ve tested this recipe more times than I care to admit, and I can tell you with confidence that it solves every problem people have with cornbread. It’s not dry. It’s not bland. And it doesn’t fall apart the second you try to butter it. Here’s why this one stands out:
- Quick & Easy: You can have this on the table in about 35 minutes. Mix the batter, heat the skillet, and let the oven do the rest. Perfect for those evenings when you need something hearty but don’t want to spend all night in the kitchen.
- Simple Ingredients: No weird specialty items here. You probably already have cornmeal, flour, eggs, and butter in your pantry. The Hatch chiles are the star, and they’re worth seeking out, but the rest is pure kitchen staple territory.
- Perfect for Chili Season: This cornbread was made for sopping up bowls of red or green chili. It’s also incredible alongside a pot of pinto beans, a plate of grilled meats, or even just slathered with butter for breakfast.
- Crowd-Pleaser: I’ve brought this to potlucks and watched people go back for thirds. Even folks who claim they “don’t like cornbread” change their tune after one bite of this cheesy, spicy version.
- Unbelievably Delicious: The combination of smoky chiles, sharp cheddar, and that buttery cornmeal texture is pure comfort. It’s the kind of bread that makes you close your eyes after the first bite.
What makes this recipe different from all the others is the technique. I blend a portion of the cornmeal with hot butter before adding the wet ingredients—it’s a little trick that keeps the cornbread tender and prevents that gritty texture that ruins so many recipes. Plus, I use buttermilk for tang and tenderness, and I never skip preheating the skillet with oil until it’s smoking hot. That sizzle when the batter hits the pan is what creates that legendary crispy crust. This isn’t just another cornbread recipe. It’s the one you’ll make again and again.
What Ingredients You Will Need
This recipe uses simple, wholesome ingredients to deliver bold flavor and satisfying texture without the fuss. Most of these are pantry staples, and the Hatch chiles are worth the extra effort to find. Here’s what you’ll need:
- 1 cup yellow cornmeal (medium grind works best; I prefer Bob’s Red Mill for consistent texture)
- 1 cup all-purpose flour (spooned and leveled; don’t scoop straight from the bag)
- 1 tablespoon baking powder (make sure it’s fresh for the best rise)
- 1 teaspoon baking soda
- 1 teaspoon salt (kosher salt preferred)
- 1/4 cup granulated sugar (just enough to balance the heat, not make it sweet)
- 1 cup buttermilk (full-fat for best results; shake the carton before measuring)
- 2 large eggs (room temperature)
- 1/2 cup unsalted butter (melted and slightly cooled, plus extra for the skillet)
- 1 cup roasted Hatch green chiles (diced; about 4-5 medium chiles, stems and seeds removed. Frozen or jarred works fine if fresh aren’t available)
- 1 1/2 cups sharp cheddar cheese (shredded from a block; pre-shredded won’t melt as smoothly)
- 2 tablespoons vegetable oil or bacon fat (for preheating the skillet)
A few notes on ingredients. If you can’t find Hatch chiles, you can substitute Anaheim or poblano peppers, but the flavor won’t be quite the same. Hatch chiles have a distinct smoky, slightly fruity heat that’s hard to replicate. I buy a big batch when they’re in season, roast them myself, and freeze them in small bags. It’s a little work upfront, but it means I have Hatch chiles all year long. For the cheese, I really recommend grating your own. The anti-caking agents in pre-shredded cheese keep it from melting into that beautiful, gooey consistency you want in every bite.
Equipment Needed
You don’t need a fancy kitchen to make this cornbread, but a few key tools make a real difference. Here’s what I use:
- 10-inch cast iron skillet: This is non-negotiable for that crispy crust. Lodge makes a great affordable option that will last forever. If you don’t have one, you can use a 9×9 baking dish, but the crust won’t be as good.
- Large mixing bowl: For combining dry ingredients
- Medium mixing bowl: For whisking wet ingredients
- Whisk: For smoothing out lumps in the batter
- Rubber spatula: For folding in the chiles and cheese without overmixing
- Measuring cups and spoons: For accuracy
- Chef’s knife and cutting board: For dicing the chiles if using fresh
- Oven mitts: The skillet handle gets dangerously hot
If you don’t own a cast iron skillet, don’t rush out and buy one just for this recipe. You can use a 9-inch square baking pan or even a muffin tin for cornbread muffins. Just reduce the baking time by about 10 minutes if using muffins. But honestly, if you make cornbread even semi-regularly, a cast iron skillet is worth the investment. I’ve had mine for over a decade, and it only gets better with age.
Preparation Method
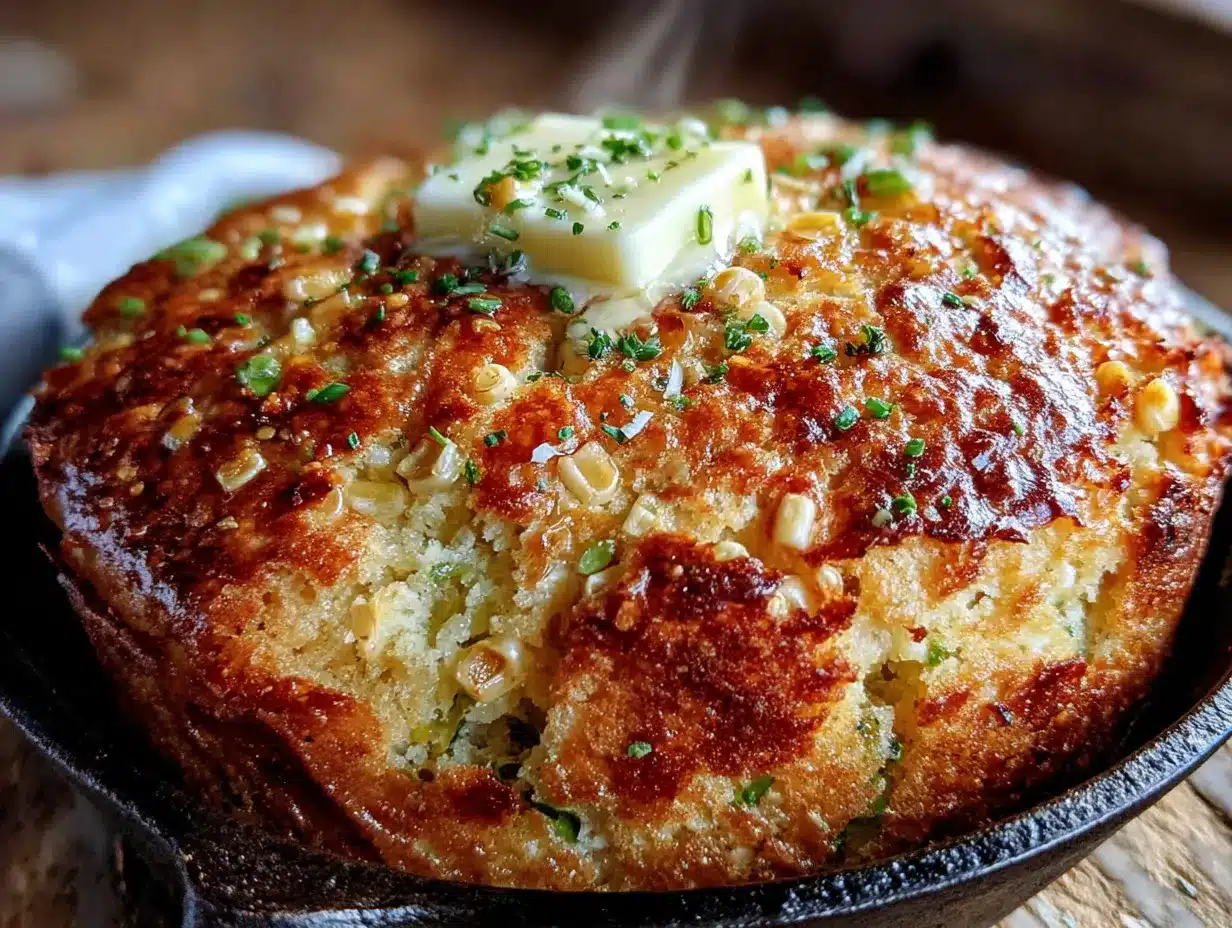
Let’s get to the good part. Follow these steps, and you’ll have the best cornbread of your life. I promise.
- Preheat your oven to 400°F (200°C). Place your cast iron skillet inside the oven while it preheats. You want that pan screaming hot when the batter hits it. This step is crucial for that crispy, golden crust.
- Roast your Hatch chiles if using fresh. Place them directly over a gas flame or under the broiler, turning occasionally, until the skin is blackened and blistered all over. Transfer to a bowl, cover with plastic wrap, and let steam for 10 minutes. Then peel off the skins, remove the stems and seeds, and dice the flesh. If you’re using frozen or jarred chiles, just drain and dice them.
- In a large bowl, whisk together the cornmeal, flour, baking powder, baking soda, salt, and sugar. Make sure everything is evenly distributed. I like to sift the baking powder and soda through a fine-mesh strainer to break up any lumps.
- In a separate medium bowl, whisk together the buttermilk and eggs until smooth and slightly frothy. The eggs should be room temperature so they incorporate easily into the batter.
- Pour the melted butter into the dry ingredients and use a fork or your fingers to work it in until the mixture looks like coarse crumbs. This is that technique I mentioned earlier—it coats the cornmeal particles with fat, which prevents them from absorbing too much liquid and becoming gritty. Let this sit for 2 minutes.
- Pour the buttermilk mixture into the dry ingredients and stir with a rubber spatula until just combined. A few lumps are fine. Overmixing will make the cornbread tough.
- Fold in the diced Hatch chiles and 1 cup of the shredded cheddar cheese. Reserve the remaining 1/2 cup for the top. Fold gently, just until everything is evenly distributed. The batter will be thick and slightly shaggy.
- Carefully remove the hot skillet from the oven using oven mitts. Add the vegetable oil or bacon fat and swirl to coat the bottom and sides. The oil should shimmer and maybe even smoke a little—that’s what you want.
- Pour the batter into the hot skillet and spread it evenly with the spatula. It should sizzle loudly when it hits the pan. Sprinkle the remaining 1/2 cup of cheddar cheese over the top.
- Bake for 20-25 minutes, or until the top is golden brown and a toothpick inserted into the center comes out clean or with a few moist crumbs. The edges should be pulling away from the skillet slightly.
- Let the cornbread cool in the skillet for 5-10 minutes before slicing and serving. This resting time allows the structure to set so it doesn’t crumble when you cut it.
A few things to watch for. If the top is browning too quickly but the center isn’t done, tent the skillet loosely with foil for the last 5 minutes of baking. If your batter seems too thick, add a tablespoon more buttermilk. And if you’re using a glass or ceramic dish instead of cast iron, reduce the oven temperature to 375°F and expect a slightly longer bake time.
Cooking Tips & Techniques
I’ve made a lot of cornbread in my day, and I’ve learned a few things the hard way. Here are my best tips for getting it right every time.
Don’t skip preheating the skillet. This is the number one mistake people make. If the pan isn’t hot enough, the batter will soak into the surface and you’ll end up with a pale, soggy bottom instead of that beautiful golden crust. I learned this lesson when I was in a rush and threw the batter into a warm-but-not-hot pan. The result was edible but disappointing—like cornbread that forgot its purpose in life.
Use room temperature ingredients. Cold eggs and buttermilk will seize up the melted butter and create a lumpy, uneven batter. Take them out of the fridge 30 minutes before you start, or if you’re impatient like me, set the eggs in a bowl of warm water for 5 minutes and microwave the buttermilk for 15 seconds.
Don’t overmix the batter. Stir just until the dry ingredients are moistened. Those few lumps are fine. Overmixing develops the gluten in the flour, which makes cornbread tough and rubbery instead of tender and cakey. I once overmixed a batch while talking on the phone, and it came out dense enough to use as a doorstop.
Let it rest before slicing. I know it’s tempting to dig in right away, but giving the cornbread 5-10 minutes to cool allows the crumb to set. Slice it too soon, and you’ll end up with a crumbly mess. Use this time to butter your serving plates and pour yourself a drink.
For extra crispy edges, brush the sides of the hot skillet with a little extra melted butter before adding the batter. It’s a small step that makes a big difference.
Variations & Adaptations
One of the best things about this recipe is how flexible it is. Here are some variations I’ve tried and loved:
- Spicy Jalapeño-Cheddar Version: Replace half the Hatch chiles with diced fresh jalapeños (seeds removed if you want less heat). Add 1/4 cup chopped cilantro to the batter for a fresh, herby note. This version is fantastic with Mexican food.
- Smoky Bacon Cornbread: Cook 4 slices of bacon until crispy, crumble them, and fold into the batter along with the chiles and cheese. Use the rendered bacon fat instead of vegetable oil to preheat the skillet. The smoky flavor pairs beautifully with the Hatch chiles.
- Gluten-Free Adaptation: Substitute the all-purpose flour with a 1:1 gluten-free baking blend that contains xanthan gum. I’ve had good results with King Arthur’s Measure for Measure flour. The texture will be slightly more delicate, but the flavor is still spot-on.
- Dairy-Free Version: Use plant-based butter and a dairy-free buttermilk made by adding 1 tablespoon of lemon juice to 1 cup of unsweetened oat or almond milk. Use a dairy-free cheddar-style shreds, though note that the melt won’t be as gooey.
- Corn and Green Onion Addition: Fold in 1/2 cup of frozen corn kernels (thawed) and 1/4 cup of sliced green onions along with the chiles. This adds sweetness and a pop of color that’s lovely for summer gatherings.
I personally love the bacon variation for game day gatherings. The combination of smoky bacon, roasted chiles, and sharp cheddar is absolutely irresistible. Just be prepared for people to ask for the recipe.
Serving & Storage Suggestions
This cornbread is best served warm, right from the skillet, with a generous pat of butter melting into each slice. It’s incredible alongside a bowl of red chili, a hearty bean soup, or grilled meats. For breakfast, I love it with a fried egg on top and a drizzle of honey. The savory-spicy-sweet combination is pure magic.
If you have leftovers (which is rare in my house), here’s how to store them. Let the cornbread cool completely, then wrap it tightly in aluminum foil or plastic wrap. Store at room temperature for up to 2 days, or in the refrigerator for up to 5 days. The texture will soften slightly in the fridge, but it’s still delicious.
For longer storage, you can freeze the cornbread. Slice it into individual portions, wrap each piece in plastic wrap, then place them in a freezer-safe bag. It will keep for up to 3 months. To reheat, unwrap a slice and warm it in a 350°F oven for 10 minutes, or pop it in the toaster oven for a few minutes. The microwave works in a pinch, but the texture will be softer.
The flavors actually develop over time. Day-old cornbread has a deeper, more complex taste as the chiles and cheese have time to meld. Don’t be afraid to make it a day ahead if you’re planning a big meal.
Nutritional Information & Benefits
Here’s the approximate nutritional breakdown for one serving (based on 8 servings per recipe):
- Calories: 345
- Total Fat: 18g
- Saturated Fat: 10g
- Cholesterol: 85mg
- Sodium: 520mg
- Total Carbohydrates: 36g
- Dietary Fiber: 2g
- Sugars: 6g
- Protein: 10g
While this isn’t health food, it does offer some nutritional benefits. Hatch chiles are rich in vitamin C and capsaicin, which has anti-inflammatory properties. Cornmeal provides complex carbohydrates for sustained energy, and the eggs and cheese add protein and calcium. The buttermilk contributes probiotics that support gut health.
If you’re watching your sodium, you can reduce the added salt to 1/2 teaspoon. For a lower-fat version, use reduced-fat cheddar and replace half the butter with unsweetened applesauce. The texture will be slightly less tender, but it’s still quite good.
Conclusion
This Savory Hatch Chili Cheddar Skillet Cornbread has become a staple in my kitchen, and I think it will become one in yours too. It’s the kind of recipe that feels both special and approachable—impressive enough for company, but simple enough for a Tuesday night. The smoky heat of the chiles, the sharpness of the cheddar, and that irresistible crispy crust come together in a way that’s greater than the sum of its parts.
I love this recipe because it reminds me that the best food comes from real conversations and shared knowledge. That woman at the farmers’ market didn’t give me a recipe card—she gave me a philosophy. Don’t apologize for the heat. Use good ingredients. And always, always preheat your skillet. I hope you’ll make this cornbread your own, whether that means adding extra chiles, swapping in a different cheese, or serving it with your favorite chili.
I’d love to hear how it turns out for you. Leave a comment below and tell me about your own cornbread adventures. Did you try a variation? Serve it with something unexpected? Burn your tongue on a particularly spicy bite? Share it all. And if you loved this recipe, please share it with a friend who needs a little more heat in their life. Happy cooking, friends!
Frequently Asked Questions
Can I use canned Hatch chiles instead of roasting fresh ones?
Absolutely. Canned or jarred Hatch chiles work perfectly in this recipe. Just drain them well before dicing. The flavor won’t be quite as smoky as freshly roasted, but it’s still delicious and much more convenient.
Why did my cornbread turn out dry?
Dry cornbread is usually the result of overbaking or overmixing. Check your oven temperature with an oven thermometer—it might be running hot. Also, make sure you’re measuring your flour correctly by spooning it into the measuring cup and leveling it off. Too much flour will dry out the batter.
Can I make this cornbread in a regular baking pan?
Yes, you can use a 9×9-inch baking pan or a 9-inch round cake pan. Grease the pan well and preheat it in the oven for 5 minutes before adding the batter. Bake at 375°F for 25-30 minutes. The crust won’t be as crispy as cast iron, but it will still be tasty.
How spicy is this cornbread?
That depends on the Hatch chiles you use. Mild Hatch chiles (usually labeled as such) add a gentle warmth without overwhelming heat. Hot Hatch chiles will give you a noticeable kick. If you’re sensitive to spice, remove all the seeds and membranes from the chiles, or use only mild chiles.
Can I freeze this cornbread?
Yes, it freezes beautifully. Let it cool completely, wrap it tightly in plastic wrap and then foil, and freeze for up to 3 months. Thaw overnight in the refrigerator and reheat in a 350°F oven for 10 minutes. The texture will be nearly as good as fresh.
Pin This Recipe!
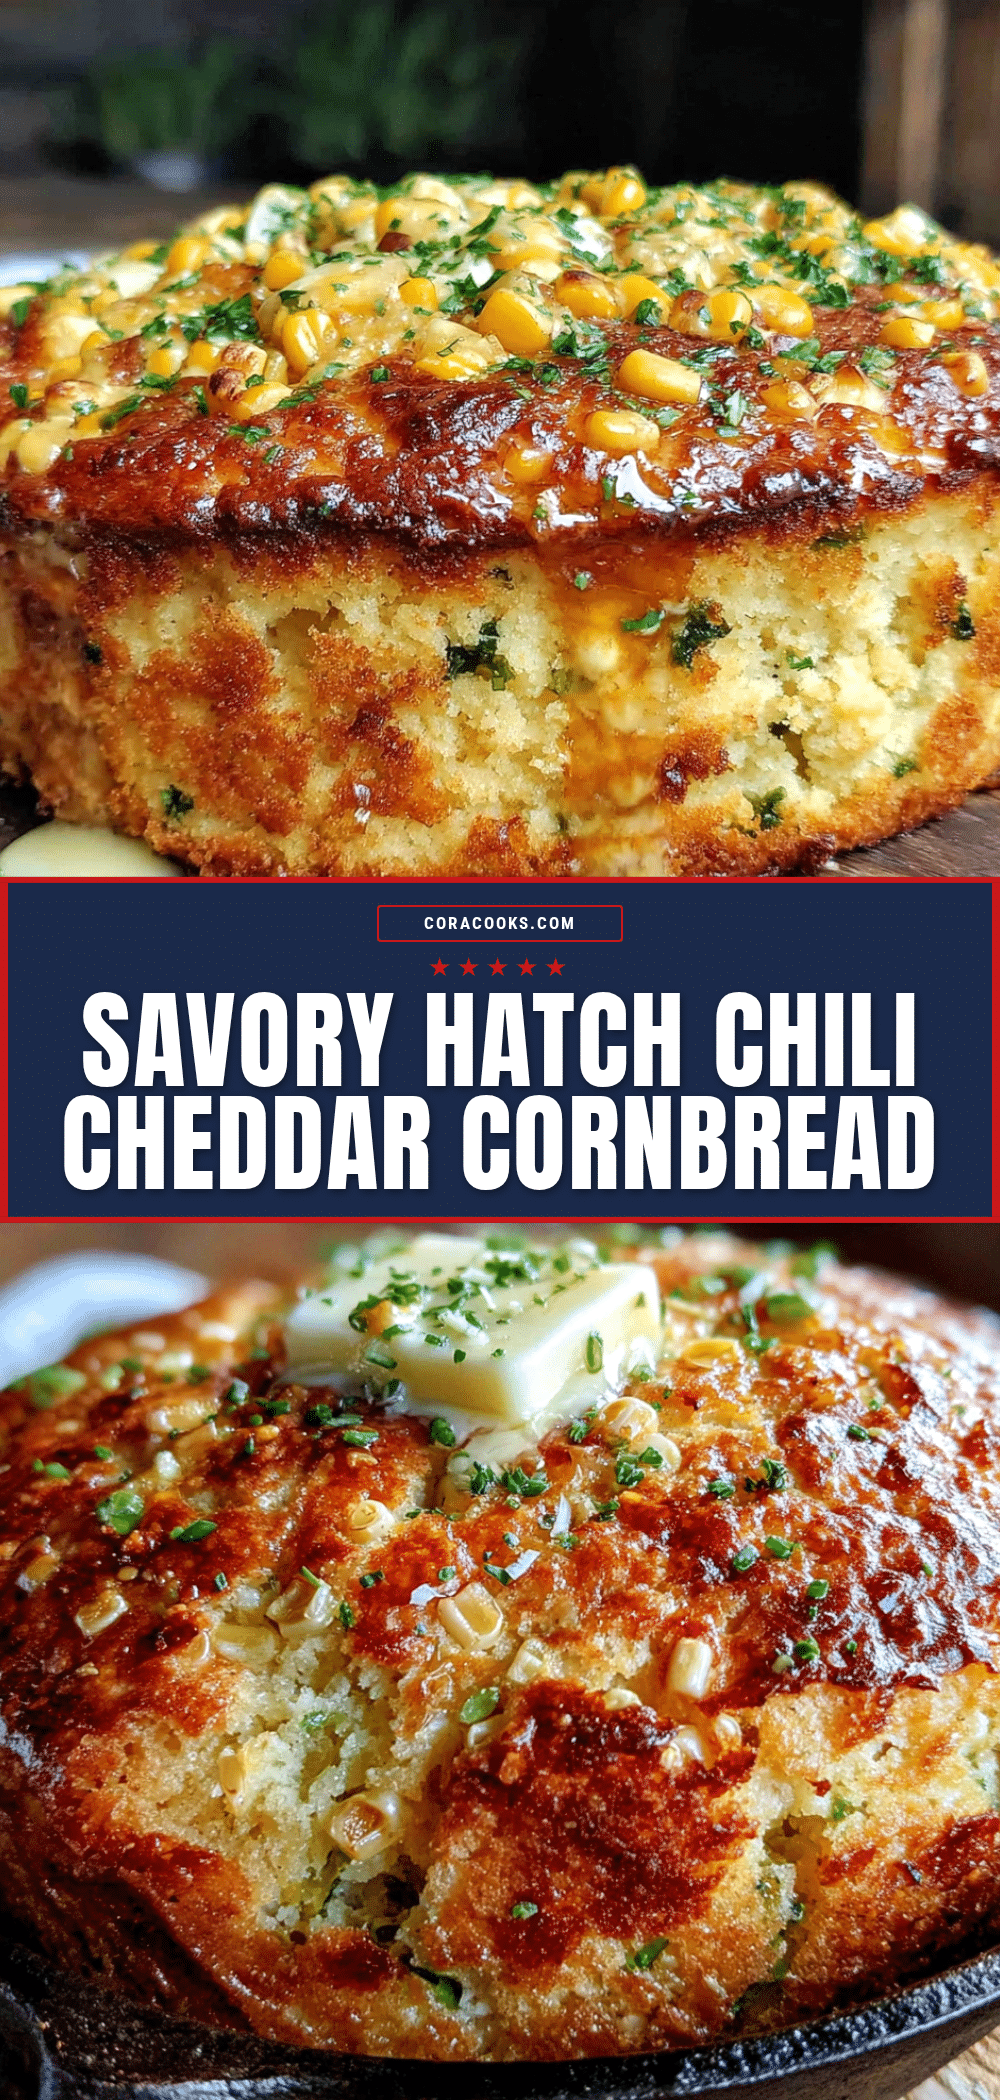
Homemade Hatch Chili Cheddar Skillet Cornbread
This savory cornbread features smoky roasted Hatch green chiles and sharp cheddar cheese, baked in a cast iron skillet for a crispy golden crust. It’s moist, flavorful, and perfect for sopping up chili or beans.
- Prep Time: 15 minutes
- Cook Time: 25 minutes
- Total Time: 40 minutes
- Yield: 8 servings 1x
- Category: Side Dish
- Cuisine: American
Ingredients
- 1 cup yellow cornmeal (medium grind)
- 1 cup all-purpose flour (spooned and leveled)
- 1 tablespoon baking powder
- 1 teaspoon baking soda
- 1 teaspoon kosher salt
- 1/4 cup granulated sugar
- 1 cup buttermilk (full-fat)
- 2 large eggs (room temperature)
- 1/2 cup unsalted butter (melted and slightly cooled, plus extra for skillet)
- 1 cup roasted Hatch green chiles (diced, about 4–5 medium chiles)
- 1 1/2 cups sharp cheddar cheese (shredded from a block)
- 2 tablespoons vegetable oil or bacon fat (for preheating skillet)
Instructions
- Preheat your oven to 400°F (200°C). Place your cast iron skillet inside the oven while it preheats.
- If using fresh Hatch chiles, roast them over a gas flame or under the broiler until skin is blackened. Steam in a covered bowl for 10 minutes, then peel, remove stems and seeds, and dice. If using frozen or jarred, drain and dice.
- In a large bowl, whisk together cornmeal, flour, baking powder, baking soda, salt, and sugar.
- In a separate medium bowl, whisk together buttermilk and eggs until smooth and slightly frothy.
- Pour melted butter into the dry ingredients and work it in with a fork or fingers until mixture resembles coarse crumbs. Let sit for 2 minutes.
- Pour buttermilk mixture into dry ingredients and stir with a rubber spatula until just combined (a few lumps are fine).
- Fold in diced Hatch chiles and 1 cup of shredded cheddar cheese. Reserve remaining 1/2 cup for topping.
- Carefully remove hot skillet from oven using oven mitts. Add vegetable oil or bacon fat and swirl to coat bottom and sides.
- Pour batter into hot skillet and spread evenly. Sprinkle remaining 1/2 cup cheddar cheese on top.
- Bake for 20-25 minutes, until top is golden brown and a toothpick inserted in center comes out clean or with a few moist crumbs.
- Let cornbread cool in skillet for 5-10 minutes before slicing and serving.
Notes
For best results, use room temperature ingredients and don’t overmix the batter. Preheating the skillet is crucial for a crispy crust. If top browns too quickly, tent with foil. For a gluten-free version, use a 1:1 gluten-free baking blend. For dairy-free, use plant-based butter and dairy-free buttermilk.
Nutrition
- Serving Size: 1 slice (1/8 of reci
- Calories: 345
- Sugar: 6
- Sodium: 520
- Fat: 18
- Saturated Fat: 10
- Carbohydrates: 36
- Fiber: 2
- Protein: 10
Keywords: Hatch chili cornbread, skillet cornbread, cheddar cornbread, savory cornbread, green chile cornbread, cast iron cornbread