Love this? Save it for later!
Share the inspiration with your friends
I used to think enchiladas were a weeknight compromise. You know the kind—drenched in red sauce from a can, filled with whatever was lingering in the fridge, and honestly, more about convenience than flavor. That was my position for years. Then a coworker named Diane retired and brought a foil pan to the farewell potluck. I watched her set it down, steam curling from under the foil, and I thought, “Okay, another enchilada.” I was so wrong.
That first bite stopped me mid-conversation. The sauce was this beautiful, pale green with tiny charred flecks, and the flavor—smoky, mildly spicy, almost buttery—was nothing like I’d ever tasted in an enchilada. I asked Diane what was in it, and she just smiled and said, “Hatch green chiles. Everything else is just details.” I practically followed her to her car asking for the recipe. She scribbled it on a napkin, and I’ve been making my version of it ever since. I mean, I’ve tweaked it quite a bit, added roasted chicken, perfected the sauce ratio, and figured out the trick to keep the tortillas from getting soggy. But the soul of it? That’s all Diane’s potluck magic.
Maybe you’ve been there—underwhelmed by soggy, bland enchiladas your whole life. Let me tell you, these Hatch green chili chicken enchiladas are the ones that change your mind. They are the ones that make you close your eyes on the first bite. I keep making them because they feel like a secret I’m finally allowed to share.
Why You’ll Love This Recipe
These aren’t just any enchiladas. They are the result of many, many test batches—some that fell apart, some that were too spicy, and one memorable disaster where I forgot to add any salt at all. Through all those trials, I landed on a version that is truly special.
- Unbelievably Flavorful: The star here is the roasted Hatch green chiles. They bring a smoky, slightly fruity heat that you just can’t get from canned chiles. It’s a flavor that lingers in the best way.
- Perfect Texture: No more mushy enchiladas! A quick pan-fry of the tortillas before rolling creates a barrier that keeps them firm and delicious, even after baking.
- Simple Ingredients: Despite the complex flavor, the ingredient list is short and honest. You can find most of it at a standard grocery store, especially during Hatch chile season.
- Crowd-Pleaser: I’ve brought these to family dinners, potlucks, and even a casual dinner party. They disappear every single time. Even people who claim they “don’t like green chiles” go back for seconds.
- Make-Ahead Friendly: You can assemble these enchiladas a day in advance and pop them in the oven when you’re ready. This makes them perfect for busy weeknights or entertaining without the stress.
This recipe is different because of the technique. It’s not just about throwing ingredients together. It’s about building layers of flavor—roasting the chiles yourself, using a touch of cream in the sauce for richness, and that crucial tortilla-frying step. It is comfort food that feels both rustic and refined, and it’s guaranteed to become a staple in your kitchen.
What Ingredients You Will Need
This recipe relies on a handful of key components that work together to create something magical. Using fresh, high-quality ingredients makes a noticeable difference here.
- For the Green Chile Sauce:
- Hatch green chiles (1 lb / 450g): Fresh is best. Look for them in late summer and early fall. If you can’t find fresh, use frozen roasted Hatch chiles (often available year-round). Avoid canned chiles for this recipe—the flavor is just not the same.
- Chicken broth (2 cups / 480ml): Use low-sodium so you can control the salt. I prefer Swanson’s or Kitchen Basics for consistent flavor.
- All-purpose flour (2 tbsp): This helps thicken the sauce slightly.
- Unsalted butter (2 tbsp): For the roux. Using unsalted lets you season to taste.
- Garlic (3 cloves, minced): Fresh garlic is non-negotiable here.
- Ground cumin (1 tsp): Adds warmth and earthiness.
- Dried oregano (1/2 tsp): Mexican oregano is ideal, but Mediterranean works too.
- Salt and pepper: To taste.
- Heavy cream (1/4 cup / 60ml): This is my secret for a silky, luxurious sauce. You can substitute half-and-half for a lighter version.
- For the Chicken Filling:
- Cooked chicken (3 cups, shredded): Rotisserie chicken is a fantastic time-saver. You can also poach or roast your own chicken breasts or thighs.
- Monterey Jack cheese (2 cups, shredded): Melts beautifully and has a mild, creamy flavor. I recommend shredding it yourself from a block—it melts much better than pre-shredded.
- Green onions (4, sliced): For a fresh, mild oniony bite.
- Sour cream (1/2 cup / 120g): Adds tang and moisture to the filling. Full-fat is best for texture.
- For Assembly:
- Corn tortillas (12, 6-inch): Corn tortillas are traditional and hold up better than flour. Look for good-quality ones.
- Vegetable oil (for frying): You’ll use this to soften the tortillas before rolling.
- Additional Monterey Jack or Cheddar cheese (1 cup, shredded): For topping the enchiladas before baking.
- Fresh cilantro (for garnish): Optional, but adds a nice pop of color and freshness.
Equipment Needed
You don’t need a professional kitchen to make these, but a few specific tools make the process much smoother.
- Baking dish (9×13-inch): A standard size works perfectly. A glass or ceramic dish is great for even baking.
- Skillet or frying pan: For roasting the chiles and frying the tortillas. A cast-iron skillet is ideal for roasting.
- Medium saucepan: For making the green chile sauce.
- Blender or food processor: To puree the roasted chiles into a smooth sauce. I’ve used a cheap blender for years, and it works fine.
- Tongs: Essential for flipping the chiles while roasting and handling the hot tortillas.
- Cutting board and sharp knife: For prepping the chiles and other ingredients.
- Mixing bowls: For combining the filling.
- Paper towels: For draining the fried tortillas.
If you don’t have a blender, you can finely chop the roasted chiles by hand. The sauce will be a bit chunkier, but still delicious. Don’t skip the skillet for frying tortillas—a non-stick pan works, but it won’t give you quite the same texture.
Preparation Method
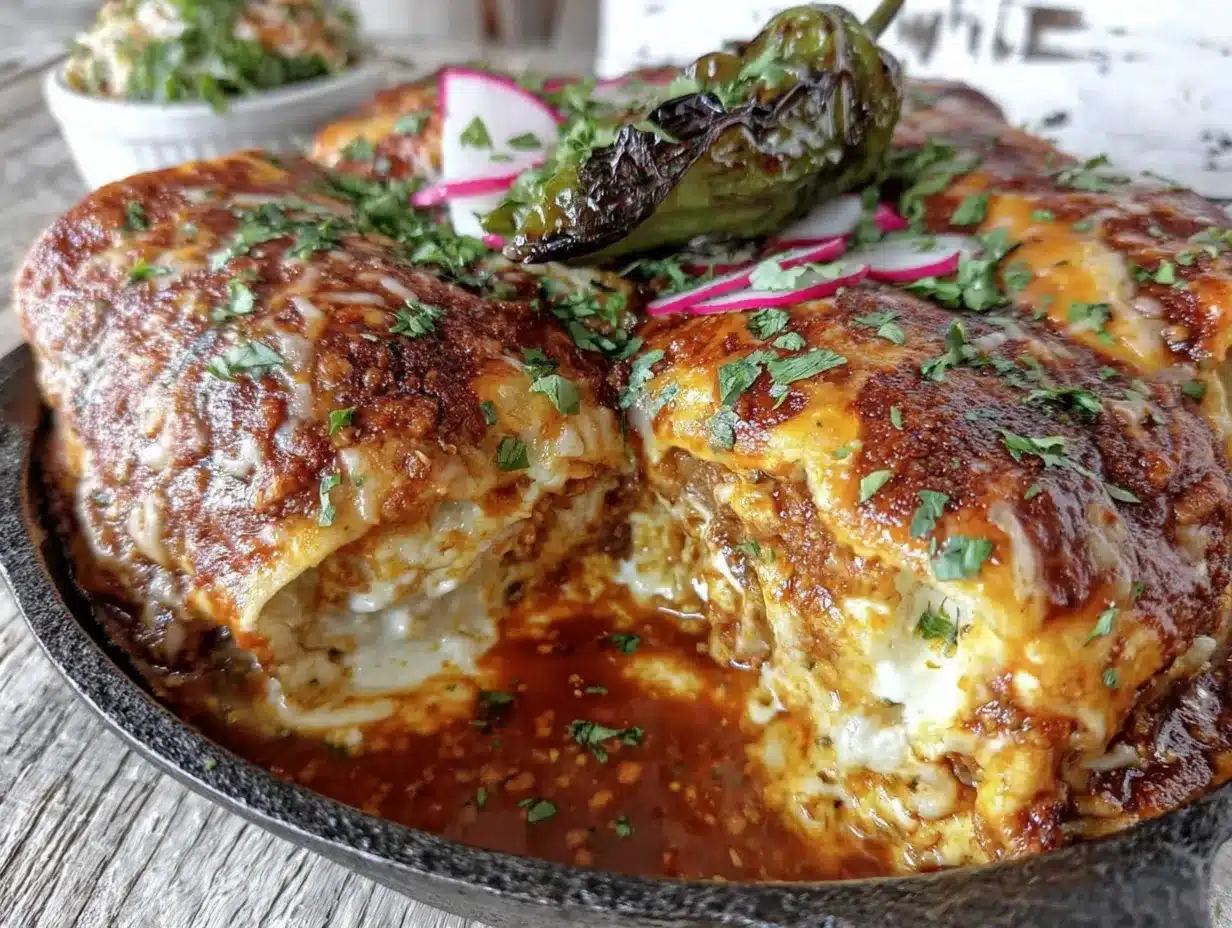
Let’s break this down into manageable steps. Take your time, and don’t rush the roasting—it’s where the magic happens.
- Roast the Hatch Chiles (20-25 minutes): Place the whole Hatch chiles directly on a gas stove burner over medium-high heat, or under the broiler on a baking sheet. Turn them every few minutes using tongs until the skin is charred and blistered on all sides. You want them to look blackened—this is what gives the sauce its smoky flavor. I once tried to rush this step and ended up with pale, sad chiles. Don’t be like me.
- Steam and Peel the Chiles (10 minutes): Transfer the charred chiles to a bowl and cover tightly with plastic wrap or a kitchen towel. Let them steam for about 10 minutes. This loosens the skin, making it easy to peel. Once cool enough to handle, rub off the blackened skin with your fingers or a paper towel. Don’t rinse them—you’ll wash away flavor. Remove the stems and seeds.
- Make the Green Chile Sauce (15 minutes): In a medium saucepan, melt the butter over medium heat. Add the minced garlic and cook for 30 seconds until fragrant. Whisk in the flour and cook for 1 minute, stirring constantly. Slowly pour in the chicken broth while whisking to prevent lumps. Add the cumin and oregano. Bring to a simmer, then cook for 5 minutes until slightly thickened.
- Blend the Sauce (5 minutes): Transfer the peeled chiles to a blender. Pour in the thickened broth mixture. Blend until completely smooth. Return the sauce to the saucepan, stir in the heavy cream, and season with salt and pepper to taste. Keep warm over low heat.
- Prepare the Chicken Filling (5 minutes): In a large bowl, combine the shredded chicken, 2 cups of Monterey Jack cheese, sliced green onions, and sour cream. Add about 1/2 cup of the green chile sauce to the mixture. Stir until everything is well combined. This step ensures every bite is flavorful.
- Fry the Tortillas (10 minutes): In a small skillet, heat about 1/4 inch of vegetable oil over medium-high heat. Working one at a time, fry each tortilla for about 10-15 seconds per side. It should just soften and become pliable—not crispy. Transfer to a plate lined with paper towels to drain. This step is crucial for preventing soggy enchiladas. I learned this trick from an old cookbook, and it’s a game-changer.
- Assemble the Enchiladas (15 minutes): Preheat your oven to 375°F (190°C). Spread about 1/2 cup of the green chile sauce on the bottom of your 9×13-inch baking dish. Take a fried tortilla, place about 1/3 cup of the chicken filling down the center, and roll it up tightly. Place it seam-side down in the dish. Repeat with the remaining tortillas and filling, arranging them snugly in a single layer.
- Bake the Enchiladas (20-25 minutes): Pour the remaining green chile sauce evenly over the rolled enchiladas. Sprinkle the remaining 1 cup of shredded cheese on top. Bake for 20-25 minutes, until the sauce is bubbly and the cheese is melted and lightly golden. Let them rest for 5 minutes before serving—this helps them set and makes them easier to serve.
Cooking Tips & Techniques
Over the years, I’ve made every mistake you can imagine with these enchiladas. Here’s what I’ve learned so you don’t have to.
- Don’t Overcook the Tortillas: When frying, you want them soft, not crispy. If they get too hard, they will crack when you roll them. A quick 10-second dip in hot oil is all they need.
- Use Room Temperature Ingredients: For the filling, letting the sour cream and cheese come to room temperature helps everything mix together more evenly. It prevents cold spots in the filling.
- Taste Your Chiles: Not all Hatch chiles are created equal. Some are mild, some are medium, and some will light your mouth on fire. If you’re sensitive to heat, remove all the seeds and membranes. If you love spice, leave a few in.
- Make the Sauce Ahead: The green chile sauce can be made up to 3 days in advance. The flavors actually meld and deepen over time. Just reheat it gently before using.
- Don’t Overfill: It’s tempting to pile on the filling, but too much will make the enchiladas burst open during baking. About 1/3 cup per tortilla is the sweet spot.
- Let Them Rest: This is the hardest step because your kitchen will smell incredible. But letting the enchiladas rest for 5-10 minutes after baking allows the sauce to absorb slightly and makes them much easier to serve without falling apart.
Variations & Adaptations
This recipe is wonderfully flexible. Here are a few ways to make it your own.
- Vegetarian Version: Swap the chicken for 3 cups of sautéed mushrooms, black beans, or roasted sweet potatoes. The green chile sauce is so flavorful that you won’t miss the meat at all.
- Cheese Lover’s Dream: Add a layer of crumbled queso fresco or cotija cheese on top of the filling before rolling. It adds a salty, crumbly texture that’s fantastic.
- Spicier Kick: Add a finely diced jalapeño or serrano pepper to the sauce while it simmers. You can also use a mix of hot and mild Hatch chiles.
- Flour Tortilla Option: If you prefer flour tortillas, you can use them. They are more forgiving and less likely to crack, but they will be softer and less traditional. Fry them the same way.
- Dairy-Free Adaptation: Use a dairy-free butter substitute, a plant-based cream (like cashew cream), and dairy-free cheese shreds. The sauce will still be delicious, though the texture will be slightly different.
- Add Some Greens: Stir a handful of fresh spinach or chopped kale into the chicken filling. It wilts down and adds a boost of nutrients without overpowering the flavor.
I personally love making a “breakfast” version by replacing the chicken with scrambled eggs and using the green chile sauce as a base for a breakfast casserole. It’s incredible for a weekend brunch.
Serving & Storage Suggestions
These enchiladas are a full meal on their own, but they pair beautifully with a few simple sides.
- Serving Temperature: Serve them hot, right out of the oven, after that crucial 5-minute rest. The cheese should be molten and the sauce bubbling.
- Presentation: Spoon a little extra sauce from the bottom of the dish over each enchilada before serving. Top with fresh cilantro, a dollop of sour cream, and some sliced avocado or pickled red onions for a pop of color.
- Perfect Pairings: A simple side of Mexican rice and refried beans is classic. A crisp green salad with a lime vinaigrette cuts through the richness beautifully. For drinks, a cold Mexican lager or a zesty margarita is perfect.
- Storage: Store leftovers in an airtight container in the refrigerator for up to 4 days. The flavors continue to develop, and they might even taste better the next day.
- Reheating: The best way to reheat is in the oven at 350°F (175°C) for about 15-20 minutes, covered with foil to prevent drying out. You can also microwave individual portions, but the tortillas will be softer.
- Freezing: These enchiladas freeze beautifully. Assemble the dish completely but do not bake it. Cover tightly with plastic wrap and then foil, and freeze for up to 3 months. To bake, thaw overnight in the refrigerator and then follow the baking instructions, adding about 10 minutes to the cook time.
Nutritional Information & Benefits
While these are indulgent comfort food, they also offer some surprising nutritional benefits.
- Estimated Per Serving (2 enchiladas): Approximately 550-650 calories, 35g fat, 35g protein, 30g carbohydrates. This is an estimate and will vary based on specific ingredients used.
- Hatch Chiles: These are packed with Vitamin C and capsaicin, which has anti-inflammatory properties and can boost metabolism. They also give the dish a fantastic depth of flavor without adding fat or sugar.
- Chicken: A great source of lean protein, which helps keep you full and satisfied. Using skinless chicken breast reduces the fat content.
- Healthy Fats: The cheese and sour cream provide calcium and healthy fats, which are important for nutrient absorption and brain health. Using full-fat versions in moderation can be part of a balanced diet.
- Dietary Considerations: This recipe is naturally gluten-free if you use certified gluten-free corn tortillas and check your broth. It can be made dairy-free with the substitutions mentioned above. It is not low-carb due to the tortillas, but you can serve it over a bed of lettuce for a lighter version.
I don’t believe in labeling food as “good” or “bad.” These enchiladas are a celebration of flavor, and enjoying them with the people you love is a beautiful thing.
Conclusion
So there you have it—my best recipe for roasted Hatch green chili chicken enchiladas. They are the result of a chance encounter at a potluck, many kitchen experiments, and a deep love for the unique flavor of Hatch chiles. These enchiladas are more than just a meal; they are an experience. They are the dish you bring to a friend who needs comfort, the meal you make on a chilly Sunday afternoon, the recipe that earns you a reputation as a great cook.
I encourage you to make this recipe your own. Adjust the spice level, try different fillings, and don’t be afraid to make a mess. Cooking is about joy, not perfection. If your first batch isn’t perfect, that’s okay. Mine wasn’t either. But I promise, once you taste that smoky, creamy, cheesy bite, you’ll understand why I keep making them.
I would love to hear how yours turn out! Leave a comment below and tell me about your enchilada journey. Did you add something unexpected? Did your family love them? Share your stories, and don’t forget to pin this recipe for later. Happy cooking, friend!
Frequently Asked Questions
Can I use canned Hatch green chiles instead of fresh?
You can, but the flavor will be significantly different. Fresh roasted chiles have a smoky, complex taste that canned chiles just can’t replicate. If you’re in a pinch, use frozen roasted Hatch chiles, which are much closer to the real thing.
How do I keep my enchiladas from getting soggy?
The key is to fry the corn tortillas briefly in hot oil before rolling them. This creates a barrier that prevents the sauce from soaking in and turning them to mush. Also, don’t oversaturate the dish with sauce—just enough to cover the enchiladas is perfect.
Can I make this recipe ahead of time for a party?
Absolutely! Assemble the enchiladas completely in the baking dish, but do not bake them. Cover and refrigerate for up to 24 hours. When you’re ready to serve, bake as directed, adding about 10 minutes to the cooking time since they’ll be cold from the fridge.
What if I can’t find Hatch chiles where I live?
During the fall, many grocery stores have a special Hatch chile promotion and sell them fresh or frozen. Outside of that season, you can order frozen roasted Hatch chiles online from retailers like Melissa’s Produce or Amazon. Anaheim chiles are the closest substitute, though they have a milder flavor.
Can I use flour tortillas instead of corn?
Yes, you can. Flour tortillas are more pliable and less likely to crack, so you can skip the frying step if you want. However, they will result in a softer, less traditional enchilada. If you use flour, I still recommend lightly toasting them in a dry skillet to improve their texture.
Pin This Recipe!
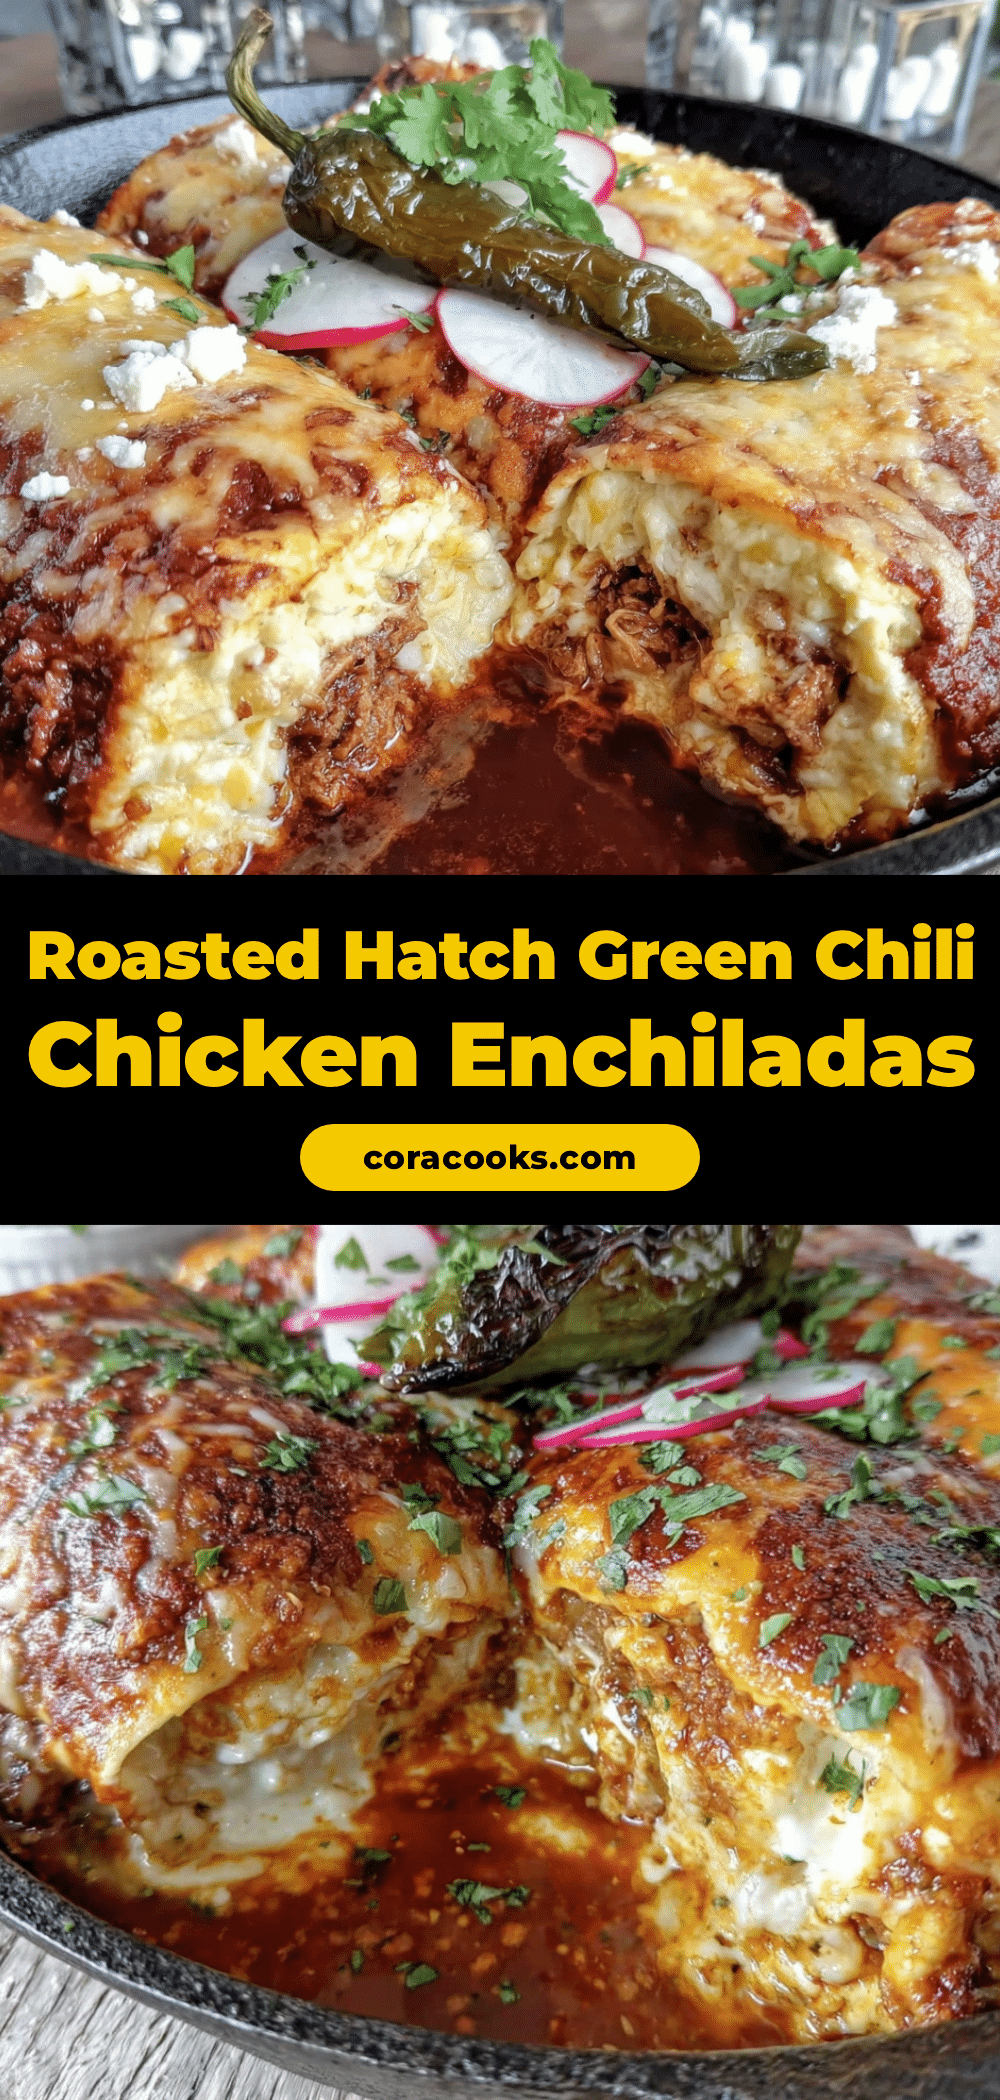
Easy Roasted Hatch Green Chili Chicken Enchiladas Recipe

Smoky, creamy, and perfectly textured chicken enchiladas made with roasted Hatch green chiles. A potluck-inspired recipe that transforms simple ingredients into an unforgettable comfort food experience.
- Prep Time: 30 minutes
- Cook Time: 45 minutes
- Total Time: 1 hour 15 minutes
- Yield: 6 servings 1x
- Category: Main Course
- Cuisine: Mexican
Ingredients
- 1 lb (450g) fresh Hatch green chiles
- 2 cups (480ml) low-sodium chicken broth
- 2 tbsp all-purpose flour
- 2 tbsp unsalted butter
- 3 cloves garlic, minced
- 1 tsp ground cumin
- 1/2 tsp dried oregano (Mexican preferred)
- Salt and pepper to taste
- 1/4 cup (60ml) heavy cream
- 3 cups cooked shredded chicken (rotisserie works well)
- 2 cups shredded Monterey Jack cheese (plus 1 cup for topping)
- 4 green onions, sliced
- 1/2 cup (120g) sour cream
- 12 (6-inch) corn tortillas
- Vegetable oil for frying
- Fresh cilantro for garnish (optional)
Instructions
- Roast the Hatch chiles: Place whole chiles on a gas stove burner over medium-high heat or under a broiler. Turn every few minutes until skin is charred and blistered on all sides (20-25 minutes).
- Steam and peel the chiles: Transfer charred chiles to a bowl, cover tightly with plastic wrap or a towel, and let steam for 10 minutes. Rub off blackened skin, remove stems and seeds. Do not rinse.
- Make the green chile sauce: In a medium saucepan, melt butter over medium heat. Add garlic and cook 30 seconds. Whisk in flour and cook 1 minute. Slowly whisk in chicken broth, add cumin and oregano. Bring to a simmer and cook 5 minutes until slightly thickened.
- Blend the sauce: Transfer peeled chiles to a blender. Pour in thickened broth mixture. Blend until smooth. Return to saucepan, stir in heavy cream, and season with salt and pepper. Keep warm.
- Prepare the chicken filling: In a large bowl, combine shredded chicken, 2 cups Monterey Jack cheese, sliced green onions, sour cream, and 1/2 cup of the green chile sauce. Stir until well combined.
- Fry the tortillas: In a small skillet, heat about 1/4 inch vegetable oil over medium-high heat. Fry each tortilla for 10-15 seconds per side until soft and pliable. Drain on paper towels.
- Assemble the enchiladas: Preheat oven to 375°F (190°C). Spread 1/2 cup green chile sauce on bottom of a 9×13-inch baking dish. Place about 1/3 cup filling down center of each tortilla, roll tightly, and place seam-side down in dish.
- Bake: Pour remaining sauce over enchiladas. Sprinkle remaining 1 cup cheese on top. Bake 20-25 minutes until bubbly and golden. Let rest 5 minutes before serving. Garnish with cilantro if desired.
Notes
Frying tortillas briefly in oil prevents sogginess. Make sauce up to 3 days ahead for deeper flavor. Let enchiladas rest 5-10 minutes after baking for easier serving. For spicier version, leave some seeds in chiles or add jalapeño. Freezes well for up to 3 months.
Nutrition
- Serving Size: 2 enchiladas
- Calories: 600
- Sugar: 3
- Sodium: 800
- Fat: 35
- Saturated Fat: 18
- Carbohydrates: 30
- Fiber: 4
- Protein: 35
Keywords: Hatch green chile enchiladas, chicken enchiladas, roasted green chile, enchilada recipe, New Mexican cuisine, comfort food, potluck recipe