Love this? Save it for later!
Share the inspiration with your friends
“You know that moment when you open the lunchbox and find the usual sandwich, apple, and maybe some chips? Well, last Thursday, I was running late, juggling a spilled coffee and a last-minute Zoom call when my phone buzzed with a text from Jamie’s teacher: ‘Jamie says she misses pizza for lunch.’ Now, Jamie’s got a gluten intolerance, so pizza’s usually off the table—literally. I didn’t have time for a full meal prep, but I wanted to do something fun and safe for her school lunch. That’s how these Easy Gluten-Free Pizza Lunchables were born—right in my chaotic kitchen, with a cracked mixing bowl and a dash of desperation.”
Honestly, I wasn’t sure if it would work out. I mean, gluten-free dough can be tricky, and packing a lunch that’s both kid-approved and allergy-friendly? That’s a challenge. But those little pizza bites turned out to be a hit—not just with Jamie but with her classmates too! It’s funny how a last-minute scramble can lead to your new go-to recipe. Maybe you’ve been there, too, staring into the fridge wondering how to make lunch exciting and safe at the same time.
So, let me tell you why these Easy Gluten-Free Pizza Lunchables have stayed in my rotation ever since that hectic morning. They’re simple, customizable, and perfect for school lunches that kids actually look forward to. Plus, they save me from the dreaded “What’s for lunch?” question every day. If you’re juggling gluten sensitivities and busy schedules, this recipe might just be the lifesaver you didn’t see coming.
Why You’ll Love This Recipe
After testing this recipe multiple times (sometimes under pressure, sometimes just for fun), I can confidently say it’s a winner for families dealing with gluten intolerance without sacrificing flavor or fun.
- Quick & Easy: Whips up in under 30 minutes, making it perfect for those rushed school mornings or last-minute lunchbox ideas.
- Simple Ingredients: Uses pantry staples you probably already have—no need for specialty gluten-free flour blends.
- Perfect for School Lunches: Portable, mess-free, and kid-approved, these Lunchables are designed to make lunchtime something to look forward to.
- Crowd-Pleaser: Even kids with picky palates love the cheesy, savory goodness without the gluten worries.
- Unbelievably Delicious: The crust is crispy yet tender, topped with melty cheese and classic pizza flavors that taste homemade.
What sets this recipe apart? It’s not just another gluten-free pizza. The dough’s texture comes from a clever mix of rice flour and a touch of tapioca starch, giving it that perfect chewiness. Plus, I’ve included a little trick—pre-baking the crust just enough so it doesn’t get soggy when you pack the sauce and toppings separately. This means the Lunchables stay fresh and ready to enjoy hours later.
Honestly, this recipe doesn’t just feed kids—it gives them a little lunchtime joy, and for busy parents, that’s priceless.
What Ingredients You Will Need
This recipe keeps things straightforward with wholesome ingredients that come together to make a flavorful, allergy-friendly lunch. Most of these are pantry staples with a few easy-to-find gluten-free options.
- For the Crust:
- 1 cup rice flour (I prefer Bob’s Red Mill for consistency)
- 1/2 cup tapioca starch (adds chewiness and stretch)
- 1 teaspoon baking powder (gluten-free certified)
- 1/2 teaspoon salt
- 1 tablespoon olive oil (for richness)
- 2/3 cup warm water (about 160°F / 70°C)
- For the Sauce:
- 1/2 cup tomato sauce (use your favorite brand or homemade)
- 1/2 teaspoon dried oregano
- 1/4 teaspoon garlic powder
- Pinch of salt and pepper
- For the Toppings:
- 1 cup shredded mozzarella cheese (whole milk gives best melt)
- 1/4 cup mini pepperoni slices (optional, or use turkey pepperoni)
- Sliced black olives or diced bell peppers (optional for veggies)
- Extras:
- Small containers or silicone cups to pack sauce separately
Tip: If you want a dairy-free version, swap mozzarella for a plant-based cheese that melts well, like Daiya or Follow Your Heart.
Seasonal twist? In warmer months, I like adding fresh basil leaves or swapping pepperoni for sliced cherry tomatoes.
Equipment Needed
- Mixing bowl (I have one with a small chip, but it’s still my favorite!)
- Whisk or fork for mixing dry ingredients
- Spoon or spatula for stirring wet ingredients
- Baking sheet lined with parchment paper or a silicone baking mat
- Rolling pin or a clean bottle to flatten the dough (no fancy equipment needed!)
- Knife or pizza cutter for slicing crust into squares
- Small containers for packing sauce (silicone cups are great for portion control)
If you don’t have a rolling pin, your hands work just fine to press the dough evenly. And honestly, using parchment paper makes cleanup way easier, especially on busy mornings.
Preparation Method
- Preheat your oven to 375°F (190°C). Line a baking sheet with parchment paper.
- Mix dry ingredients: In your mixing bowl, whisk together 1 cup rice flour, 1/2 cup tapioca starch, 1 teaspoon baking powder, and 1/2 teaspoon salt until evenly combined.
- Add wet ingredients: Stir in 1 tablespoon olive oil and gradually pour in 2/3 cup warm water. Use a spoon or spatula to bring the dough together. It should be slightly sticky but manageable. If too dry, add a teaspoon of water at a time.
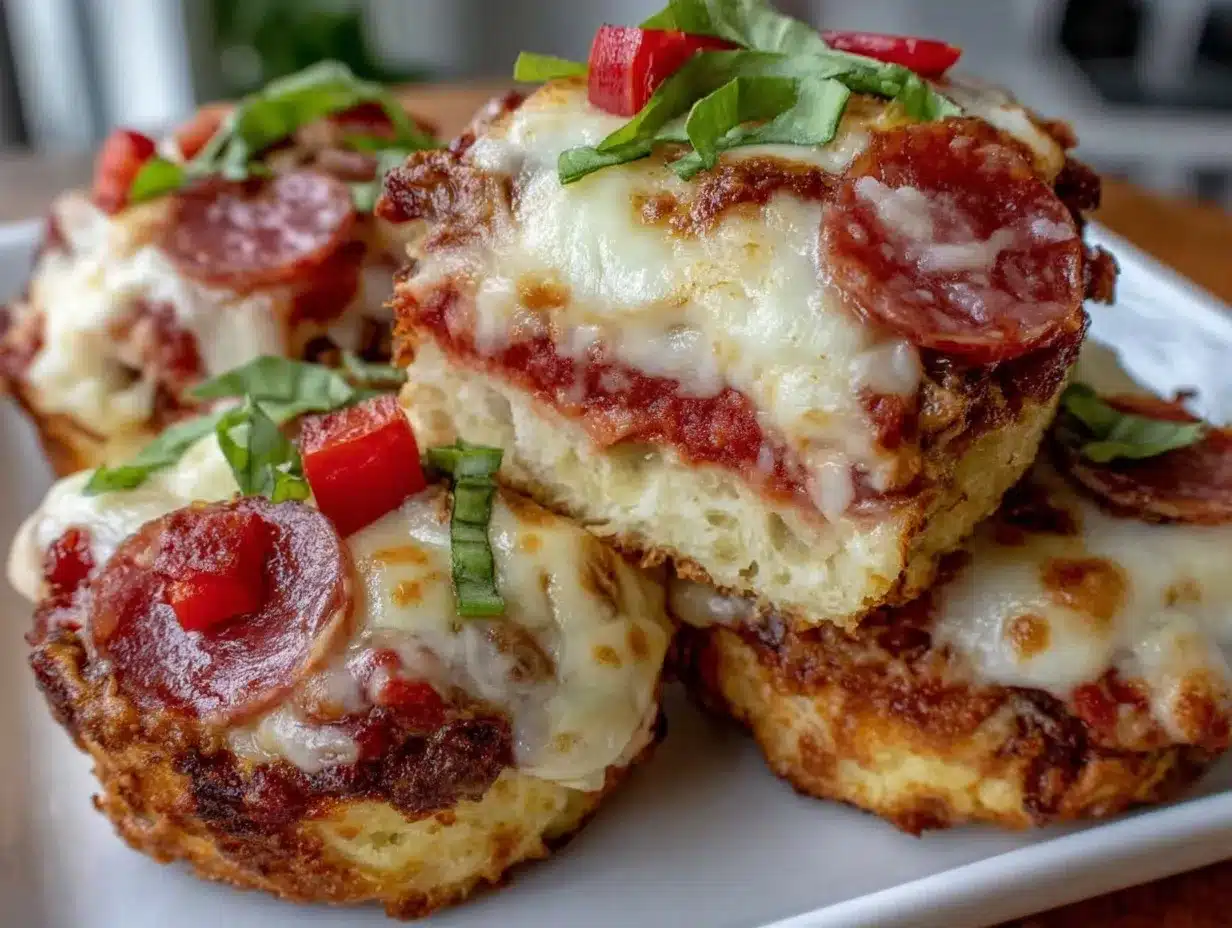
- Form the crust: Transfer the dough onto a parchment-lined baking sheet. Using your hands or a rolling pin, press the dough into a roughly 8×8 inch square, about 1/4 inch thick. Don’t worry about perfect edges—rustic is charming!
- Pre-bake the crust for 12-15 minutes or until it’s just set and starting to turn golden at the edges. This prevents sogginess later when adding sauce and toppings.
- Prepare the sauce: While crust bakes, mix tomato sauce with oregano, garlic powder, salt, and pepper in a small bowl. Adjust seasoning to taste.
- Slice the crust: Remove crust from oven and let cool for 5 minutes. Then slice into 9 (3×3) small squares with a sharp knife or pizza cutter.
- Assemble the Lunchables: Pack crust squares into lunch containers. In small separate cups, add sauce and toppings (mozzarella, pepperoni, veggies). Keep sauce separate to prevent sogginess.
- On the day: At lunchtime, kids can dip crust pieces into sauce and add toppings for a hands-on pizza experience.
- Bonus: If you want to warm it up, the crust reheats nicely in a toaster oven for 3-4 minutes, but it’s just as tasty cold or room temperature.
Note: If the dough feels too sticky to handle, a quick dusting of rice flour on your hands helps. Also, make sure not to overbake the crust; it should be firm but not hard.
Cooking Tips & Techniques
Getting gluten-free dough right takes some patience—trust me, I’ve had plenty of “oops” moments. Here’s what I learned:
- Warm water is key: It helps the dough come together smoothly. Too cold, and the tapioca starch can clump.
- Don’t overwork the dough: It’s more like a batter than traditional dough. Mix just enough to combine.
- Pre-baking the crust: This step is a game-changer. It stops the base from getting soggy once sauce is added later.
- Use parchment paper: It prevents sticking and makes cleanup a breeze.
- Rolling vs. pressing: Either works. For a more rustic look, press with your hands. Rolling gives a uniform thickness but isn’t necessary.
- Keep sauce separate: Packing sauce in small containers or silicone cups keeps the crust crisp until lunchtime.
One time, I forgot to pre-bake the crust, and the whole thing turned into a soggy mess. That’s when I realized how crucial that step is. Also, timing matters—don’t rush the cooling before slicing or the crust can crumble.
For busy mornings, prepping the crust the night before and assembling Lunchables in the morning saves time. Plus, multitasking while the crust bakes (like packing backpacks) makes the whole process smoother.
Variations & Adaptations
These pizza Lunchables are super flexible, so you can tweak them for different tastes and dietary needs.
- Dairy-Free Version: Swap mozzarella for a dairy-free cheese that melts well, like Miyoko’s or Daiya.
- Vegan Option: Use dairy-free cheese and replace pepperoni with roasted veggies or seasoned tofu slices.
- Whole Grain Boost: Add a tablespoon of ground flaxseed or oat flour to the dough for extra fiber (note: might slightly change texture).
- Spicy Twist: Add a pinch of chili flakes to the sauce or swap regular pepperoni for a spicy variety.
- Personal Favorite: I love adding fresh basil leaves and a drizzle of olive oil just before packing for a fresh flavor boost.
For different cooking methods, these crust squares can be pan-toasted on a non-stick skillet for a crispier texture if you don’t want to use the oven. Just keep an eye so they don’t burn.
Got nut allergies? This recipe is naturally nut-free, but always double-check your ingredients for cross-contamination if needed.
Serving & Storage Suggestions
These Easy Gluten-Free Pizza Lunchables are best served at room temperature or slightly chilled—perfect for school lunches. Kids love dipping the crust pieces into sauce and adding toppings themselves, which makes lunchtime interactive and fun.
For a complete meal, pair the Lunchables with fresh fruit like apple slices or grapes, and a small veggie side such as carrot sticks. A cold glass of milk or a favorite juice rounds out the lunch nicely.
Storage is straightforward: keep the pre-baked crust stored in an airtight container at room temperature for up to 2 days or freeze for up to 1 month. Thaw crust squares overnight in the fridge before assembling Lunchables.
Leftover sauce and toppings can be refrigerated for 2-3 days. If you want to reheat the crust, a toaster oven or skillet for a few minutes works wonders to refresh the texture.
Over time, the flavors meld nicely if you prepare the sauce a day ahead. Just keep sauce and crust separate until lunchtime to avoid sogginess.
Nutritional Information & Benefits
This recipe offers a balanced gluten-free option that’s moderate in calories and rich in flavor. Each serving (roughly 3 crust squares with toppings) provides:
- Approximately 300 calories
- 10 grams protein (thanks to cheese and optional pepperoni)
- Gluten-free carbohydrates from rice flour and tapioca starch
- Calcium and vitamin D from cheese
Rice flour is easy to digest and a good choice for gluten intolerance. Olive oil adds heart-healthy fats, and the tomato sauce provides antioxidants like lycopene.
This recipe is naturally free from common allergens like nuts and soy (unless using toppings containing them). It’s a great choice for kids needing gluten-free lunches that don’t feel like a compromise.
Conclusion
So, there you have it—Easy Gluten-Free Pizza Lunchables that bring a little pizza party to school lunchboxes without the gluten drama. Whether you’re juggling food allergies or just want a fun, homemade alternative to store-bought lunch kits, this recipe ticks all the boxes for flavor, convenience, and kid-friendliness.
Feel free to make it your own by swapping toppings or adding that special ingredient your kids love. Honestly, it’s become a staple in our household, and I hope it brings the same lunchtime joy to your family.
If you give this recipe a try, I’d love to hear how it goes or what variations you come up with. Sharing your kitchen stories always makes my day. Happy cooking and packing those lunchboxes with love!
FAQs
Can I make the gluten-free pizza crust ahead of time?
Absolutely! You can pre-bake the crust and store it in an airtight container at room temperature for up to 2 days or freeze it for up to a month. Just thaw in the fridge before assembling.
What if my child doesn’t like pepperoni?
No worries! You can swap pepperoni for other toppings like diced ham, roasted veggies, or keep it simple with just cheese and sauce. Customizing is part of the fun.
Is this recipe suitable for dairy-free diets?
Yes, just replace the mozzarella with your favorite dairy-free cheese alternative. There are several brands available that melt well and taste great.
How do I prevent the crust from getting soggy in the lunchbox?
Keep the sauce in a separate small container or silicone cup and have kids dip the crust pieces right before eating. Pre-baking the crust also helps keep it crisp longer.
Can I make these Lunchables for adults, too?
Definitely! They’re great for anyone looking for a gluten-free, easy meal or snack. You can make larger crust portions or add more toppings for a heartier lunch.
Pin This Recipe!
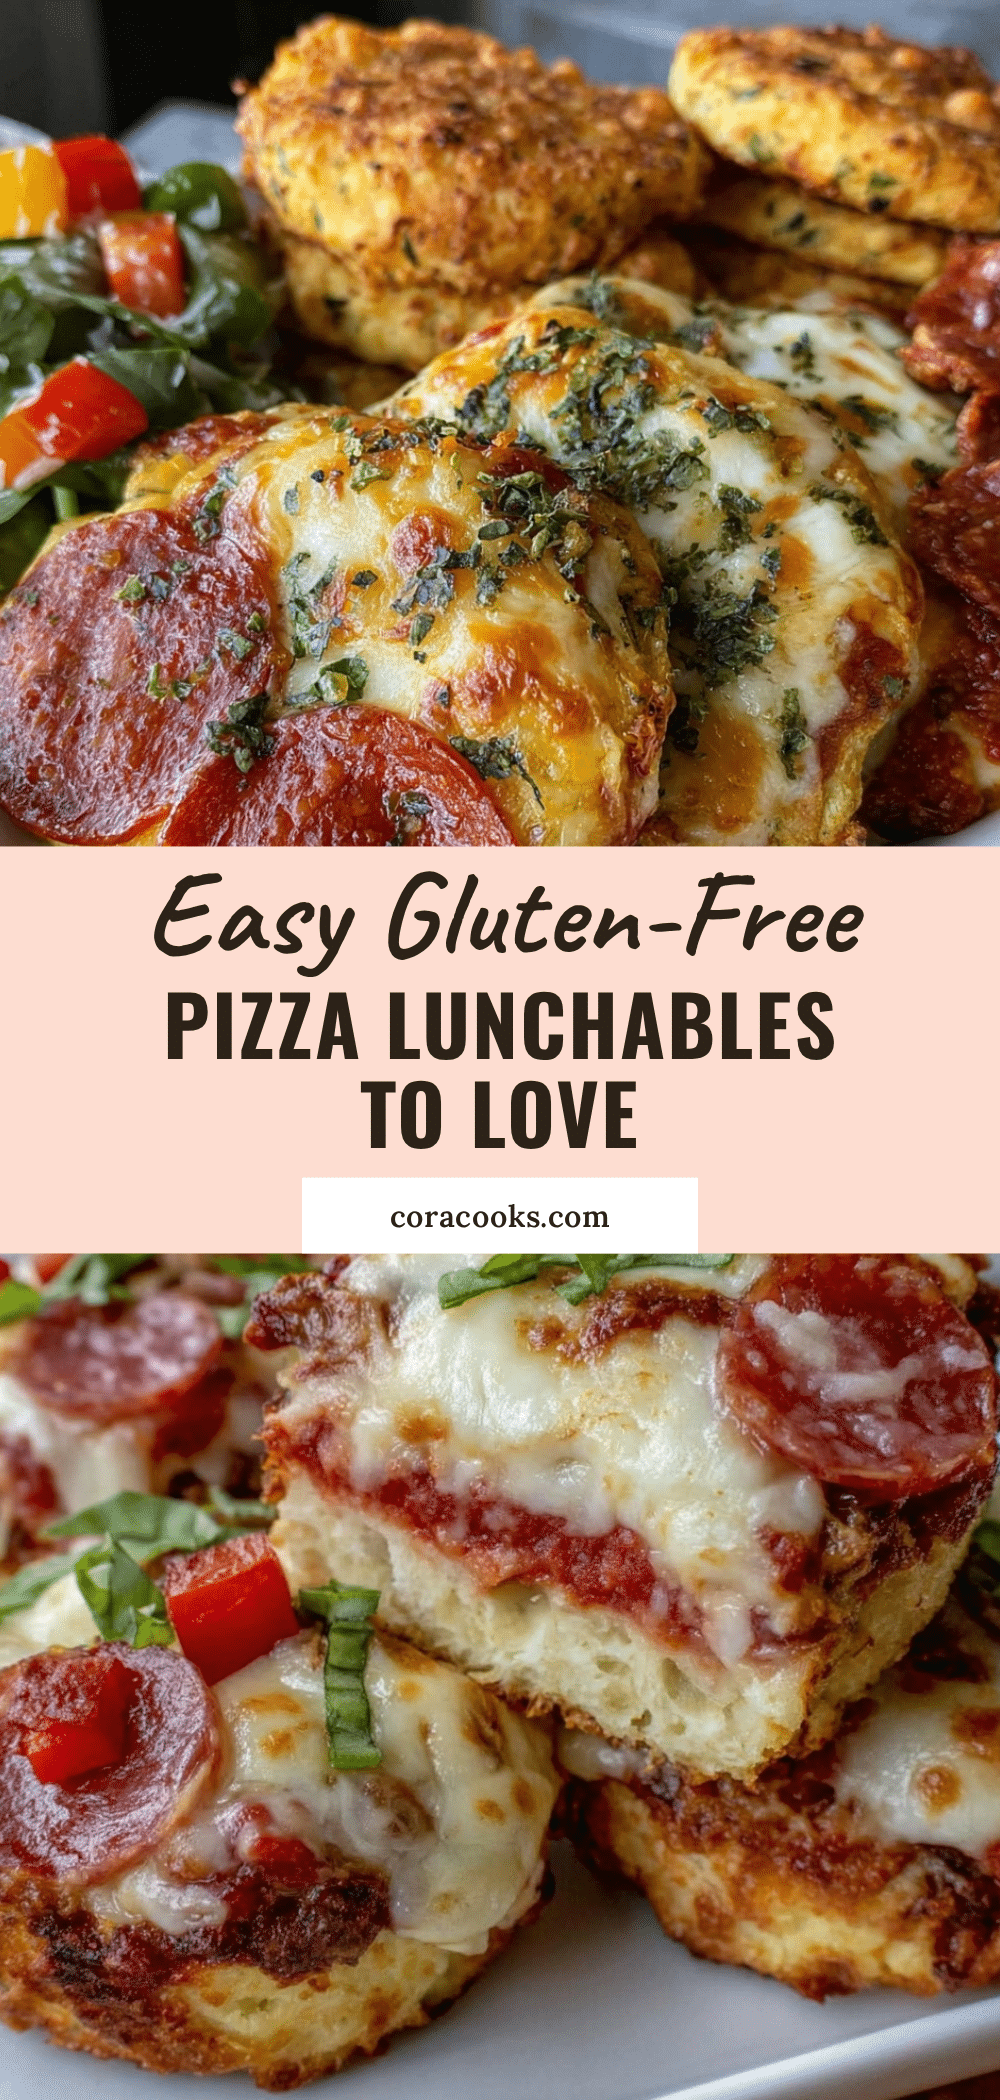
Easy Gluten-Free Pizza Lunchables Recipe Perfect for School Lunches
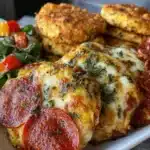
A quick and easy gluten-free pizza lunchable recipe designed for school lunches, featuring a crispy yet tender crust made from rice flour and tapioca starch, with separate sauce and toppings to keep it fresh and kid-friendly.
- Prep Time: 10 minutes
- Cook Time: 15 minutes
- Total Time: 25 minutes
- Yield: 3 servings 1x
- Category: Lunch, Snack
- Cuisine: American
Ingredients
- 1 cup rice flour
- 1/2 cup tapioca starch
- 1 teaspoon gluten-free baking powder
- 1/2 teaspoon salt
- 1 tablespoon olive oil
- 2/3 cup warm water (about 160°F / 70°C)
- 1/2 cup tomato sauce
- 1/2 teaspoon dried oregano
- 1/4 teaspoon garlic powder
- Pinch of salt and pepper
- 1 cup shredded mozzarella cheese
- 1/4 cup mini pepperoni slices (optional)
- Sliced black olives or diced bell peppers (optional)
- Small containers or silicone cups for packing sauce separately
Instructions
- Preheat your oven to 375°F (190°C). Line a baking sheet with parchment paper.
- In a mixing bowl, whisk together rice flour, tapioca starch, baking powder, and salt until evenly combined.
- Stir in olive oil and gradually pour in warm water. Use a spoon or spatula to bring the dough together until slightly sticky but manageable. Add water a teaspoon at a time if too dry.
- Transfer the dough onto the parchment-lined baking sheet. Press the dough into an 8×8 inch square about 1/4 inch thick using hands or a rolling pin.
- Pre-bake the crust for 12-15 minutes until just set and starting to turn golden at the edges.
- While the crust bakes, mix tomato sauce with oregano, garlic powder, salt, and pepper in a small bowl. Adjust seasoning to taste.
- Remove crust from oven and let cool for 5 minutes. Slice into 9 (3×3) small squares with a knife or pizza cutter.
- Pack crust squares into lunch containers. In separate small cups, add sauce and toppings (mozzarella, pepperoni, veggies). Keep sauce separate to prevent sogginess.
- At lunchtime, kids can dip crust pieces into sauce and add toppings for a hands-on pizza experience.
- Optional: Reheat crust in a toaster oven for 3-4 minutes before serving, or enjoy cold or at room temperature.
Notes
Use warm water to help dough come together smoothly. Do not overwork the dough; it should be more like a batter. Pre-baking the crust prevents sogginess. Keep sauce separate until serving. Dust hands with rice flour if dough is too sticky. Crust can be pre-baked and stored up to 2 days at room temperature or frozen for up to 1 month. Reheat crust in toaster oven or skillet if desired.
Nutrition
- Serving Size: Approximately 3 crus
- Calories: 300
- Sugar: 3
- Sodium: 450
- Fat: 12
- Saturated Fat: 5
- Carbohydrates: 35
- Fiber: 1
- Protein: 10
Keywords: gluten-free, pizza, lunchables, school lunch, kid-friendly, easy recipe, dairy-free option, allergy-friendly