Love this? Save it for later!
Share the inspiration with your friends
It was 11:17 PM on a rainy Tuesday, and I had a weird, almost desperate craving for sourdough. The kind of craving that makes you want to tear into a crusty, chewy loaf slathered in butter. But I had a problem. I didn’t have a starter. I didn’t have any bubbly, living yeast culture bubbling away in my fridge. I had flour, water, and a mason jar. And a stubborn thought that wouldn’t let me sleep: “Why not just start one right now?”
Honestly, I’d been intimidated by sourdough for years. I thought you needed some ancient, handed-down starter from a friend’s grandmother, or some special heirloom flour. Let me tell you, that’s just not true. That night, I was tired and impulsive, and I figured if it failed, I’d just have some funky flour water to toss out. I had no audience, no one to impress—just me, my late-night podcast, and a simple plan. I mixed equal parts flour and water in a clean jar, put a lid on it, and left it on the counter. I didn’t overthink it. I just did it.
And you know what? That weird, late-night experiment turned into something magical. The next morning, I saw the tiniest little bubble. By day three, it was doubling in size. I felt like a mad scientist who’d accidentally created life. Maybe you’ve been there—staring at a recipe for sourdough, thinking it’s out of reach. It’s not. This easy sourdough starter from scratch with a day-by-day schedule is the method I wish I’d had years ago. It’s what finally made me stop buying bread and start baking my own. That late-night whim changed everything, and I keep making starters because there’s something deeply satisfying about creating something alive from just two ingredients.
Why You’ll Love This Recipe
This isn’t just another sourdough starter guide. This is the one that actually works for real people with real lives and real budgets. I’ve tested this method more times than I can count, and I’ve tweaked it so it’s practically foolproof. Here’s why you’ll love it:
- Simple Ingredients: You only need two things—flour and water. That’s it. No fancy organic rye flour, no special bottled water. I use all-purpose flour and tap water that’s been sitting out for a bit. Your wallet will thank you.
- Quick & Easy: The active part of this takes about 5 minutes a day. Seriously. You mix, you wait, you feed. It’s the perfect project for busy parents or anyone who thinks they don’t have time for sourdough.
- Perfect for Families on a Budget: A $5 bag of flour can yield weeks of bread. Compare that to a $6 artisan loaf at the store. This starter will keep giving, and you’ll save so much money over time.
- Crowd-Pleaser: Once you have a healthy starter, you can make pancakes, waffles, crackers, and of course, bread. Your family will think you’re a kitchen wizard.
- Unbelievably Satisfying: There’s a special kind of pride that comes from baking bread with a starter you grew yourself. It feels like a superpower, honestly.
What makes this method different from the rest? It’s the day-by-day schedule. I didn’t just say “feed it daily.” I broke down exactly what to look for each day, so you’re never guessing if you’re on the right track. This easy sourdough starter from scratch with a day-by-day schedule takes the mystery out of the process. It’s the kind of guide that holds your hand through the whole journey, and by day seven, you’ll have a bubbly, active starter ready to bake.
This recipe isn’t just good—it’s the kind that makes you feel like a real baker. It’s comfort food reimagined as a process. It’s slower, yes, but it’s also more rewarding. Perfect for impressing your family without spending a dime on fancy equipment.
What Ingredients You Will Need
This easy sourdough starter from scratch uses the simplest pantry staples to create something truly alive. You don’t need a grocery list longer than your arm. Just two ingredients, plus water, and you’re in business.
For the Starter
- All-Purpose Flour: This is your workhorse. I use unbleached all-purpose flour because it has more natural yeast and bacteria than bleached flour. (Bleached flour can work, but it’s slower.) A good brand like King Arthur or Gold Medal works perfectly. If you want to speed things up, you can mix in a little whole wheat or rye flour for the first few days—they’re packed with natural yeast.
- Water: Tap water is fine, but let it sit out for an hour or two to let the chlorine evaporate. Chlorine can kill the good bacteria you’re trying to cultivate. If you have a water filter, even better. I use lukewarm water (around 75°F) to give the yeast a cozy environment.
Optional Boosters (But Not Required)
- Whole Wheat or Rye Flour: If you have some on hand, using a 50/50 mix of all-purpose and whole wheat for the first 3 days can jumpstart fermentation. The extra nutrients in whole grains make the yeast happy. (I’ve done this, and it works like a charm.)
- Unfiltered Apple Cider Vinegar: Some people add a tiny splash (like 1/4 teaspoon) on day one to create a more acidic environment that discourages bad bacteria. I’ve tried it, and it’s not necessary, but it doesn’t hurt.
- Pineapple Juice: This is a weird trick I learned from a baker friend. Using pineapple juice instead of water for the first 2 days can help stabilize the pH and prevent mold. I tried it once, and it worked, but honestly, plain water is just fine.
Ingredient Selection Tips
I recommend sticking with unbleached all-purpose flour for consistency. It’s what I use in my kitchen, and it gives predictable results. If you’re feeling adventurous, try a blend of 80% all-purpose and 20% whole wheat after day 5 for a more complex flavor. Just remember, the flour you feed your starter will affect the final bread, so choose what you’ll most often bake with.
For water, avoid distilled water—it’s too pure and lacks the minerals yeast needs. Tap water that’s been dechlorinated is perfect. If your tap water is heavily chlorinated, buy a jug of spring water. It’s a small investment for a reliable starter.
Equipment Needed
You don’t need a fancy kitchen setup for this. In fact, you probably already have everything you need. Here’s what I use:
- A Glass Jar or Container: A 16-ounce or 32-ounce mason jar is perfect. I use a wide-mouth quart jar because it’s easy to stir in. Avoid metal bowls—the acid in the starter can react with metal over time. Glass or ceramic is best.
- A Kitchen Scale: This is a game-changer. Measuring by weight (grams) is so much more accurate than cups. I use a cheap digital scale, and it’s made my starter consistent every time. If you don’t have one, you can use measuring cups, but be prepared for some inconsistency.
- A Spoon or Spatula: A wooden spoon or silicone spatula works great. Avoid metal utensils if you’re using a metal bowl, but honestly, it’s fine for quick mixing.
- A Clean Cloth or Paper Towel: To cover the jar loosely. I use a paper towel secured with a rubber band. It lets the starter breathe while keeping dust and bugs out.
- A Rubber Band: To mark the starting level of your starter. This helps you see how much it rises after feeding. It’s a simple trick that makes a huge difference.
Budget-friendly tip: Don’t run out and buy a fancy sourdough crock. A simple mason jar works perfectly. I’ve been using the same jar for years, and it’s never let me down.
Preparation Method
Here’s the step-by-step schedule for your easy sourdough starter from scratch. Follow this day by day, and you’ll have a bubbly, active starter in about a week. Remember, this is a living thing, so be patient and observant.
Day 1: The Beginning
- In your clean jar, combine 60 grams (about 1/2 cup) of all-purpose flour and 60 grams (about 1/4 cup) of lukewarm water.
- Stir vigorously until no dry flour remains. It should look like a thick paste.
- Cover loosely with a cloth or paper towel and secure with a rubber band. Place it in a warm spot in your kitchen (around 70-75°F is ideal).
- Mark the level of the mixture on the jar with a rubber band or a piece of tape.
- Wait 24 hours. You might not see any activity yet, and that’s totally normal. Don’t panic.
Sensory cue: It should smell a bit like wet flour—neutral and slightly earthy. If it smells like stinky feet, that’s actually okay for day one. The bad bacteria are just getting started.
Day 2: The First Bubbles
- Check your starter. You might see a few tiny bubbles on the surface or around the edges. If you don’t, don’t worry. Some starters take longer.
- Discard half of the starter (about 60 grams). Yes, you have to throw some away. I know it feels wasteful, but it’s necessary to keep the yeast-to-food ratio balanced. You can save the discard for pancakes later.
- Add 60 grams of flour and 60 grams of water to the remaining starter. Stir well.
- Cover and return to its warm spot. Mark the new level.
- Wait another 24 hours.
Troubleshooting tip: If you see a layer of liquid on top (called “hooch”), that’s a sign your starter is hungry. Just stir it back in and feed it a little more next time.
Day 3: Getting Active
- By now, you should see more bubbles and maybe a slight rise in volume. The smell might be changing—a bit sour, a bit fruity.
- Repeat the feeding: discard half, then add 60 grams flour and 60 grams water.
- Stir, cover, and wait. You might notice it rises faster now. Check it after 12 hours if you can.
- If it’s doubled in size within 12 hours, you’re on the right track!
Personal note: My starter on day three smelled like a combination of yogurt and old socks. I almost threw it out, but I’m so glad I didn’t. That funky smell is a sign of good fermentation.
Day 4: The Rise
- Your starter should be noticeably more active. It might double in size within 6-8 hours after feeding.
- Feed it again: discard half, add 60 grams flour and 60 grams water.
- Now is a good time to switch to feeding every 12 hours if you can. If not, once a day is still fine—it’ll just take a bit longer to mature.
- Look for a domed top and lots of bubbles. It should smell pleasantly sour, like sourdough bread.
Day 5: Almost There
- Your starter should be doubling consistently within 4-6 hours of feeding. It’s getting strong!
- Continue the twice-daily feedings (morning and evening) if possible. If you’re on a once-daily schedule, it’s still okay.
- At this point, you can start using the discard for recipes. I love making sourdough discard crackers or pancakes.
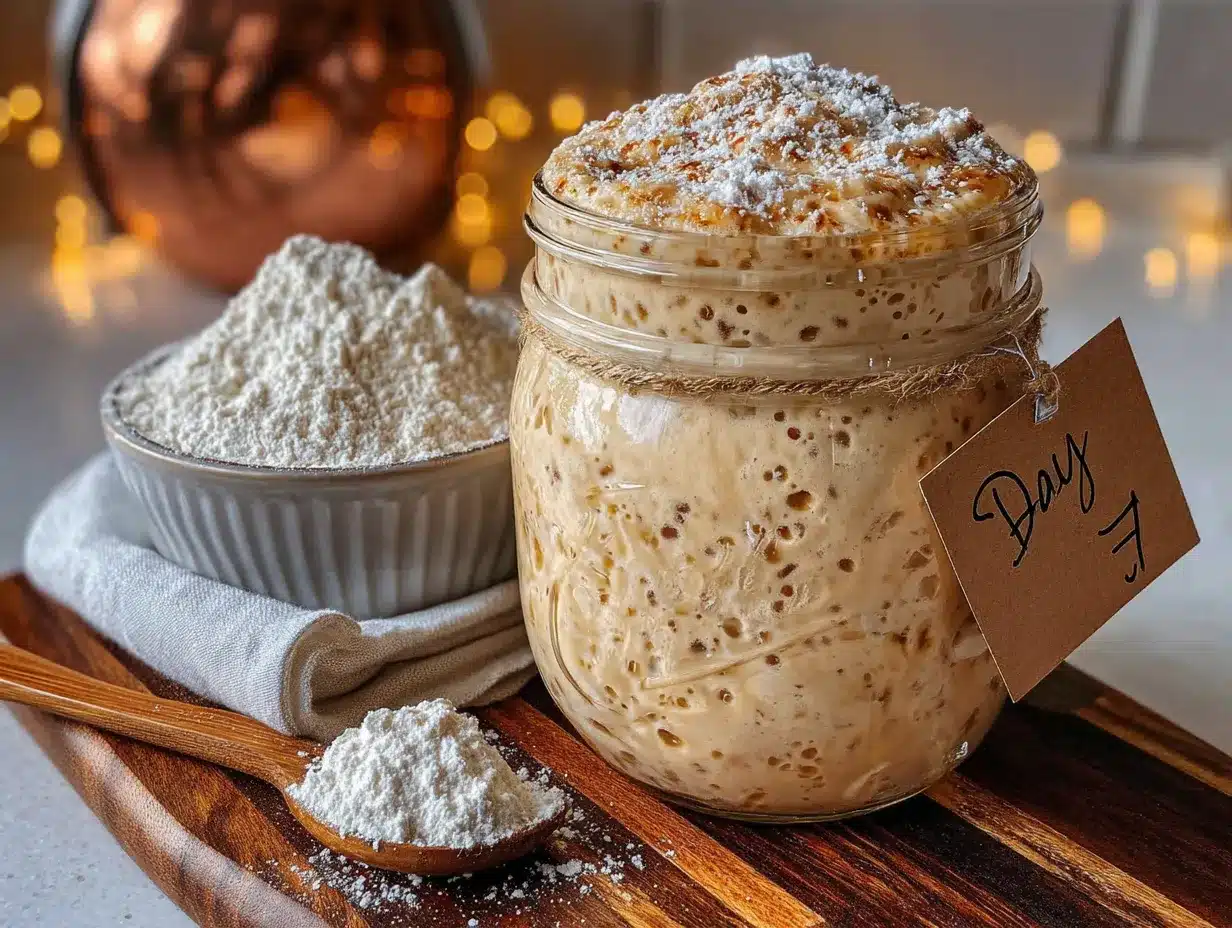
- The texture should be light and airy, with a network of bubbles throughout.
Day 6: The Float Test
- Feed your starter as usual. About 4-6 hours after feeding, take a small spoonful and drop it into a glass of water. If it floats, your starter is ready to bake with!
- If it sinks, give it another day or two. Keep feeding on schedule.
- It should smell tangy and pleasant, not overly sharp or like nail polish remover.
Day 7: Ready to Bake!
- Congratulations! Your starter should be doubling within 4-6 hours, passing the float test, and smelling beautifully sour.
- You can now use it to bake bread. Keep feeding it regularly (once a day if kept at room temperature, or once a week if refrigerated).
- To maintain it: feed it a 1:1:1 ratio (starter:flour:water) by weight. For example, 50 grams starter, 50 grams flour, 50 grams water.
Final tip: Your first loaf might not be perfect, and that’s okay. The starter gets better with age. My first sourdough loaf was a dense brick, but I was so proud of it. You will be too.
Cooking Tips & Techniques
After making countless starters, I’ve learned a few things the hard way. Here are my best tips to set you up for success with your easy sourdough starter from scratch.
Temperature matters more than you think. Yeast is a living thing, and it likes warmth. If your kitchen is cold (below 65°F), your starter will be sluggish. Try placing it on top of the fridge, near a warm oven, or inside a turned-off microwave with the light on. I’ve even put mine in a cooler with a jar of warm water to create a cozy environment. If it’s too hot (above 85°F), it can ferment too fast and become acidic. Aim for that sweet spot of 70-75°F.
Don’t skip the discard step. I know it feels wrong to throw away food, especially when you’re on a budget. But here’s the thing: if you don’t discard, you’ll end up with a giant jar of starter that needs an enormous amount of flour to keep it alive. Plus, discarding helps maintain the right balance of yeast and bacteria. Save your discard in a separate jar in the fridge and use it for pancakes, waffles, or crackers. Nothing goes to waste!
Watch for the signs, not the clock. Every starter is different. Some are ready in 5 days, some take 10. Don’t stress if yours isn’t doubling on day 4. Look for the signs: consistent doubling, a dome on top, lots of bubbles, and a pleasant sour smell. I once had a starter that took 14 days because my kitchen was cold. It still made amazing bread.
Use a scale for consistency. I can’t stress this enough. Measuring by volume (cups) is unreliable because flour density varies. A scale costs $10 and takes the guesswork out. When I switched to weighing, my starter became predictable and strong. It’s the single best investment you can make for sourdough.
Don’t overthink it. Sourdough is supposed to be rustic and forgiving. If you forget a feeding, just feed it when you remember. If it smells a little funky, it’s probably fine. I’ve forgotten my starter for two days and brought it back to life with a few feedings. It’s resilient.
Variations & Adaptations
Once you’ve got your easy sourdough starter from scratch going, you can adapt it to fit your family’s needs. Here are some variations I’ve tried and loved.
Whole Wheat Starter
For a nuttier, more complex flavor, feed your starter with whole wheat flour instead of all-purpose. The starter will be more active because whole wheat has more nutrients. I do this when I’m planning to bake hearty, rustic loaves. Just be aware that whole wheat starters can be more acidic, so you might need to feed them more often.
Rye Starter
Rye flour is a powerhouse for sourdough. It ferments quickly and gives a deep, earthy flavor. I love using a rye starter for dark, dense breads like pumpernickel. The starter will be very active, so keep an eye on it—it can double in 3-4 hours. My rye starter is my favorite for making pancakes; the flavor is incredible.
Gluten-Free Starter
Yes, you can make a gluten-free starter! Use a blend of brown rice flour and sorghum flour, or just buckwheat flour. The process is the same, but it might take a bit longer to get active. I’ve made one for a friend with celiac disease, and it worked beautifully for gluten-free sourdough bread. Just keep it separate from your wheat starter to avoid cross-contamination.
Stiff Starter (Lower Hydration)
Instead of a 1:1 ratio of flour to water, try a 2:1 ratio (like 100 grams flour to 50 grams water). This creates a stiff, dough-like starter that’s less acidic and produces milder bread. I use this for sandwich loaves. It’s easier to handle and stores well in the fridge.
Flavor Boosts
If you want a more tangy starter, feed it with a higher ratio of whole grains or let it go longer between feedings. For a milder starter, feed it more frequently with white flour. I’ve played with both, and I prefer a medium tang—it’s the most versatile for my family’s tastes.
Serving & Storage Suggestions
Once your easy sourdough starter from scratch is mature, you’ll need to know how to keep it happy and how to use it. Here’s what works for me.
Room Temperature Storage
If you bake every day or every other day, keep your starter on the counter. Feed it once a day (or twice if it’s very active). Use a 1:1:1 ratio (starter:flour:water) by weight. For example, 50 grams starter, 50 grams flour, 50 grams water. It will stay bubbly and ready to use. Just remember to discard half before each feeding, or you’ll end up with a gallon of starter.
Refrigerator Storage
For most home bakers, the fridge is the way to go. Feed your starter, let it sit at room temperature for 1-2 hours, then pop it in the fridge. It will go dormant and only need feeding once a week. When you want to bake, take it out, feed it, and let it sit at room temperature until it doubles (usually 4-8 hours). I keep my starter in the fridge for weeks at a time without issue.
Freezing Starter
You can freeze a backup starter. Spread it thin on parchment paper, freeze it, then break it into pieces and store in a freezer bag. When you need it, thaw a piece and feed it. It might take a few feedings to come back to full strength, but it works. I do this as a safety net in case my main starter gets moldy or I accidentally kill it.
Reheating and Using
When using refrigerated starter, always feed it and let it come to room temperature first. A cold starter won’t rise well. I usually feed mine the night before I plan to bake, and by morning it’s bubbly and ready. The flavor actually improves after a few days in the fridge—it becomes more complex and tangy.
Flavor Development Over Time
Your starter will change as it ages. A young starter (under 2 weeks) will produce mild, slightly sweet bread. An older starter (a few months) will be more tangy and robust. I’ve kept starters for years, and they develop a unique personality. My current starter is about 8 months old, and it makes the most amazing sourdough with a deep, complex flavor.
Nutritional Information & Benefits
While sourdough starter itself isn’t something you eat by the bowlful, the bread you make from it has some surprising benefits. Here’s what you should know.
| Nutrient | Per 100g Sourdough Bread (approx.) |
|---|---|
| Calories | 250-270 |
| Protein | 8-10g |
| Carbohydrates | 45-50g |
| Fiber | 3-5g |
| Fat | 1-2g |
Health Benefits: Sourdough fermentation breaks down phytic acid, a compound in grains that can block nutrient absorption. This means your body can better absorb the minerals in the bread, like iron, zinc, and magnesium. It also pre-digests some of the gluten, making it easier to digest for some people. I’ve had friends who can’t eat regular bread but tolerate sourdough just fine.
Dietary Considerations: Traditional sourdough is not gluten-free, but the fermentation process reduces gluten content. If you have celiac disease, stick with a gluten-free starter made from alternative flours. Sourdough is naturally low in fat and sugar, making it a healthier choice than many store-bought breads.
Potential Allergens: Wheat flour contains gluten. If you’re allergic, use a gluten-free flour blend. Some people are sensitive to the natural yeast in sourdough, but this is rare. I’ve never had an issue, and my family loves the bread.
Personal Wellness Perspective: For me, baking sourdough is more than just making bread. It’s a slow, mindful process that connects me to my food. Knowing exactly what’s in my bread—just flour, water, and salt—gives me peace of mind. It’s also a great way to save money and reduce food waste. I feel good about feeding my family something wholesome and homemade.
Conclusion
So there you have it—your complete guide to creating an easy sourdough starter from scratch with a day-by-day schedule. I know it might feel like a commitment, but honestly, it’s one of the most rewarding things you can do in your kitchen. You’re not just making a starter; you’re creating a living, breathing thing that will feed your family for months or even years.
I encourage you to customize this process. Use the flour you have on hand, adjust the feeding schedule to fit your life, and don’t stress if things don’t go perfectly. My first starter was a mess, and I almost gave up. But I’m so glad I didn’t. That late-night experiment turned into a hobby, a money-saver, and a source of pride. Every time I pull a golden, crusty loaf out of the oven, I think back to that rainy Tuesday night and smile.
Now it’s your turn. Grab a jar, some flour, and water, and just start. Don’t overthink it. And when you’ve got your bubbly, active starter, come back and tell me about it. I’d love to hear how it goes. Share your wins, your struggles, and your first loaf in the comments. Happy baking, friend!
Frequently Asked Questions
Can I use bleached all-purpose flour for my sourdough starter?
Yes, you can, but it might take longer to get active. Bleached flour has fewer natural yeast and bacteria, so the fermentation process can be slower. I recommend unbleached flour for faster results, but if bleached is all you have, it will still work—just be patient.
Why does my starter smell like nail polish remover?
That’s a sign of over-fermentation. Your starter is too hungry or too warm. Try feeding it more frequently (every 12 hours instead of 24) or moving it to a cooler spot. The smell should mellow out after a few proper feedings. If it persists, your starter might be too acidic, and you can reset it by saving just a tiny bit (like 10 grams) and feeding it fresh flour and water.
Can I feed my starter with different types of flour each time?
Absolutely! I often switch between all-purpose, whole wheat, and rye depending on what I’m baking. Your starter is adaptable. Just be aware that switching to a whole grain flour will make it more active, so you might need to feed it sooner. It’s a fun way to experiment with different flavors.
What should I do if mold grows on my starter?
If you see fuzzy mold (green, black, or pink), throw it away and start over. Mold is not safe, and it’s not worth the risk. To prevent mold, make sure your jar is clean, use a clean utensil each time, and don’t let the starter dry out on the sides of the jar. I wipe the inside of my jar with a clean paper towel after each feeding.
How long can I keep my starter in the fridge without feeding?
You can safely leave your starter in the fridge for 1-2 weeks without feeding. If you’re going on vacation or know you won’t bake, you can go up to a month, but it will need several feedings to bounce back. For long-term storage, I recommend drying some starter (spread it thin on parchment and let it air dry) or freezing it as a backup.
Pin This Recipe!
Easy Sourdough Starter from Scratch: Day-by-Day Schedule
Create a bubbly, active sourdough starter from scratch with just flour and water. This day-by-day schedule takes the mystery out of the process, guiding you from day one to a ready-to-bake starter in about a week.
- Prep Time: 5 minutes per day
- Cook Time: 0 minutes
- Total Time: 7 days
- Yield: 1 active sourdough starter (about 180 grams after feeding)
- Category: Starter
- Cuisine: American
Ingredients
- All-purpose flour (unbleached preferred)
- Water (tap water, dechlorinated by sitting out for 1-2 hours, or spring water)
- Optional: Whole wheat or rye flour (for first 3 days to jumpstart fermentation)
- Optional: Unfiltered apple cider vinegar (1/4 teaspoon on day one)
- Optional: Pineapple juice (instead of water for first 2 days)
Instructions
- Day 1: In a clean jar, combine 60 grams (about 1/2 cup) all-purpose flour and 60 grams (about 1/4 cup) lukewarm water. Stir until no dry flour remains. Cover loosely with a cloth or paper towel and secure with a rubber band. Place in a warm spot (70-75°F). Mark the level. Wait 24 hours.
- Day 2: Check for tiny bubbles. Discard half (about 60 grams). Add 60 grams flour and 60 grams water. Stir, cover, and return to warm spot. Mark new level. Wait 24 hours.
- Day 3: Look for more bubbles and a slight rise. Repeat feeding: discard half, add 60 grams flour and 60 grams water. Stir, cover, and wait. Check after 12 hours for doubling.
- Day 4: Starter should be more active, doubling in 6-8 hours. Feed again: discard half, add 60 grams flour and 60 grams water. Switch to feeding every 12 hours if possible.
- Day 5: Starter should double consistently in 4-6 hours. Continue twice-daily feedings. Discard can be used for recipes like pancakes or crackers.
- Day 6: Feed as usual. 4-6 hours after feeding, perform the float test: drop a small spoonful into a glass of water. If it floats, starter is ready. If not, continue feeding.
- Day 7: Starter should double in 4-6 hours, pass the float test, and smell pleasantly sour. It is now ready to bake with. Maintain with a 1:1:1 ratio (starter:flour:water) by weight.
Notes
Temperature is crucial: aim for 70-75°F. If kitchen is cold, place starter on top of fridge or near a warm oven. Don’t skip the discard step; save discard for other recipes. Use a scale for consistency. If mold appears (fuzzy green, black, or pink), discard and start over. Starter can be stored in the fridge for 1-2 weeks without feeding.
Nutrition
- Serving Size: Not applicable (star
Keywords: sourdough starter, easy sourdough starter, sourdough from scratch, day-by-day sourdough, homemade starter, sourdough for beginners