Love this? Save it for later!
Share the inspiration with your friends
The little girl next door, maybe six years old, watched me fumbling with a bottle of red gel food coloring last December. I was trying to get the stripes on a test pancake just right, and honestly, I was making a mess. She didn’t say anything at first. Then she just pointed at the bottle and said, “You’re supposed to shake it first, silly.” That was it. She wandered back to her own yard, and I stood there, holding a sticky bottle, realizing I had just been schooled by a first-grader on my own porch.
That moment stuck with me. Not just because she was right (the color did blend better after a shake), but because it reminded me what Christmas morning is really about. It’s not about perfection. It’s about the little moments — the sticky fingers, the spilled sprinkles, the laughter when a pancake beard looks more like a fuzzy cloud than Santa’s majestic whiskers. These cozy Santa pancakes were born from that exact feeling. They aren’t fancy restaurant fare. They are the kind of breakfast you make in your pajamas, with a cup of coffee that goes cold because you’re too busy helping little hands arrange blueberry eyes.
I started making these a few years ago when my own attempts at a “perfect” Christmas brunch left me stressed and snapping at everyone. I mean, who needs that on Christmas morning? So I scaled back. I wanted something fun, fast, and forgiving. Something that lets the kids help without giving you an anxiety attack. These pancakes are exactly that. They come together in about twenty minutes, use ingredients you probably already have, and they look so darn festive that even the grumpiest morning person cracks a smile. This recipe stayed with me because it brings people together, not because it’s complicated. And honestly, maybe you’ve been there — wanting the magic without the madness. These pancakes are your answer.
Why You’ll Love This Recipe
Let me tell you why these cozy Santa pancakes have become a non-negotiable part of our Christmas morning. I’ve tested this recipe through three different Christmases, with different kids, different kitchens, and even different pancake griddles. It works every single time, and here is why you will love it too.
- Quick & Easy: From start to finish, these pancakes take about 20 minutes. You can have the whole batch done before the first present is even unwrapped. No standing over a hot stove for an hour while everyone else has fun without you.
- Simple Ingredients: You likely have everything in your pantry right now. Flour, baking powder, milk, eggs, sugar, and a little vanilla. The decorations are just common pantry items too — chocolate chips, strawberries, and whipped cream. No special trips to a fancy baking store required.
- Perfect for Christmas Morning: This is the ultimate festive breakfast. The kids can help arrange the faces, and you can sip your coffee while they giggle over Santa’s lopsided mustache. It sets the tone for a relaxed, joyful day.
- Crowd-Pleaser: I have yet to meet a child or adult who doesn’t light up when they see these. They are adorable without being fussy, and they taste like classic, buttery pancakes. Everyone from toddlers to grandparents digs in.
- Unbelievably Delicious: The texture is fluffy on the inside with a perfectly golden outside. The combination of warm pancake, melted chocolate chips, and cool whipped cream is pure comfort. It’s the kind of breakfast that makes you want to curl up on the couch and stay in your pajamas all day.
What makes this recipe different from the dozens of other Santa pancake tutorials out there? It’s the technique. I don’t use a piping bag or any fancy tools. You shape the pancakes freehand right in the pan. It sounds messy, but I promise it is actually easier and faster. Plus, each pancake ends up with its own unique personality, which is way more charming than something that looks machine-made. This isn’t just another recipe — it’s your best version of a Christmas morning tradition that actually brings you peace, not stress.
What Ingredients You Will Need
This recipe uses simple, wholesome ingredients to deliver that classic pancake flavor and fluffy texture. The magic really comes from the decorations, which turn a basic breakfast into a festive masterpiece. I’ve kept the ingredient list short on purpose — no one wants to hunt down obscure items on Christmas Eve.
- All-purpose flour: 1 ½ cups (180g). This is the backbone of our pancakes. I recommend Gold Medal or King Arthur Flour for consistent results. Spoon the flour into your measuring cup and level it off with a knife for accuracy.
- Granulated sugar: 2 tablespoons (25g). Just enough to add a hint of sweetness without making the pancakes taste like cake. You can use coconut sugar if you prefer a less refined option, but the color will be slightly darker.
- Baking powder: 2 teaspoons. This is our leavening agent. Make sure it’s fresh — if it’s been sitting in your pantry for over a year, it might not give you that fluffy rise. Test it by dropping a little in hot water; if it fizzes, it’s good.
- Baking soda: ½ teaspoon. Works with the buttermilk (or the acid in the milk-vinegar combo) to create extra lift and tenderness.
- Salt: ¼ teaspoon. Don’t skip this. It balances the sweetness and enhances the overall flavor.
- Buttermilk: 1 ¼ cups (300ml). This is the secret to fluffy, tender pancakes. If you don’t have buttermilk, you can make a quick substitute by adding 1 tablespoon of white vinegar or lemon juice to 1 ¼ cups of regular milk. Let it sit for 5 minutes before using. I’ve done this a hundred times, and it works perfectly.
- Large egg: 1, room temperature. A room-temperature egg blends more evenly into the batter and creates a smoother texture. If you forgot to take it out of the fridge, just place it in a bowl of warm water for 5 minutes.
- Unsalted butter: 3 tablespoons (42g), melted, plus more for the pan. I use unsalted so I can control the salt level. Kerrygold is my go-to for its rich, creamy flavor.
- Vanilla extract: 1 teaspoon. Pure vanilla extract makes a noticeable difference. Imitation vanilla works in a pinch, but the flavor is less rich.
For the Santa Decorations:
- Fresh strawberries: 4-5 large ones. These make Santa’s hat and nose. Look for bright red, evenly shaped berries. Wash and dry them thoroughly, then slice off the green tops and cut them into thin rounds or wedges.
- Whipped cream: 1 cup (240ml) heavy whipping cream, whipped with 1 tablespoon powdered sugar until soft peaks form. Store-bought whipped cream works too, but homemade is so much better. For a dairy-free option, use coconut cream whipped with a little maple syrup.
- Mini chocolate chips: ¼ cup (45g). These are for Santa’s eyes and smile. You can also use regular chocolate chips cut in half, or even raisins if that’s what you have.
- Red sprinkles: Optional, for the hat. A little festive sparkle never hurt anyone.
Equipment Needed
You don’t need a professional pastry kitchen for this. I’ve made these pancakes in a tiny apartment with a warped nonstick pan, and they turned out great. Here is what you will actually need.
- Large mixing bowl: Any bowl will do. I use a standard ceramic one, nothing fancy.
- Whisk: A good whisk helps you get the batter smooth without overmixing. A fork works in a pinch, but a whisk is better.
- Non-stick skillet or griddle: A 10-inch non-stick skillet is ideal. If you have an electric griddle, that works even better because you can cook multiple pancakes at once. I’ve used cast iron too, but you need to be careful with the heat — it runs hot.
- Measuring cups and spoons: For accuracy. Eyeballing ingredients works for experienced cooks, but for pancakes, precise measurements matter.
- Spatula: A thin, flexible metal spatula is best for flipping. A silicone one works too, but it might be a little thick for thin pancakes.
- Small squeeze bottle or piping bag: This is optional but helpful for making the Santa face details with batter. I’ve used a zip-top bag with the corner snipped off, and it works just fine.
- Toothpicks: For arranging chocolate chips and strawberry pieces. Little fingers work too, but toothpicks give you more control.
Budget-friendly tip: Don’t run out and buy a squeeze bottle. A sturdy zip-top bag with a tiny hole cut in the corner does the exact same job. I’ve been using the same bag method for years.
Preparation Method
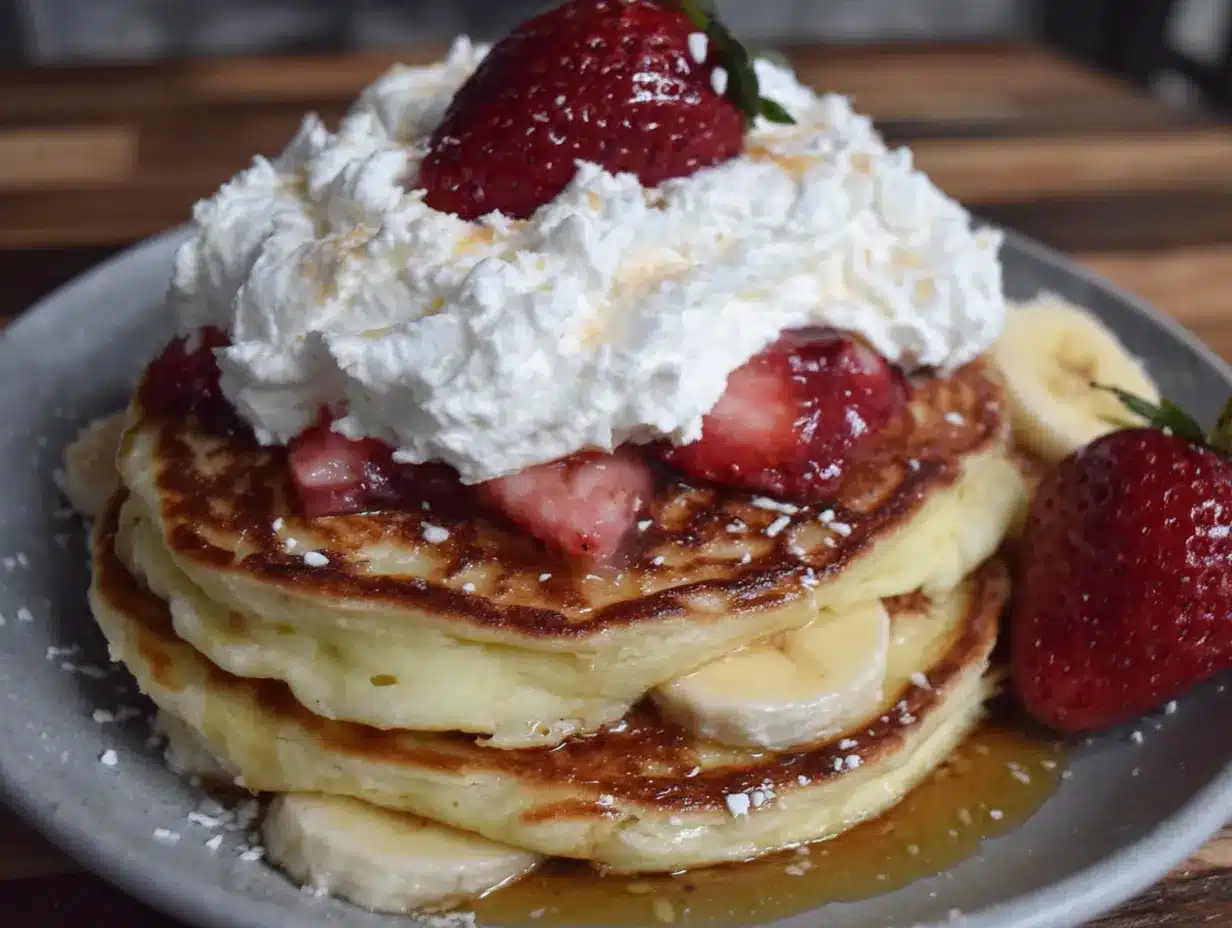
Alright, let’s make some magic happen. I’ll walk you through every step so you feel confident, even if this is your first time making shaped pancakes. Take a deep breath — it’s supposed to be fun.
- Make the pancake batter: In a large mixing bowl, whisk together the flour, sugar, baking powder, baking soda, and salt. In a separate bowl or measuring cup, whisk together the buttermilk, egg, melted butter, and vanilla extract. Pour the wet ingredients into the dry ingredients and stir gently with a whisk until just combined. A few small lumps are totally fine — overmixing makes pancakes tough. Let the batter rest for 5 minutes while you heat your pan. This resting time allows the gluten to relax and the baking powder to activate, giving you fluffier pancakes.
- Heat your pan: Place your non-stick skillet or griddle over medium-low heat. Let it heat up for a full 2-3 minutes. Drop a tiny bit of water on the surface; if it sizzles and evaporates immediately, it’s ready. Lightly grease the pan with a little butter or cooking spray. I use a paper towel to spread the butter evenly — too much butter can make the pancakes greasy and uneven.
- Shape Santa’s face: This is the fun part. Using a ¼ cup measuring cup, pour a round puddle of batter onto the hot pan for Santa’s face. Then, using a small spoon or your squeeze bottle, add a smaller dollop of batter right above the round puddle for his hat. The hat should be slightly off-center, like a floppy Santa cap. Don’t worry if it looks messy — the pancakes spread as they cook, and you’ll fix the shape later with the decorations.
- Cook the first side: Let the pancake cook undisturbed for 2-3 minutes. You’ll see small bubbles forming on the surface, especially around the edges. When the bubbles pop and leave tiny holes that don’t fill back in, it’s time to flip. The edges should look set and dry. This is the most important visual cue.
- Flip carefully: Slide your spatula all the way under the pancake. The hat part might feel delicate — that’s normal. Flip confidently in one smooth motion. Cook for another 1-2 minutes on the second side, until golden brown. The pancake should feel springy when you press the center gently. Transfer to a plate and repeat with the remaining batter. You should get about 6-8 Santa pancakes, depending on size.
- Prepare the decorations: While the pancakes are cooking, wash and slice your strawberries. Cut them into thin rounds for the hat and smaller triangles for the nose. Whip your cream if you’re making it from scratch — just pour the heavy cream and powdered sugar into a bowl and whisk until soft peaks form. This takes about 3-4 minutes with a hand mixer, or 5-6 minutes by hand.
- Assemble Santa: Place a warm pancake on a plate. Add a generous dollop of whipped cream to the top of the hat part — this creates Santa’s fluffy pom-pom. Arrange strawberry slices in a triangle shape on the hat for the red part. Place a small strawberry triangle in the center of the face for the nose. Add two mini chocolate chips for eyes, and arrange a few more in a curved line for the smile. You can also add a little whipped cream mustache if you’re feeling extra festive.
- Serve immediately: These pancakes are best eaten warm, while the chocolate chips are still slightly melty and the whipped cream is cold and fluffy. Stack them on a platter or serve individually. Let everyone decorate their own if you want to make it an activity — kids absolutely love this part.
One thing I learned the hard way: don’t try to make all the pancakes first and then decorate them. The whipped cream will start to melt, and the pancakes will cool down. Decorate each pancake right after it comes off the griddle for the best texture and presentation.
Cooking Tips & Techniques
I’ve made these pancakes more times than I can count, and I’ve made every mistake in the book. Here are the tips I wish someone had told me before my first attempt.
Control your heat: Medium-low is your friend. If your pan is too hot, the outside of the pancake will burn before the inside is cooked through. If it’s too cool, the pancake will spread too much and lose its shape. I keep my burner on a 4 out of 10, and I adjust slightly if needed. The first pancake is always a test — if it browns too fast, turn the heat down.
Don’t overmix the batter: This is the most common pancake mistake. Overmixing develops gluten, which makes pancakes tough and rubbery. Stir until the flour is just moistened. Lumps are okay. In fact, lumps are good. I used to beat my batter until it was perfectly smooth, and my pancakes were always dense. Once I stopped caring about lumps, they became light and fluffy.
Use a squeeze bottle for the hat: If you have a squeeze bottle, fill it with batter and pipe the hat shape directly onto the pan. This gives you much more control than using a spoon. If you don’t have a bottle, a zip-top bag with a tiny corner snipped off works just as well. I used a spoon for my first few batches, and the hats were always lopsided. The squeeze bottle was a game-changer.
Keep pancakes warm in the oven: If you’re making a big batch, preheat your oven to 200°F (95°C). Place the cooked pancakes on a baking sheet in a single layer and keep them warm while you finish cooking. This prevents them from getting cold and soggy. Don’t stack them on a plate — the steam will make them limp.
Timing is everything: Start your coffee and set the table before you begin cooking. Once those pancakes hit the griddle, you’re on a timeline. Having everything ready means you can focus on the cooking and decorating without rushing.
Variations & Adaptations
One of the best things about this recipe is how adaptable it is. I’ve tried several variations over the years, and they all bring something fun to the table.
Gluten-Free Version: Substitute the all-purpose flour with a 1:1 gluten-free baking flour blend. I’ve used Bob’s Red Mill and King Arthur Flour’s gluten-free blends with great success. The texture will be slightly denser, but still delicious. Add an extra tablespoon of milk to the batter since gluten-free flours absorb more liquid.
Dairy-Free Version: Use almond milk or oat milk mixed with 1 tablespoon of apple cider vinegar instead of buttermilk. Replace the melted butter with coconut oil or a neutral vegetable oil. For the whipped cream, use canned coconut cream — just chill the can overnight and whip the solid part. It’s surprisingly good.
Whole Wheat Version: Swap half the all-purpose flour for whole wheat pastry flour. This adds fiber and a nutty flavor without making the pancakes too heavy. You might need to add an extra tablespoon or two of milk because whole wheat flour absorbs more liquid.
Fun Flavor Twists: Add ½ teaspoon of cinnamon or pumpkin pie spice to the dry ingredients for a warm, festive flavor. You can also fold in ¼ cup of mini chocolate chips into the batter for chocolate-speckled Santa faces. One year, I added a splash of peppermint extract to the batter, and it tasted like a Christmas candy cane — just be careful, a little goes a long way.
Different Decorations: If strawberries aren’t in season, use raspberries for the hat or canned cherries (drained well). For the eyes, you can use blueberries or blackberries cut in half. I’ve even used banana slices for the nose in a pinch. The beauty of this recipe is that it’s forgiving — use what you have.
Serving & Storage Suggestions
These pancakes are best served immediately, while the whipped cream is cold and the pancakes are warm. But let’s be realistic — Christmas morning is chaotic, and you might not eat everything at once. Here is how to handle leftovers.
Serving Temperature: Serve the pancakes warm, right off the griddle. If you’re serving a crowd, keep them warm in a 200°F oven as described above. Arrange them on a large platter with the Santa faces facing up so everyone can see the cute decorations before they dig in.
What to Serve With: These pancakes are a meal on their own, but they pair beautifully with a side of crispy bacon or breakfast sausage for a savory contrast. A bowl of fresh fruit salad or a simple yogurt parfait rounds out the meal. For drinks, hot cocoa with marshmallows is a no-brainer, but a strong cup of coffee or a glass of cold milk works perfectly too.
Storage Instructions: If you have leftover pancakes (unlikely, but possible), let them cool completely on a wire rack. Store them in an airtight container in the refrigerator for up to 3 days. Do not store them with the whipped cream and decorations — those should be added fresh. Store the plain pancakes separately, and decorate them when you reheat.
Reheating Methods: The best way to reheat pancakes is in a toaster or toaster oven. It crisps up the edges and warms the center perfectly. You can also microwave them for 20-30 seconds, but they will be softer. For a larger batch, reheat them in a 350°F oven for 5-7 minutes on a baking sheet.
Freezer Instructions: These pancakes freeze beautifully. Place the cooled, undecorated pancakes on a baking sheet in a single layer and freeze for 1 hour. Then transfer them to a freezer-safe bag or container. They will keep for up to 2 months. To serve, reheat directly from frozen in a toaster or oven. Then decorate fresh.
Flavor note: The pancakes actually taste even better the next day, in my opinion. The flavors meld together, and the texture becomes slightly more tender. Just don’t expect any leftovers to last that long.
Nutritional Information & Benefits
Let’s be honest — these are a treat, not a health food. But that doesn’t mean they can’t fit into a balanced lifestyle. Here is the estimated nutritional breakdown for one Santa pancake (without extra toppings).
| Nutrient | Amount per Pancake |
|---|---|
| Calories | 185 |
| Total Fat | 7g |
| Saturated Fat | 4g |
| Carbohydrates | 26g |
| Fiber | 1g |
| Sugar | 8g |
| Protein | 5g |
The strawberries add a good dose of vitamin C and antioxidants, while the buttermilk provides calcium and probiotics (if using real buttermilk). The egg contributes high-quality protein. For a slightly healthier version, use whole wheat flour and reduce the sugar to 1 tablespoon. You can also top with fresh fruit instead of whipped cream.
Dietary Considerations: This recipe contains gluten, dairy, and eggs. For gluten-free and dairy-free options, see the variations section above. The recipe is vegetarian as written. It is not suitable for vegan diets without significant modification.
My personal take? Christmas morning is not the day to count calories. Enjoy the pancakes, savor the time with your family, and get back to your routine the next day. Balance is about the whole picture, not one meal.
Conclusion
These cozy Santa pancakes have become more than just a recipe in my house — they are a tradition. They are the thing my kids ask about the moment December hits, and the thing I look forward to making even when I’m exhausted on Christmas Eve. There is something magical about watching a simple pancake transform into a little Santa face. It’s simple, it’s silly, and it’s absolutely perfect.
I hope you give them a try this Christmas morning. Don’t stress about making them look perfect — the lopsided ones are always the most charming. Let the kids help, let the whipped cream get everywhere, and laugh when Santa’s mustache slides off. That’s what makes the memory.
I would love to hear how yours turn out! Leave a comment below and tell me about your Christmas morning pancake adventure. Did you try a fun variation? Did your kids come up with their own decorations? Share a photo on social media and tag me — I love seeing your creations. Until then, happy cooking, and Merry Christmas from my kitchen to yours!
Frequently Asked Questions
Can I make the pancake batter the night before?
I don’t recommend it. The baking powder and baking soda start reacting as soon as they hit the liquid, so the batter will lose its lift overnight. If you want to prep ahead, mix the dry ingredients and wet ingredients separately, then combine them in the morning. It takes 2 minutes.
My pancakes always turn out flat. What am I doing wrong?
This is usually a leavening issue. Check that your baking powder and baking soda are fresh. Also, don’t overmix the batter, and let it rest for 5 minutes before cooking. Finally, make sure your pan is hot enough — a cold pan won’t give you that initial rise.
Can I use pancake mix instead of making from scratch?
Absolutely. Just prepare the pancake mix according to the package instructions, then proceed with the shaping and decorating steps. The flavor won’t be quite as good as homemade, but it will still be festive and fun. Add a teaspoon of vanilla to the mix for better flavor.
How do I keep the whipped cream from melting?
Make sure your pancakes are completely cool before adding the whipped cream, or serve the whipped cream on the side and let everyone add their own. You can also stabilize the whipped cream by adding a tablespoon of instant vanilla pudding mix or cornstarch while whipping.
Can I make these pancakes without a squeeze bottle?
Yes! A squeeze bottle makes it easier, but you can definitely use a small spoon to dollop the batter for the hat. It will be a little less precise, but the pancakes will still look cute. Alternatively, use a zip-top bag with a tiny corner snipped off — it works just as well.
Pin This Recipe!
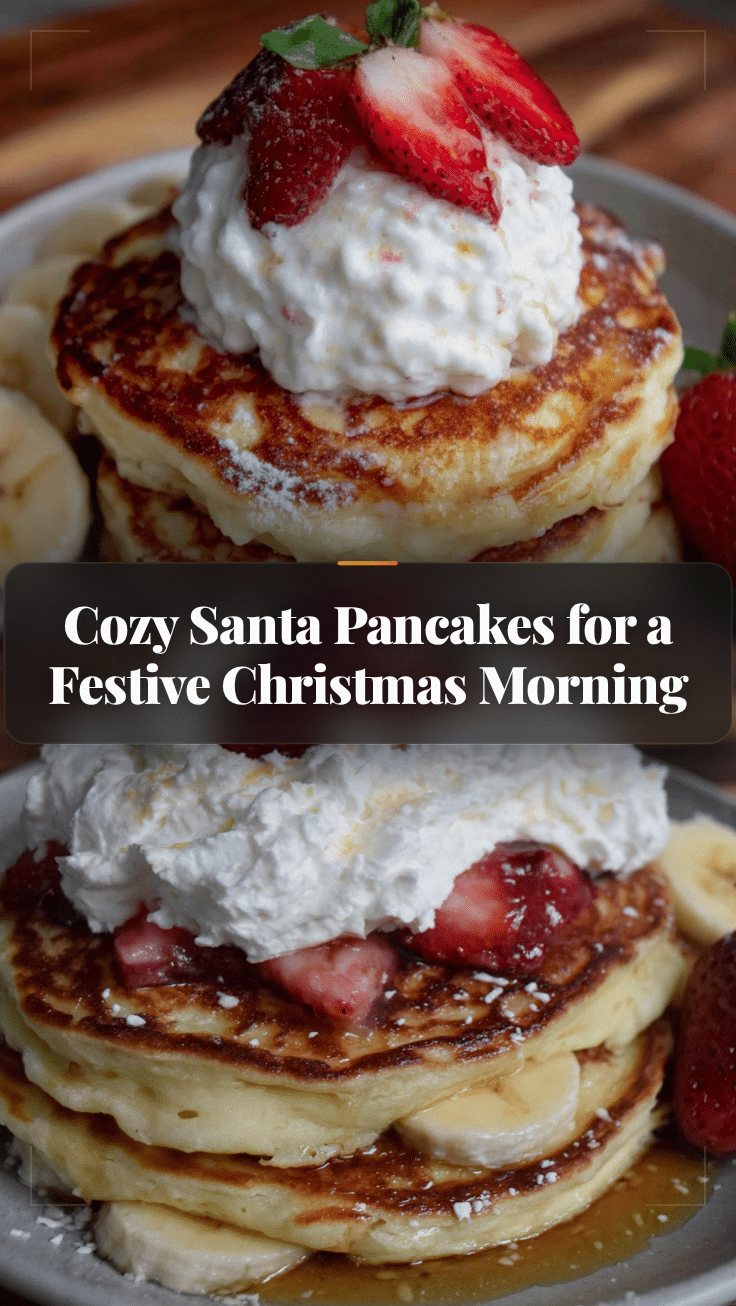
Cozy Santa Pancakes: Easy Christmas Morning Recipe
These festive Santa pancakes are quick, easy, and perfect for a relaxed Christmas morning. Made with simple ingredients and decorated with strawberries, chocolate chips, and whipped cream, they bring joy without the stress.
- Prep Time: 10 minutes
- Cook Time: 10 minutes
- Total Time: 20 minutes
- Yield: 6-8 servings 1x
- Category: Breakfast
- Cuisine: American
Ingredients
- 1 ½ cups (180g) all-purpose flour
- 2 tablespoons (25g) granulated sugar
- 2 teaspoons baking powder
- ½ teaspoon baking soda
- ¼ teaspoon salt
- 1 ¼ cups (300ml) buttermilk (or 1 ¼ cups milk + 1 tablespoon vinegar/lemon juice)
- 1 large egg, room temperature
- 3 tablespoons (42g) unsalted butter, melted, plus more for the pan
- 1 teaspoon vanilla extract
- 4–5 large fresh strawberries
- 1 cup (240ml) heavy whipping cream
- 1 tablespoon powdered sugar
- ¼ cup (45g) mini chocolate chips
- Red sprinkles (optional)
Instructions
- In a large bowl, whisk together flour, sugar, baking powder, baking soda, and salt.
- In a separate bowl, whisk together buttermilk, egg, melted butter, and vanilla extract.
- Pour wet ingredients into dry ingredients and stir gently until just combined (a few lumps are fine). Let batter rest for 5 minutes.
- Heat a non-stick skillet or griddle over medium-low heat for 2-3 minutes. Lightly grease with butter.
- Using a ¼ cup measure, pour a round puddle of batter for Santa’s face. Then add a smaller dollop above for the hat (slightly off-center).
- Cook undisturbed for 2-3 minutes until bubbles form and edges look set. Flip carefully and cook 1-2 minutes more until golden brown.
- Repeat with remaining batter to make 6-8 pancakes.
- While pancakes cook, wash and slice strawberries into thin rounds for the hat and small triangles for the nose.
- Whip heavy cream with powdered sugar until soft peaks form (about 3-4 minutes with a hand mixer).
- Place a warm pancake on a plate. Add a dollop of whipped cream to the top of the hat for the pom-pom.
- Arrange strawberry slices in a triangle on the hat. Place a small strawberry triangle in the center for the nose.
- Add two mini chocolate chips for eyes and a curved line of chips for the smile. Add optional red sprinkles.
- Serve immediately.
Notes
Don’t overmix the batter; lumps are okay. Decorate each pancake immediately after cooking to prevent whipped cream from melting. For best results, keep pancakes warm in a 200°F oven if making a batch. The first pancake is a test—adjust heat if needed.
Nutrition
- Serving Size: 1 pancake
- Calories: 185
- Sugar: 8
- Sodium: 280
- Fat: 7
- Saturated Fat: 4
- Carbohydrates: 26
- Fiber: 1
- Protein: 5
Keywords: Santa pancakes, Christmas breakfast, festive pancakes, easy Christmas recipe, kid-friendly breakfast