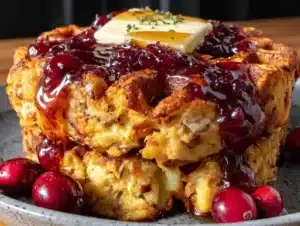
Love this? Save it for later!
Share the inspiration with your friends
I was standing in my kitchen last November, staring into the fridge at a mountain of Thanksgiving leftovers, when the idea hit me—not gently, like a soft suggestion, but hard, like a brick through a window. The stuffing was getting dry. The cranberry sauce was sitting in its bowl, glossy and untouched. And I had this waffle iron I hadn’t used since summer. Honestly, I don’t know why it took me thirty-two years to put these things together. But something about the way the leftover stuffing crumbled between my fingers—dry, savory, begging for a second life—made me think: what if I just… pressed it?
The first waffle was a disaster, let me tell you. I didn’t add enough egg, so it fell apart when I opened the iron. I stood there, spatula in hand, staring at a pile of crumbs that smelled incredible but looked like a crime scene. My neighbor Karen knocked on the door five minutes later, drawn by the smell of sage and butter drifting through the hallway. “What are you making?” she asked, peeking over my shoulder. I told her I wasn’t sure yet. But I was determined.
That’s how these Cozy Leftover Stuffing Waffles with Cranberry Maple Syrup were born—not in a moment of brilliance, but in a moment of stubborn refusal to let good food go to waste. Maybe you’ve been there, standing in front of an open fridge, wondering how to make yesterday’s feast feel exciting again. This recipe is my answer. It’s crispy on the outside, tender on the inside, and the syrup—oh, that syrup—turns leftover cranberry sauce into something you’ll want to put on everything. Trust me, I’ve tried it on pancakes, yogurt, and straight off the spoon.
Why You’ll Love This Recipe
These waffles aren’t just a clever way to use leftovers—they’re a whole new reason to look forward to the day after Thanksgiving. I’ve tested this recipe through three different holiday seasons, tweaking the binder ratios and cooking times until every batch came out golden and intact. Here’s why I think you’ll fall for them too:
- Quick & Easy: From fridge to plate in under 15 minutes. No yeast, no rising time, no complicated steps. Just mix, press, and eat.
- Simple Ingredients: You already have everything in your kitchen. Leftover stuffing, eggs, a little flour if needed, and that jar of cranberry sauce hiding in the back of the fridge.
- Perfect for Post-Holiday Mornings: When you’re tired of turkey sandwiches and want something that feels special without starting from scratch.
- Crowd-Pleaser: I served these at a Friendsgiving brunch and watched three people who claimed they “didn’t like stuffing” go back for seconds. Kids love the waffle shape. Adults love the savory-sweet combo.
- Unbelievably Delicious: The outside gets shatteringly crisp while the inside stays soft and herby. Drizzled with warm cranberry maple syrup, it’s comfort food that makes you close your eyes on the first bite.
What makes this different from other leftover recipes is the texture. Most stuffing casseroles turn soggy. Stuffing pancakes fall apart. But the waffle iron creates this beautiful crust that transforms leftover stuffing into something entirely new—crispy, structured, and absolutely craveable. It’s not just reheating. It’s reinventing.
What Ingredients You Will Need
This recipe uses simple, straightforward ingredients—most of which you’ll already have on hand if you’ve recently made a holiday meal. The beauty here is flexibility: your stuffing can be homemade or boxed, your cranberry sauce can be jellied or whole berry. It all works.
For the Stuffing Waffles
- 3 cups leftover stuffing (homemade or boxed—both work great; if yours is very dry, add an extra egg)
- 2 large eggs, lightly beaten (acts as the binder; for a vegan version, use 2 flax eggs)
- 2 to 3 tablespoons all-purpose flour (or gluten-free flour blend; helps absorb excess moisture and creates structure)
- 1/4 cup chicken or vegetable broth (only if your stuffing seems dry; skip this if your stuffing is already moist)
- 2 tablespoons melted butter or olive oil (for richness and crispy edges; I prefer melted butter for flavor)
- Salt and black pepper to taste (go easy—stuffing is usually well-seasoned already)
For the Cranberry Maple Syrup
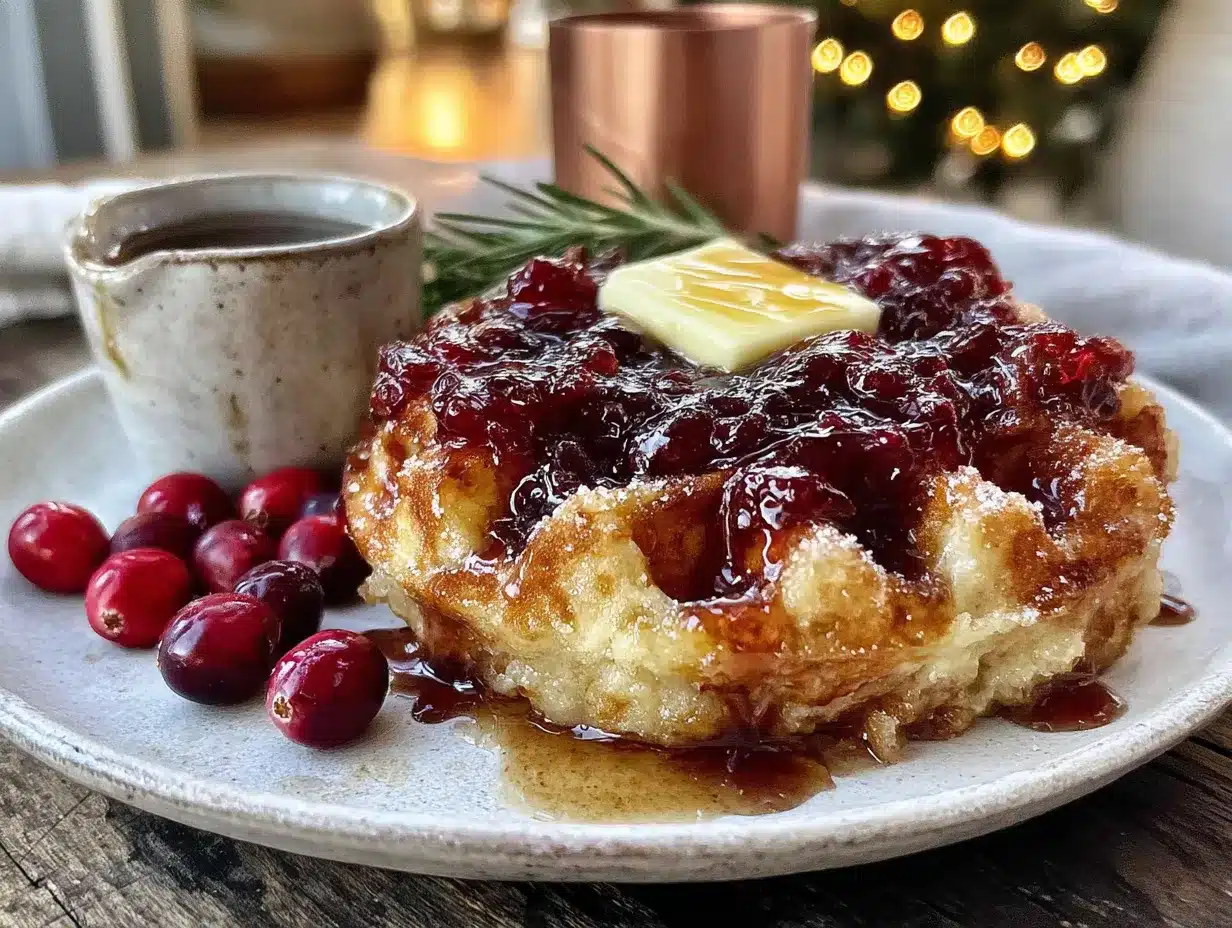
- 1 cup leftover cranberry sauce (jellied or whole berry; I personally love whole berry for texture)
- 1/2 cup pure maple syrup (not pancake syrup—the real stuff makes a difference here)
- 1 tablespoon orange juice (optional, but brightens the flavor beautifully)
- 1/4 teaspoon cinnamon (adds warmth that pairs perfectly with the stuffing herbs)
- Pinch of salt (balances the sweetness)
Optional Garnishes
- Fresh sage or thyme leaves
- Crumbled cooked bacon or sausage
- A pat of butter on top (always a good idea)
- Chopped pecans or walnuts for crunch
I recommend using a stuffing that has some texture—chunks of bread, bits of onion, maybe some celery. The more interesting your stuffing, the more interesting your waffles will be. If you’re using boxed stuffing, look for one with herb seasoning rather than chicken flavor for the best savory profile. And for the cranberry sauce, I’ve had great results with both homemade and canned—just make sure it’s not too watery, or your syrup will be thin.
Equipment Needed
You don’t need much fancy gear for this recipe, which is part of why I love it. Here’s what you’ll want:
- Waffle iron: Any standard waffle iron works. I use a classic round one, but Belgian-style works too—just expect thicker waffles that might need an extra minute. If you don’t have a waffle iron, you can press the mixture in a panini press or even shape it into patties and pan-fry them (they won’t be waffles, but they’ll still be delicious).
- Medium mixing bowl: For combining the stuffing and eggs.
- Small saucepan: For warming the cranberry maple syrup.
- Spatula: A thin, flexible one works best for removing waffles without breaking them.
- Measuring cups and spoons: For the flour and syrup ingredients.
- Pastry brush or paper towel: For greasing the waffle iron.
My first waffle iron was a $15 thrift store find that stuck like crazy. I learned the hard way that nonstick spray isn’t always enough—a good coating of melted butter brushed into the hot iron makes all the difference. If you can afford it, a waffle iron with removable plates makes cleanup so much easier. But honestly, even a basic one will get the job done.
Preparation Method
- Preheat your waffle iron. Set it to medium-high heat. While it’s heating, brush the plates with melted butter or spray with nonstick cooking spray. A well-greased iron is the difference between a beautiful waffle and a tragic mess.
- Prepare the stuffing mixture. In a medium bowl, break up the leftover stuffing with your hands or a fork until it’s in small, even pieces. You want texture, not paste. Add the beaten eggs and stir until everything is well coated. The mixture should hold together when squeezed—if it’s too dry, add a tablespoon of broth at a time. If it’s too wet, add a tablespoon of flour.
- Add the flour and butter. Sprinkle in the flour and drizzle in the melted butter. Mix until just combined. Don’t overmix—you want some texture remaining. Season with a pinch of salt and pepper if needed, but taste first. Most stuffing is already well-seasoned.
- Let the mixture rest. This is a step I learned after my first few failures. Let the mixture sit for 3 to 5 minutes. This allows the bread in the stuffing to absorb the egg, creating a more cohesive batter. You’ll notice it thickens slightly.
- Scoop and spread. Using a 1/2 cup measure, scoop the stuffing mixture onto the center of the hot waffle iron. Gently spread it out with the back of the measuring cup or a spatula. Don’t overfill—leave about 1/2 inch of space around the edges for expansion.
- Cook until golden and crispy. Close the lid and cook for 4 to 6 minutes, depending on your waffle iron. Don’t open it too early—I’ve made that mistake. The waffle is ready when it’s deep golden brown and releases easily from the iron. If it sticks, give it another 30 seconds.
- Remove carefully. Use a thin spatula to gently lift the waffle from the iron. Place it on a wire rack to keep it crispy. Don’t stack them—steam will make them soggy. Repeat with the remaining mixture.
- Make the cranberry maple syrup. While the waffles cook, combine the cranberry sauce, maple syrup, orange juice (if using), cinnamon, and salt in a small saucepan. Warm over medium-low heat, stirring occasionally, until the cranberry sauce melts and the mixture is smooth and bubbly. This takes about 3 to 4 minutes.
- Serve immediately. Place a waffle on a plate, drizzle generously with warm cranberry maple syrup, and add any garnishes you like. I always add a pat of butter and a few fresh sage leaves. The contrast of hot syrup and cold butter is pure magic.
One thing I learned the hard way: don’t walk away from the waffle iron. The difference between perfect and burnt is about 45 seconds. Set a timer if you need to. And if your first waffle comes out less than perfect, eat it anyway—it’s still delicious, and you’ll do better on the next one.
Cooking Tips & Techniques
After making these waffles more times than I care to count—including one memorable attempt where I forgot the eggs entirely and ended up with stuffing crumbles in my waffle iron for a week—I’ve picked up a few tricks that make the process smoother.
Moisture management is everything. Stuffing varies wildly in moisture content. Homemade stuffing with lots of broth will need more flour. Boxed stuffing that’s been sitting in the fridge for two days might be dry and need an extra egg. I always start with the minimum and add more as needed. The mixture should feel like damp sand that holds together when pressed—not wet, not crumbly.
Don’t skip the resting time. I know it’s tempting to rush, but those few minutes allow the bread to absorb the egg fully. Without resting, the waffle is more likely to fall apart when you open the iron. I learned this after my third failed batch. Now I set a timer and walk away.
Temperature matters. If your waffle iron is too hot, the outside will burn before the inside sets. If it’s too cool, the waffle will stick and steam rather than crisp. Medium-high is the sweet spot. Test with a small spoonful of mixture first—it should sizzle immediately when it hits the iron.
Keep waffles warm in the oven. If you’re making a batch for a crowd, preheat your oven to 200°F and place cooked waffles directly on the oven rack. This keeps them crispy without steaming. Do not put them on a plate and cover them with foil—I’ve made that mistake, and the result is sad, soggy waffles.
Double the syrup. Honestly, make extra. It keeps in the fridge for up to two weeks and is incredible on pancakes, oatmeal, yogurt, or even stirred into cocktails. I’ve been known to make a batch just for the syrup and eat it on toast.
Variations & Adaptations
One of the best things about this recipe is how adaptable it is. I’ve made versions that barely resemble the original, and every single one was delicious in its own way.
Gluten-Free Version: Use gluten-free stuffing (many boxed brands offer this now) and substitute the all-purpose flour with a gluten-free blend. I’ve had good results with Bob’s Red Mill 1-to-1 baking flour. The texture is slightly more delicate, so handle the waffles gently.
Vegan Version: Replace the eggs with flax eggs (1 tablespoon ground flaxseed mixed with 3 tablespoons water per egg, let sit for 5 minutes). Use olive oil or vegan butter instead of regular butter. For the syrup, make sure your maple syrup is pure—most are, but check the label. This version works surprisingly well; the flax adds a nice nuttiness.
Savory Breakfast Bowl: Skip the waffle iron entirely. Crumble the stuffing mixture into a hot skillet with a little oil and cook until crispy, stirring occasionally. Top with a fried egg, a drizzle of the cranberry maple syrup, and some crumbled bacon. It’s a deconstructed version that’s perfect for lazy mornings.
Stuffing Waffle Sandwich: Use the waffles as “bread” for a leftover turkey sandwich. Spread a little cranberry sauce on one waffle, pile on sliced turkey and a handful of arugula, and top with another waffle. Press in the waffle iron for 30 seconds to warm through. I made this for lunch the day after Thanksgiving last year and haven’t looked back.
Spicy Maple Syrup: Add a pinch of cayenne pepper or a small chopped jalapeño to the cranberry maple syrup while it warms. The heat cuts through the sweetness beautifully and pairs perfectly with the savory stuffing. My brother-in-law, who puts hot sauce on everything, declared this his favorite version.
Serving & Storage Suggestions
These waffles are best served immediately, hot and crispy, with the warm syrup poured right over the top. The contrast between the crunchy exterior and the soft, herby interior is the whole point. I like to serve them on a warmed plate with a pat of butter melting into the crevices and a sprinkle of fresh thyme or sage leaves on top.
For a complete meal, pair these waffles with a simple side of scrambled eggs or a fresh green salad with a tangy vinaigrette. The acidity cuts through the richness. If you’re serving them for brunch, a mimosa or a hot cup of coffee with a splash of cream is all you need.
Storage: Leftover waffles (if you have any) can be stored in an airtight container in the refrigerator for up to 3 days. To reheat, pop them in a toaster or toaster oven until crispy again—about 3 to 4 minutes on medium heat. The microwave will make them soggy, so avoid it if you can. I’ve also frozen them successfully: wrap each waffle individually in plastic wrap, then place in a freezer bag. They keep for up to 2 months. Reheat directly from frozen in a toaster or oven at 350°F for about 8 minutes.
The syrup keeps beautifully in a jar in the refrigerator for up to 2 weeks. It thickens as it cools, so just warm it gently before serving. I’ve been known to make double batches just to have it on hand for pancakes and oatmeal throughout the week.
One thing I love about these waffles is that the flavors actually improve after a day in the fridge. The herbs meld together, and the texture becomes even more interesting. If you’re planning ahead, make them the night before and reheat them for breakfast—they’re just as good, if not better.
Nutritional Information & Benefits
While these waffles are definitely a treat, they’re not without their redeeming qualities. Here’s a rough estimate per serving (one waffle with about 2 tablespoons of syrup):
- Calories: Approximately 320-380
- Protein: 8-10g
- Carbohydrates: 45-55g
- Fat: 12-16g
- Fiber: 2-4g
- Sugar: 18-22g (mostly from the maple syrup and cranberries)
The stuffing provides complex carbohydrates from the bread, which gives you sustained energy. Cranberries are packed with antioxidants and vitamin C, and the herbs in the stuffing—sage, thyme, rosemary—offer anti-inflammatory properties. If you use whole-grain stuffing, you’ll get more fiber. And the eggs add high-quality protein that helps keep you full.
For those watching their sodium, be mindful of the stuffing you choose. Boxed varieties can be quite salty. Homemade stuffing lets you control the salt level. And if you’re diabetic or watching your sugar intake, you can reduce the maple syrup or use a sugar-free alternative—though I’ll be honest, the real maple syrup is part of what makes this recipe special.
I’m not a nutritionist, and I don’t pretend these are health food. But I do believe that food made with care, shared with people you love, and eaten with joy has its own kind of nutritional value. These waffles are comfort food, and sometimes that’s exactly what we need.
Conclusion
I’ve made these Cozy Leftover Stuffing Waffles with Cranberry Maple Syrup for three Thanksgivings running now, and they’ve become as much a part of the holiday tradition as the turkey itself. There’s something deeply satisfying about taking the odds and ends from a big meal and turning them into something new and exciting—something that doesn’t feel like leftovers at all. The first time I served them, my mom looked at me like I’d lost my mind. After her first bite, she asked for the recipe.
What I love most about this dish is that it’s not precious. It’s forgiving. It adapts to whatever stuffing you have, whatever cranberry sauce you prefer, whatever mood you’re in. You can dress it up with fancy garnishes or eat it straight off the waffle iron with your hands (I’ve done both, no regrets). It’s the kind of recipe that feels like a discovery, even though it’s really just a happy accident born from a fridge full of leftovers.
I’d love to hear how yours turn out. Did you add bacon? Try it with a different syrup? Forget the eggs like I did and learn the hard way? Drop a comment below—I read every single one, and your stories make me smile. And if you make these on the day after Thanksgiving, send a picture. There’s nothing better than knowing someone else is standing in their kitchen, waffle iron hot, turning yesterday’s feast into today’s favorite breakfast.
Now go preheat that waffle iron. You’ve got leftovers waiting for a second chance.
Frequently Asked Questions
Can I use any type of leftover stuffing?
Absolutely. Homemade, boxed, cornbread stuffing, sourdough—they all work. The key is adjusting the moisture level. Drier stuffings need more egg or a splash of broth. Wetter stuffings need a little extra flour. Trust your hands: the mixture should hold together when squeezed.
My waffles fell apart when I opened the iron. What went wrong?
This usually happens for one of three reasons: not enough binder (add another egg next time), not enough resting time (let the mixture sit for 5 minutes), or opening the iron too early (wait until the steam subsides and the waffle releases easily). Don’t get discouraged—my first batch was a crumbly mess, and I still ate every piece.
Can I make these ahead of time?
Yes! Cook the waffles, let them cool completely on a wire rack, then store them in an airtight container in the fridge for up to 3 days. Reheat in a toaster or oven at 350°F until crispy. They also freeze beautifully for up to 2 months.
What if I don’t have a waffle iron?
No problem. Shape the stuffing mixture into patties and pan-fry them in a little butter or oil over medium heat, about 3 to 4 minutes per side, until golden and crispy. They won’t have the classic waffle shape, but they’ll taste just as good. You can also press the mixture in a panini press if you have one.
Can I use the cranberry maple syrup for other things?
Oh, absolutely. I make extra on purpose. It’s incredible on pancakes, French toast, oatmeal, yogurt, ice cream, or even as a glaze for roasted chicken or pork. I’ve stirred it into cocktails and drizzled it over brie. It keeps in the fridge for up to 2 weeks, so make a double batch—you’ll thank me later.
PrintCozy Leftover Stuffing Waffles with Cranberry Maple Syrup

Transform your Thanksgiving leftovers into crispy, golden waffles with a sweet-tart cranberry maple syrup. This quick and easy recipe turns leftover stuffing and cranberry sauce into a comforting breakfast or brunch that feels entirely new.
- Prep Time: 10 minutes
- Cook Time: 15 minutes
- Total Time: 25 minutes
- Yield: 4 servings 1x
- Category: Breakfast, Brunch
- Cuisine: American
Ingredients
- 3 cups leftover stuffing (homemade or boxed)
- 2 large eggs, lightly beaten
- 2 to 3 tablespoons all-purpose flour (or gluten-free flour blend)
- 1/4 cup chicken or vegetable broth (only if stuffing seems dry)
- 2 tablespoons melted butter or olive oil
- Salt and black pepper to taste
- 1 cup leftover cranberry sauce (jellied or whole berry)
- 1/2 cup pure maple syrup
- 1 tablespoon orange juice (optional)
- 1/4 teaspoon cinnamon
- Pinch of salt
- Fresh sage or thyme leaves (optional garnish)
- Crumbled cooked bacon or sausage (optional garnish)
- Butter for serving (optional garnish)
- Chopped pecans or walnuts (optional garnish)
Instructions
- Preheat your waffle iron to medium-high heat. Brush the plates with melted butter or spray with nonstick cooking spray.
- In a medium bowl, break up the leftover stuffing with your hands or a fork until it’s in small, even pieces.
- Add the beaten eggs and stir until everything is well coated. The mixture should hold together when squeezed—if too dry, add broth a tablespoon at a time; if too wet, add flour a tablespoon at a time.
- Sprinkle in the flour and drizzle in the melted butter. Mix until just combined. Season with salt and pepper if needed.
- Let the mixture rest for 3 to 5 minutes to allow the bread to absorb the egg.
- Scoop 1/2 cup of the stuffing mixture onto the center of the hot waffle iron. Gently spread it out, leaving about 1/2 inch of space around the edges.
- Close the lid and cook for 4 to 6 minutes until deep golden brown and the waffle releases easily from the iron.
- Use a thin spatula to gently remove the waffle and place it on a wire rack to keep crispy. Repeat with remaining mixture.
- While waffles cook, combine cranberry sauce, maple syrup, orange juice (if using), cinnamon, and salt in a small saucepan. Warm over medium-low heat, stirring occasionally, until smooth and bubbly, about 3 to 4 minutes.
- Serve waffles immediately with warm cranberry maple syrup and desired garnishes.
Notes
Moisture management is key—stuffing varies in moisture, so adjust with extra flour or broth as needed. Don’t skip the resting time; it helps the waffles hold together. Keep waffles warm in a 200°F oven directly on the rack to maintain crispness. The syrup keeps in the fridge for up to 2 weeks and is great on pancakes, oatmeal, or yogurt.
Nutrition
- Serving Size: 1 waffle with about
- Calories: 350
- Sugar: 20
- Sodium: 600
- Fat: 14
- Saturated Fat: 5
- Carbohydrates: 50
- Fiber: 3
- Protein: 9
Keywords: leftover stuffing waffles, cranberry maple syrup, Thanksgiving leftovers, stuffing waffles, holiday breakfast, leftover recipe