Love this? Save it for later!
Share the inspiration with your friends
I was standing in the produce aisle last November, staring at a pile of Honeycrisp apples, when this specific smell hit me—not from the apples themselves, but from somewhere deeper in the store where they keep the fresh herbs. That sharp, almost piney scent of sage. And just like that, I was seven years old at my neighbor Mrs. Kowalski’s kitchen table, watching her core apples with this little metal tool I thought was the most fascinating thing I’d ever seen. She’d let me crank the handle, and the peel would come off in one perfect spiral. She always made two stuffings for Thanksgiving—her family’s traditional bread version and then this wild card she called “the one with the apples.” Nobody ever called it cornbread stuffing back then. It was just “the one with the apples.”
Honestly, I didn’t get it as a kid. Fruit in stuffing? That seemed wrong somehow. But I remember sneaking bites when she wasn’t looking, and there was something about the way the sweetness of the apple played against that earthy sage that just worked. She passed away a few years ago, and her family stopped hosting the big dinners. So this stuffing? It’s my way of getting that feeling back. Not the exact recipe—I’ve messed with it plenty over the years—but that same sense of surprise when something unexpected turns out perfect.
Maybe you’ve had that moment where a dish just clicks, even though you weren’t sure about it going in. That’s this stuffing for me. It’s savory, sure, but with these little pockets of sweetness from the apple that keep every bite interesting. The cornbread gives it this crumbly, almost tender texture that regular bread stuffing just can’t match. And let me tell you, the sage isn’t shy here—it’s the backbone of the whole thing. I’ve been making this version for about five years now, and it’s become my signature contribution to every fall gathering. I mean, I once forgot the eggs entirely and it still turned out okay. Not great, but okay. That’s how forgiving this recipe is.
Why You’ll Love This Recipe
Look, I’ve tested a lot of stuffing recipes over the years. Some were dry disasters. Others were so soggy they might as well have been soup. This one? It hits that perfect middle ground—moist but not wet, with edges that get just a little crispy if you’re lucky. Here’s why I keep coming back to it:
- Quick & Easy: From start to table in about an hour, and most of that is hands-off baking time. Perfect for when you’re juggling a million other dishes.
- Simple Ingredients: Nothing weird here. Cornbread, apples, sage, onions, celery—stuff you probably already have or can grab without a second thought.
- Perfect for Fall Gatherings: This isn’t just a Thanksgiving thing. I’ve made it for Friendsgiving, Sunday dinners, even a random October potluck where it disappeared in ten minutes.
- Crowd-Pleaser: People who swear they don’t like stuffing? They try this one and suddenly they’re asking for the recipe. The apple-sage combo wins everyone over.
- Unbelievably Delicious: The texture is next-level. The cornbread crumbles just right, the apples soften into these little sweet pockets, and the sage ties it all together like nobody’s business.
What makes this different from every other stuffing recipe out there? Two things. First, I use a mix of day-old cornbread and a handful of toasted breadcrumbs for texture contrast. Second, I sauté the apples with the onions and celery instead of tossing them in raw—this caramelizes them slightly and deepens the whole flavor profile. It’s not just another version. It’s the one I’d serve to anyone who thinks stuffing is boring.
This is the kind of dish that makes you close your eyes after the first bite. It’s comfort food reimagined—familiar enough to feel like home, but with enough personality to feel special. Perfect for impressing guests without stress, or turning a simple weeknight dinner into something memorable.
What Ingredients You Will Need
This recipe uses straightforward ingredients that come together to create something genuinely special. Most of these are pantry staples or easy fall finds. I’ve tested substitutions for just about everything, so don’t stress if you need to swap something.
For the Cornbread Base
- 6 cups day-old cornbread, crumbled into rough pieces (about 1-inch chunks)—homemade is best, but a good bakery version works fine
- 1 cup toasted breadcrumbs (I use panko for extra crunch, but plain works too)
- ½ cup unsalted butter (Kerrygold is my go-to for flavor)
- 2 medium yellow onions, diced (about 2 cups total)
- 3 celery stalks, diced (about 1½ cups)
- 2 medium Honeycrisp or Granny Smith apples, peeled and diced into ½-inch cubes (about 2 cups)
- 3 cloves garlic, minced
For the Seasoning
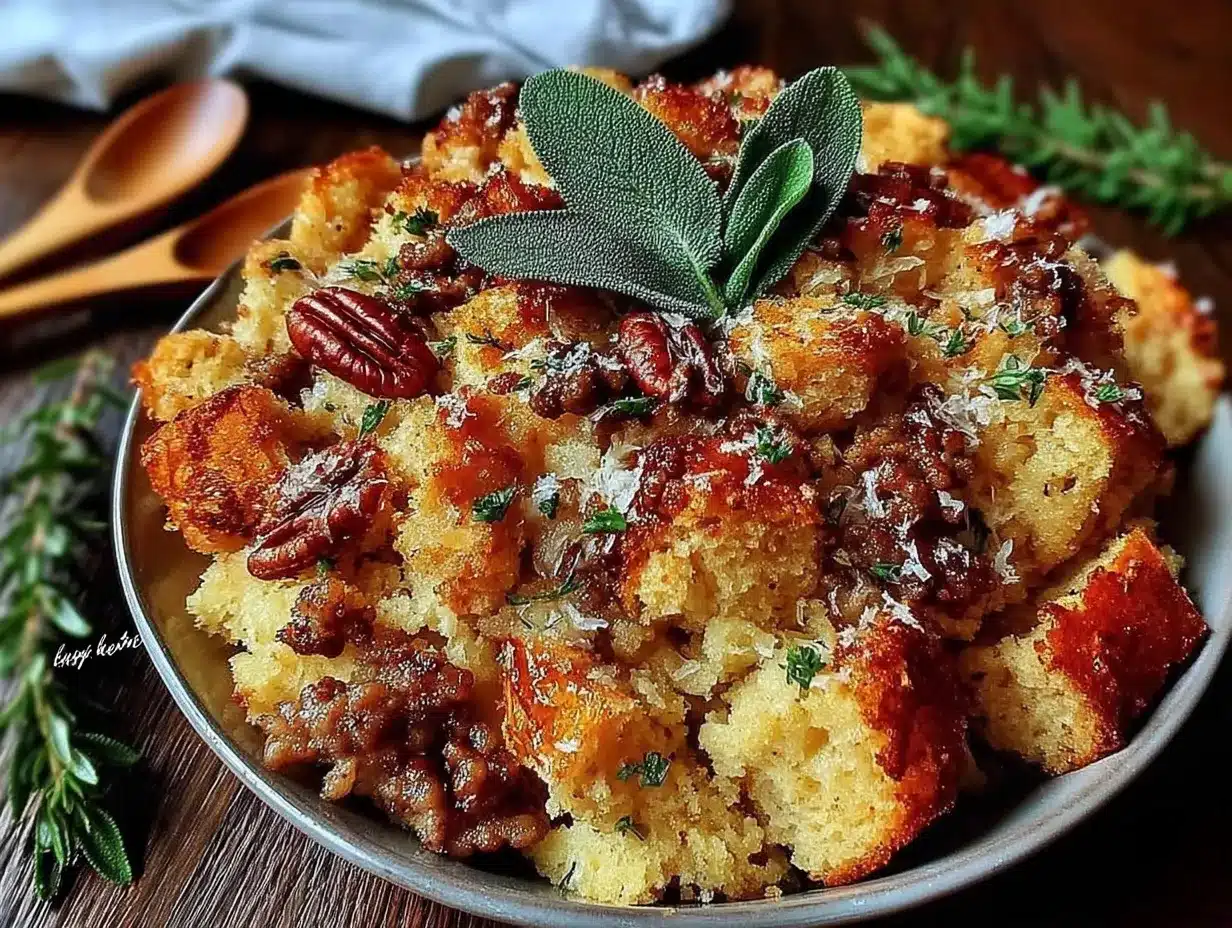
- 3 tablespoons fresh sage, finely chopped (about 15-20 leaves)—don’t even think about using dried here, fresh is non-negotiable
- 1 tablespoon fresh thyme leaves (or 1 teaspoon dried)
- 1 teaspoon kosher salt (Diamond Crystal preferred)
- ½ teaspoon black pepper, freshly ground
- ½ teaspoon smoked paprika (optional, but it adds a lovely warmth)
For the Binding
- 2 large eggs, lightly beaten
- 2 cups low-sodium chicken or vegetable broth (start with 1½ cups and add more if needed)
- ¼ cup heavy cream (or half-and-half for a lighter option)
A quick note on apples: I’ve tested this with Fuji, Gala, and Braeburn. Honeycrisp gives the best balance of sweetness and structure—they hold their shape during cooking without turning to mush. Granny Smith works beautifully if you want a tarter contrast. Just avoid Red Delicious; they get mealy and weird.
For the cornbread, I’m partial to the recipe from Joy the Baker’s website, but Jiffy mix in a pinch works surprisingly well. The key is letting it go stale for at least a day. Fresh cornbread will turn your stuffing into paste, and nobody wants that.
If you’re dairy-free, swap the butter for a good plant-based version and use vegetable broth with a splash of unsweetened oat milk instead of cream. I’ve done it for a friend with allergies and it still came out great—just a little less rich.
Equipment Needed
You don’t need a fancy kitchen for this, but a few specific tools make the process smoother. Here’s what I use:
- 9×13-inch baking dish (or any 3-quart casserole dish)—glass or ceramic works best for even heat distribution
- Large skillet (12-inch preferred) for sautéing the vegetables and apples
- Large mixing bowl for combining everything
- Sharp chef’s knife—a dull knife is actually more dangerous than a sharp one, trust me
- Cutting board (I prefer wood, but plastic is fine)
- Measuring cups and spoons
- Wooden spoon or silicone spatula for stirring
- Aluminum foil for covering during baking
If you don’t have a 9×13 dish, you can use a 10-inch cast iron skillet. Just adjust the baking time by about 5 minutes since cast iron holds heat differently. I actually prefer the cast iron method sometimes—the edges get extra crispy. Also, if you don’t have a large skillet, just sauté the veggies in batches. It adds a few minutes but doesn’t hurt the final result.
One tip: invest in a good microplane or zester if you don’t have one. I use mine for garlic all the time now, and it makes mincing feel like cheating.
Preparation Method
Let’s get cooking. This comes together in about an hour, with about 20 minutes of active work. The rest is baking time, which means you can clean up or start on another dish.
- Preheat your oven to 375°F (190°C). Position the rack in the middle. While it’s heating, spread your crumbled cornbread and breadcrumbs on a baking sheet and toast them for 8-10 minutes. This step isn’t strictly necessary, but it prevents sogginess and adds a nutty flavor that makes a real difference.
- Melt the butter in your large skillet over medium heat. Let it foam up a bit, then add the diced onions and celery. Cook for 6-8 minutes, stirring occasionally, until the onions are translucent and starting to brown at the edges. You want them soft but not mushy—they’ll continue cooking in the oven.
- Add the diced apples and minced garlic to the skillet. Cook for another 4-5 minutes, stirring gently. The apples should soften slightly but still hold their shape. You’ll notice the kitchen starting to smell amazing at this point—that’s the butter and apple caramelizing together.
- Stir in the fresh sage, thyme, salt, pepper, and smoked paprika. Cook for 1 minute until fragrant. Don’t skip this step—raw herbs don’t release their full flavor. Letting them bloom in the hot butter is what makes the stuffing taste so layered.
- Transfer the vegetable-apple mixture to a large mixing bowl. Add the toasted cornbread and breadcrumbs. Toss gently with your hands or a spatula to combine. Be careful not to overmix—you want some texture, not a paste.
- In a separate small bowl, whisk together the eggs, chicken broth, and heavy cream. Pour this over the cornbread mixture. Stir gently until everything is evenly moistened. The mixture should look wet but not soupy—if it’s too dry, add another ¼ cup of broth. If it’s swimming in liquid, add a handful more breadcrumbs.
- Transfer the stuffing to your greased 9×13 baking dish. Spread it into an even layer. Don’t press it down—you want some air pockets for texture.
- Cover with foil and bake for 25 minutes. Then remove the foil and bake for another 15-20 minutes, until the top is golden brown and crispy. The internal temperature should reach 165°F (74°C) if you want to be precise.
- Let it rest for 5-10 minutes before serving. This lets the stuffing set so it doesn’t fall apart when you scoop it. I know it’s hard to wait, but trust me on this one.
A few notes I’ve learned the hard way: if your stuffing looks dry halfway through baking, drizzle a little extra broth over the top before covering it back up. If the top is browning too fast, tent with foil. And whatever you do, don’t open the oven every five minutes to check on it—the temperature drops and messes with the cooking time.
Cooking Tips & Techniques
I’ve made this stuffing probably two dozen times at this point, and I’ve messed it up in almost every way possible. Here’s what I’ve learned:
The cornbread matters more than you think. I once used fresh, still-warm cornbread because I was in a hurry. The stuffing turned into a dense, gluey brick. You need day-old cornbread that’s dried out enough to absorb the liquid without falling apart. If you forgot to plan ahead, cut your cornbread into cubes and spread them on a baking sheet in a 300°F oven for 10-15 minutes.
Don’t skip the toasting step. I know it seems fussy, but toasting the cornbread and breadcrumbs before mixing gives them structure. They’ll hold up better during baking and won’t turn to mush. Plus, the extra browning adds flavor you just can’t get any other way.
Season as you go. I used to dump all the salt in at the end, and the stuffing always tasted flat. Now I season the vegetables while they cook, the breadcrumbs while they toast, and the liquid mixture before pouring. Layering the seasoning makes every bite taste intentional.
The biggest mistake I see people make? Overmixing. You’re not making meatloaf. Stir just until everything comes together, then stop. Overworking the mixture breaks down the cornbread and creates a dense, heavy stuffing instead of a light, fluffy one.
If you’re making this ahead of time, assemble everything up to step 6, then cover and refrigerate for up to 24 hours. Add about 10 minutes to the baking time since you’re starting from cold. I’ve done this for Thanksgiving prep and it works like a charm.
For extra crispy edges, bake the stuffing uncovered for the entire time, but keep an eye on it. If the top starts to burn, tent with foil for the last 10 minutes. I prefer it this way, honestly—those crunchy bits are the best part.
Variations & Adaptations
This recipe is flexible in ways that might surprise you. Here are some variations I’ve tried and loved:
Savory Sausage Version
Brown 1 pound of breakfast or Italian sausage (casings removed) in the skillet before cooking the vegetables. Remove the sausage, cook the veggies in the rendered fat (skip the butter), then crumble the sausage back in at step 5. This adds a meaty, savory depth that’s incredible for a main dish stuffing.
Vegetarian & Vegan Adaptation
Use vegetable broth and replace the eggs with a flax egg (1 tablespoon ground flaxseed mixed with 3 tablespoons water per egg, let sit for 5 minutes). Swap the butter for olive oil or a plant-based butter. The texture will be slightly less rich, but still delicious. I’ve served this to a vegan friend who asked for seconds.
Gluten-Free Option
Use gluten-free cornbread (homemade or store-bought) and gluten-free breadcrumbs. Most cornbread is naturally gluten-free, but check the label—some mixes contain wheat flour. Everything else in the recipe is gluten-free, so this is an easy swap.
Herb Variations
Not a sage fan? Swap it for 2 tablespoons fresh rosemary or 3 tablespoons fresh dill. I tried a rosemary-apple version last fall and it was surprisingly good—more piney, less earthy. You can also add ½ cup dried cranberries or chopped pecans for extra texture and sweetness.
Slow Cooker Method
Prepare the stuffing through step 6, then transfer to a greased slow cooker. Cook on low for 3-4 hours or high for 1½-2 hours. The texture will be softer and less crispy, but it’s perfect for potlucks where oven space is limited.
My personal favorite variation? Adding crispy bacon bits on top during the last 10 minutes of baking. It’s not fancy, but it adds this salty crunch that plays beautifully against the sweet apples. I won’t tell anyone if you try it.
Serving & Storage Suggestions
This stuffing is best served warm, straight from the oven. The top should be golden and slightly crispy, with steam rising when you scoop into it. I like to serve it alongside roasted turkey or chicken, but honestly, it’s hearty enough to be the star of the show with a simple green salad on the side.
What to serve with it:
- Roasted turkey or chicken (obvious but perfect)
- Cranberry sauce—the tartness cuts through the richness
- Roasted Brussels sprouts or green beans
- A simple arugula salad with lemon vinaigrette
- Mashed potatoes or roasted sweet potatoes
Storage: Leftover stuffing keeps in an airtight container in the refrigerator for up to 4 days. The flavors actually meld together overnight, so day-two stuffing is often even better than day-one. I’ve been known to eat it cold straight from the fridge, and I’m not ashamed.
Freezing: You can freeze the unbaked stuffing for up to 3 months. Assemble through step 6, transfer to a freezer-safe dish, wrap tightly in plastic wrap and foil, and freeze. Thaw overnight in the refrigerator, then bake as directed, adding 10-15 minutes to the cooking time. Baked stuffing also freezes well—just reheat covered in a 350°F oven until warmed through.
Reheating: The best way to reheat is in a 350°F oven, covered with foil, for 15-20 minutes. If you’re in a hurry, microwave individual portions for 1-2 minutes, but the texture won’t be quite as nice. For crispy leftovers, reheat in a skillet over medium heat with a splash of broth, stirring occasionally.
One thing I’ve noticed: the stuffing gets drier as it sits, so when reheating, add a tablespoon or two of broth per serving to bring back some moisture. It makes a noticeable difference.
Nutritional Information & Benefits
Here’s the approximate nutritional breakdown per serving (based on 8 servings):
| Nutrient | Amount |
|---|---|
| Calories | 320 |
| Total Fat | 16g |
| Saturated Fat | 9g |
| Cholesterol | 75mg |
| Sodium | 580mg |
| Total Carbohydrates | 38g |
| Dietary Fiber | 3g |
| Sugars | 10g |
| Protein | 7g |
This stuffing has a few surprising health benefits. Apples are packed with fiber and vitamin C, and sage has anti-inflammatory properties that have been used in traditional medicine for centuries. The onions and garlic provide prebiotics that support gut health. Plus, using cornbread instead of white bread adds more fiber and a lower glycemic impact.
For a lighter version, you can reduce the butter to ¼ cup and use low-sodium broth. The flavor will still be great—just a little less rich. I’ve also made it with turkey or chicken sausage for extra protein without adding too much fat.
If you’re watching your sodium, use unsalted butter and low-sodium broth, and reduce the added salt to ½ teaspoon. The herbs provide plenty of flavor without the extra salt.
Conclusion
This savory apple sage cornbread stuffing is the kind of recipe that becomes a tradition. It’s forgiving enough for beginners but impressive enough for holiday tables. The combination of sweet apples, earthy sage, and crumbly cornbread is something you’ll find yourself craving long after the last serving is gone.
I love how this recipe lets you make it your own. Add sausage, go vegetarian, throw in some cranberries—it’s hard to mess up. The first time I made it for my family, my picky uncle asked for seconds, and that’s when I knew I had something special. It’s become my go-to for every fall gathering, and I hope it becomes yours too.
If you try this recipe, let me know how it turns out! Leave a comment below or tag me in your photos—I genuinely love seeing your versions. And if you come up with a variation I haven’t tried, share it. That’s how recipes evolve and become part of someone else’s story.
Happy cooking, friends. May your stuffing be crispy on top, moist in the middle, and gone before you know it.
Frequently Asked Questions
Can I make this stuffing ahead of time?
Absolutely. Assemble the stuffing completely, cover it, and refrigerate for up to 24 hours. When you’re ready to bake, add about 10 minutes to the cooking time since you’re starting from cold. The flavor actually gets better as it sits.
Can I use dried sage instead of fresh?
I really don’t recommend it for this recipe. Fresh sage has a bright, slightly peppery flavor that dried sage just can’t match. If you’re in a pinch, use 1 tablespoon of dried sage, but the result won’t be as vibrant. Fresh herbs are worth the extra effort here.
How do I prevent my stuffing from getting soggy?
Two things: make sure your cornbread is day-old and toasted, and don’t overdo the liquid. Start with 1½ cups of broth and add more only if the mixture looks dry. Also, baking uncovered for the last 15-20 minutes helps evaporate excess moisture and creates that crispy top.
Can I use a different type of apple?
Yes, but stick with firm, tart-sweet varieties. Honeycrisp, Granny Smith, Fuji, and Braeburn all work well. Avoid Red Delicious and McIntosh—they break down too quickly and can make the stuffing mushy.
Is this stuffing gluten-free?
It can be! Use gluten-free cornbread and gluten-free breadcrumbs. Most cornbread is naturally gluten-free, but always check the label. Everything else in the recipe is gluten-free, so it’s an easy adaptation.
PrintEasy Savory Apple Sage Cornbread Stuffing Recipe

This savory apple sage cornbread stuffing combines sweet apples, earthy sage, and crumbly cornbread for a perfect fall side dish. It’s moist but not wet, with crispy edges and a flavor that will win over even stuffing skeptics.
- Prep Time: 20 minutes
- Cook Time: 40 minutes
- Total Time: 1 hour
- Yield: 8 servings 1x
- Category: Side Dish
- Cuisine: American
Ingredients
- 6 cups day-old cornbread, crumbled into rough pieces (about 1-inch chunks)
- 1 cup toasted breadcrumbs (panko preferred)
- ½ cup unsalted butter
- 2 medium yellow onions, diced (about 2 cups)
- 3 celery stalks, diced (about 1½ cups)
- 2 medium Honeycrisp or Granny Smith apples, peeled and diced into ½-inch cubes (about 2 cups)
- 3 cloves garlic, minced
- 3 tablespoons fresh sage, finely chopped (about 15–20 leaves)
- 1 tablespoon fresh thyme leaves (or 1 teaspoon dried)
- 1 teaspoon kosher salt
- ½ teaspoon black pepper, freshly ground
- ½ teaspoon smoked paprika (optional)
- 2 large eggs, lightly beaten
- 2 cups low-sodium chicken or vegetable broth (start with 1½ cups)
- ¼ cup heavy cream (or half-and-half)
Instructions
- Preheat your oven to 375°F (190°C). Position the rack in the middle. Spread the crumbled cornbread and breadcrumbs on a baking sheet and toast them for 8-10 minutes.
- Melt the butter in a large skillet over medium heat. Add the diced onions and celery. Cook for 6-8 minutes, stirring occasionally, until the onions are translucent and starting to brown at the edges.
- Add the diced apples and minced garlic to the skillet. Cook for another 4-5 minutes, stirring gently, until the apples soften slightly but still hold their shape.
- Stir in the fresh sage, thyme, salt, pepper, and smoked paprika. Cook for 1 minute until fragrant.
- Transfer the vegetable-apple mixture to a large mixing bowl. Add the toasted cornbread and breadcrumbs. Toss gently to combine.
- In a separate small bowl, whisk together the eggs, chicken broth, and heavy cream. Pour this over the cornbread mixture. Stir gently until everything is evenly moistened.
- Transfer the stuffing to a greased 9×13 baking dish. Spread it into an even layer. Do not press it down.
- Cover with foil and bake for 25 minutes. Then remove the foil and bake for another 15-20 minutes, until the top is golden brown and crispy. The internal temperature should reach 165°F (74°C).
- Let it rest for 5-10 minutes before serving.
Notes
For best results, use day-old cornbread and toast it before mixing. Don’t overmix the stuffing. If making ahead, assemble up to step 6, cover, and refrigerate for up to 24 hours; add 10 minutes to baking time. For extra crispy edges, bake uncovered the entire time but watch for burning. Reheat leftovers in a 350°F oven with a splash of broth.
Nutrition
- Serving Size: 1 serving (about 1 c
- Calories: 320
- Sugar: 10
- Sodium: 580
- Fat: 16
- Saturated Fat: 9
- Carbohydrates: 38
- Fiber: 3
- Protein: 7
Keywords: cornbread stuffing, apple sage stuffing, Thanksgiving stuffing, fall side dish, savory stuffing, easy stuffing recipe