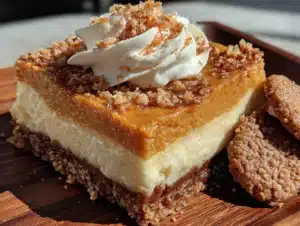
Love this? Save it for later!
Share the inspiration with your friends
I was supposed to be making a pumpkin roll. You know, that classic, perfectly swirled dessert everyone fawns over at holiday gatherings? I had the cream cheese softening, the pumpkin puree measured, and my grandmother’s jelly roll pan greased and ready. Then my three-year-old decided to “help” by handing me the box of gingersnaps instead of the graham crackers I’d asked for. I was already running late, the baby was crying, and honestly? I just grabbed the box and figured I’d make it work. What came out of that oven was absolutely nothing like the plan.
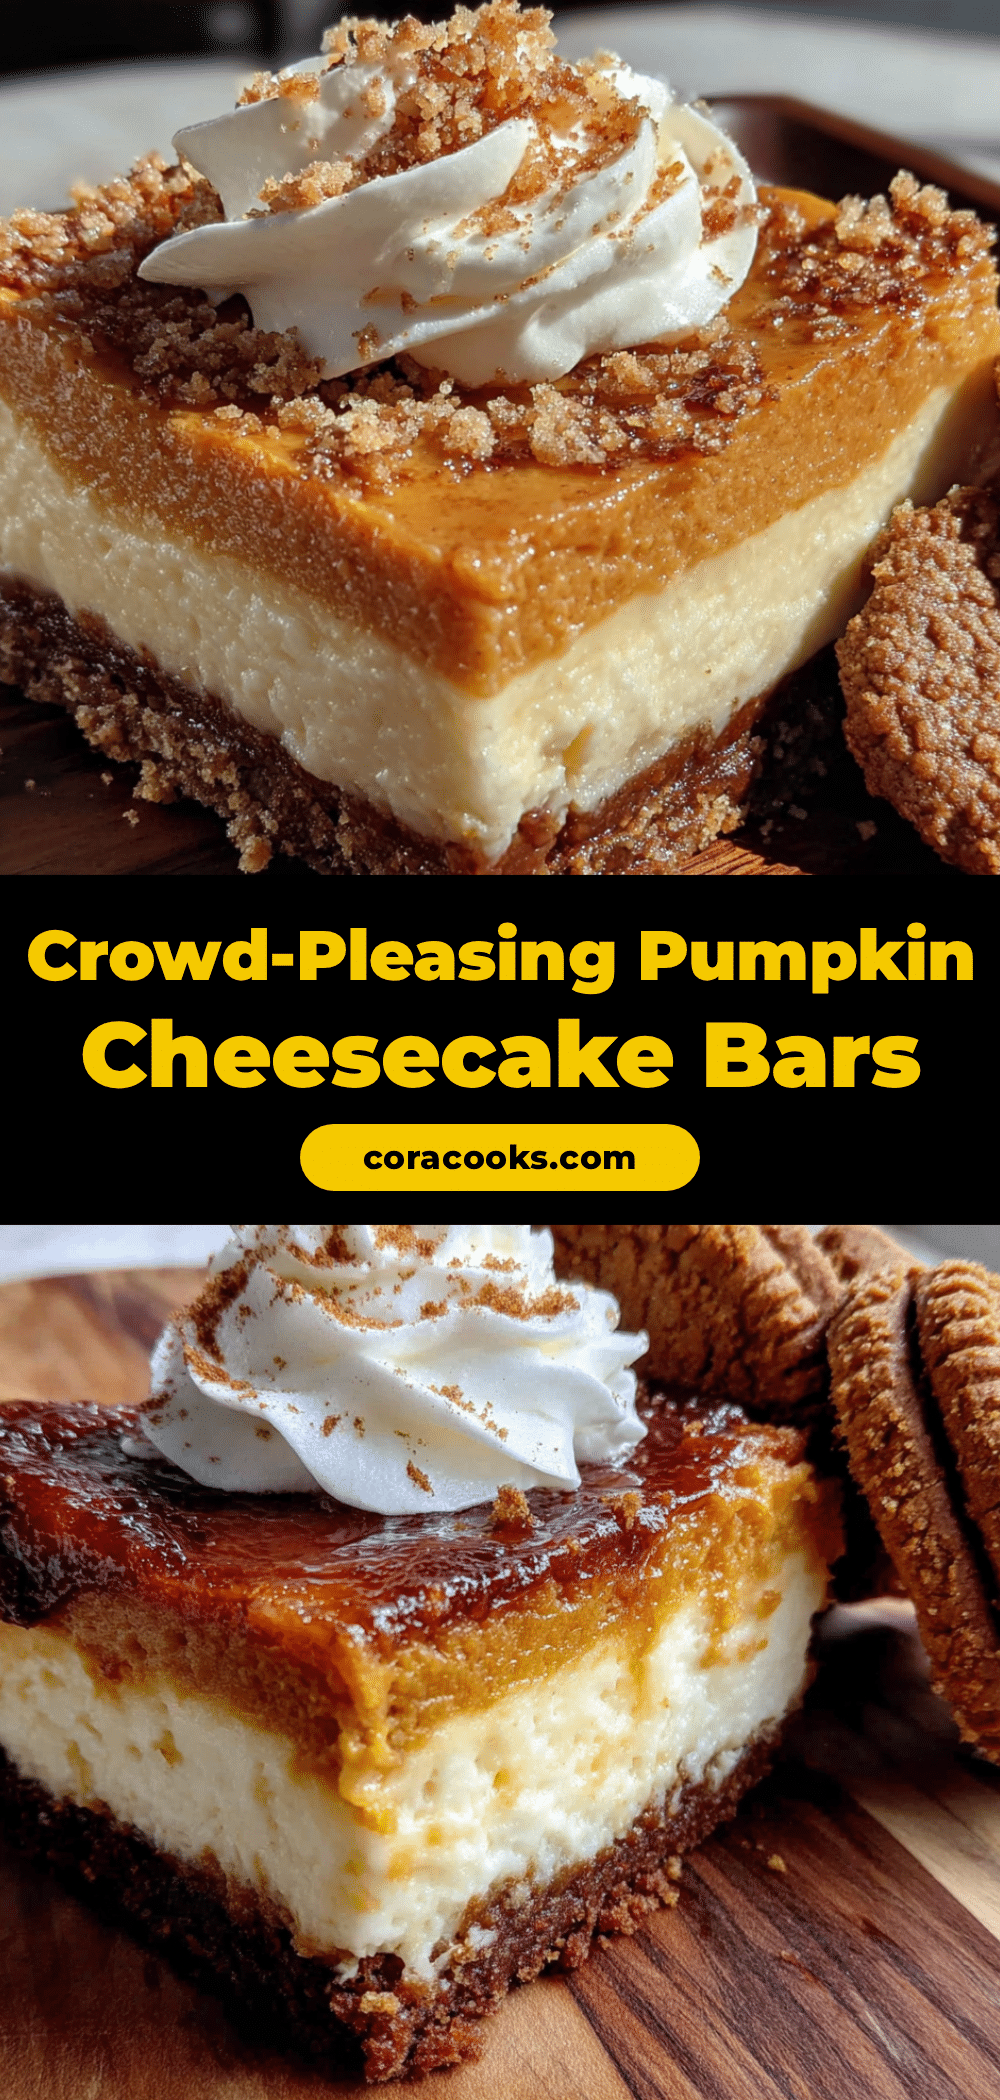
These pumpkin cheesecake bars with a gingersnap crust were born from that moment of pure kitchen chaos. I spread the gingersnap crumbs into the pan, poured the cheesecake filling on top, and crossed my fingers. The first bite? Let me tell you, I actually stopped mid-chew. The spicy, molasses-rich crunch of the crust paired with the silky, spiced pumpkin cheesecake was better than any pumpkin roll I’d ever made. I mean, I’d spent years perfecting that roll, and this accidental bar was blowing it out of the water. Maybe you’ve been there—the recipe you didn’t plan becomes the one everyone begs you to bring to every single gathering. That’s this bar.
I’ve made these bars for Thanksgiving, for Halloween parties, for random Tuesday nights when I needed a little fall comfort. They’re the reason I stopped stressing about perfect spirals and started embracing happy accidents. The gingersnap crust isn’t just a substitute—it’s the star, adding a warmth that plain graham crackers could never dream of. And the cheesecake layer? It’s dense, creamy, and just sweet enough to balance that pumpkin spice kick. This recipe stayed with me because it taught me something: sometimes the best dishes come from the moments you let go of control. And honestly, that’s a pretty good lesson for life, too.
Why You’ll Love This Recipe
These pumpkin cheesecake bars have earned a permanent spot in my holiday rotation, and for good reason. They’re the perfect balance of “wow, you made this?” and “I can totally do this again.” Let me break down exactly why you’ll fall for them.
- No-Bake Filling, Easier Than You Think: While the crust bakes, you mix the filling. It’s that simple. No water baths, no fussy techniques. I’ve tested this more times than I can count, and it comes out perfect every single time.
- Simple Ingredients, Big Flavor: You probably have most of these in your pantry right now. Canned pumpkin, cream cheese, eggs, sugar, and a box of gingersnaps. No fancy trips to specialty stores needed.
- Perfect for Hosting a Crowd: This is the dessert you make when you’re hosting a dinner party or a potluck. It slices cleanly, travels well, and looks stunning on a platter. I’ve brought these to Friendsgiving, and they disappeared before the turkey was carved.
- Crowd-Pleaser Guaranteed: Kids love the creamy, sweet filling. Adults love the sophisticated gingersnap crunch. Even the picky eaters at my table go back for seconds. It’s the dessert that gets the “can I have the recipe?” text the next day.
- Unbelievably Delicious: The texture is what gets me every time. That buttery, spiced crust against the velvety, cool cheesecake filling. It’s comfort food reimagined—familiar but somehow better than you remembered.
What makes these bars different from every other pumpkin cheesecake bar out there? It’s the crust. Using gingersnaps instead of graham crackers adds a deep, molasses warmth that perfectly complements the pumpkin pie spice. I’ve tried it with homemade gingersnaps and store-bought, and honestly, the store-bought ones work beautifully. It’s my best version because it’s forgiving, it’s flavorful, and it’s the kind of dessert that makes you close your eyes after the first bite. Perfect for impressing guests without the stress.
What Ingredients You Will Need
This recipe uses simple, wholesome ingredients that come together to create something truly special. I’ve tested these proportions to make sure every bite is balanced and delicious.
For the Gingersnap Crust
- 2 cups (about 8 ounces) crushed gingersnap cookies: I recommend Nabisco or Anna’s ginger thins for consistent texture. You can crush them in a food processor or by hand in a sealed bag with a rolling pin.
- 1/4 cup (50g) granulated sugar: Just a touch to sweeten the crust without overpowering the ginger.
- 6 tablespoons (85g) unsalted butter, melted: Use real butter here—it makes a huge difference in flavor and helps the crust hold together. Let it cool slightly before mixing.
- 1/4 teaspoon salt: Balances the sweetness and enhances the spice.
For the Pumpkin Cheesecake Filling
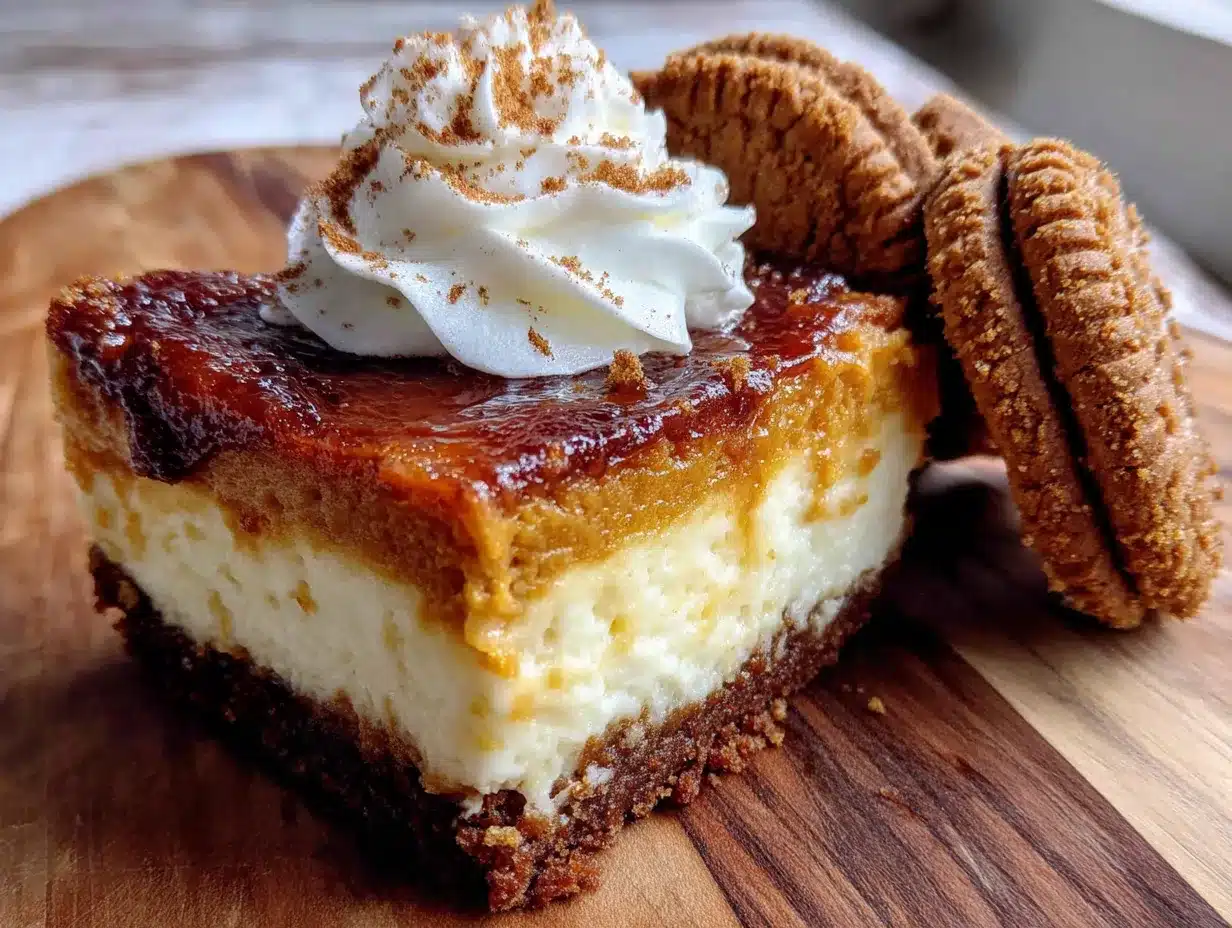
- 16 ounces (two 8-ounce blocks) cream cheese, softened: Full-fat cream cheese is non-negotiable here for that rich, creamy texture. Let it sit at room temperature for at least 30 minutes before starting.
- 3/4 cup (150g) granulated sugar: Sweetens the cheesecake without making it cloying.
- 1 cup (245g) canned pumpkin puree: Not pumpkin pie filling! Make sure you grab the plain puree. Libby’s is my go-to brand for consistent moisture content.
- 3 large eggs, room temperature: Room temperature eggs blend more smoothly into the batter, preventing lumps. If you’re short on time, place them in a bowl of warm water for 5 minutes.
- 1 teaspoon vanilla extract: Pure vanilla extract adds depth. Avoid imitation if you can.
- 1 teaspoon pumpkin pie spice: You can use store-bought or make your own with cinnamon, nutmeg, ginger, and cloves.
- 1/2 teaspoon ground cinnamon: For an extra layer of warmth.
- 1/4 teaspoon salt: Enhances all the flavors.
For the Topping (Optional but Recommended)
- 1 cup (240ml) heavy cream: For making fresh whipped cream. Cold cream whips up best.
- 2 tablespoons powdered sugar: Sweetens the cream without making it grainy.
- 1/2 teaspoon vanilla extract: A must for flavor.
- Crushed gingersnaps or candied pecans for garnish: Adds a lovely crunch on top.
Ingredient Substitution Note: If you’re gluten-free, use gluten-free gingersnaps and a gluten-free all-purpose flour blend in place of the crust. For a dairy-free option, use vegan cream cheese and a plant-based butter substitute. I’ve tested both, and they work well, though the texture is slightly less rich.
Equipment Needed
You don’t need a fancy kitchen to make these bars. Here’s what I use every time:
- 9×13-inch baking pan: This is the perfect size for a crowd. A metal pan works best for even baking. Glass pans can work, but you may need to add a few minutes to the bake time.
- Parchment paper: Line your pan with it, leaving some overhang on the sides. This makes lifting the bars out a breeze. I learned this the hard way after a sticky pan disaster.
- Food processor or rolling pin: For crushing the gingersnaps. A food processor is faster, but a sealed zip-top bag and a rolling pin work just fine. I’ve used both methods.
- Electric hand mixer or stand mixer: For beating the cream cheese until smooth. A hand mixer is totally fine—I actually prefer it for this recipe because it’s less cleanup.
- Large mixing bowls: One for the crust, one for the filling.
- Rubber spatula: For scraping down the sides of the bowl and spreading the filling evenly.
- Measuring cups and spoons: Accuracy matters here, especially for the spices.
Budget-Friendly Tip: If you don’t have a food processor, crush the cookies in a bag with a heavy pan or rolling pin. It’s a little more elbow grease, but it works perfectly. I’ve done it many times when my processor was in the dishwasher.
Preparation Method
Let’s get baking! I’ve broken this down into clear steps so you can follow along without any stress.
Step 1: Preheat and Prepare the Pan
Preheat your oven to 350°F (175°C). Line a 9×13-inch baking pan with parchment paper, leaving about 2 inches of overhang on the long sides. This will be your “handle” to lift the bars out later. Lightly grease the parchment with a little butter or cooking spray.
Step 2: Make the Gingersnap Crust
In a food processor, pulse the gingersnap cookies until they become fine crumbs. You should have about 2 cups. Transfer the crumbs to a medium bowl. Add the sugar and salt, and stir to combine. Pour in the melted butter and mix with a fork until all the crumbs are evenly moistened. The mixture should look like wet sand and hold together when you squeeze it.
Press the mixture firmly and evenly into the bottom of your prepared pan. Use the bottom of a measuring cup or a flat glass to really pack it down. A well-packed crust is key—it prevents crumbling when you cut the bars. Bake for 10 minutes, then remove from the oven and let it cool slightly while you make the filling. Leave the oven on.
Step 3: Make the Pumpkin Cheesecake Filling
In a large mixing bowl, beat the softened cream cheese with an electric mixer on medium speed until it’s smooth and creamy, about 2 minutes. Scrape down the sides of the bowl with a rubber spatula. Add the sugar and beat for another minute until well combined and fluffy.
Add the pumpkin puree, vanilla extract, pumpkin pie spice, cinnamon, and salt. Beat on low speed until just combined. Don’t overmix here—you don’t want to incorporate too much air into the batter, which can cause cracks.
Add the eggs one at a time, beating on low speed after each addition until just incorporated. Scrape down the bowl after each egg. The batter will be smooth and a beautiful orange color. It should look thick but spreadable.
Step 4: Assemble the Bars
Pour the pumpkin cheesecake filling over the pre-baked crust. Use your spatula to spread it evenly to the edges. Give the pan a gentle tap on the counter to release any air bubbles. The filling should be perfectly level.
Step 5: Bake to Perfection
Bake for 35 to 40 minutes, or until the edges are set and the center is just slightly jiggly when you gently shake the pan. A toothpick inserted into the center should come out mostly clean with a few moist crumbs. The top might have a tiny crack or two—that’s totally normal and adds character.
Remove from the oven and place the pan on a wire rack to cool completely at room temperature, about 1 hour. Then, cover the pan with plastic wrap and refrigerate for at least 4 hours, but overnight is best. This chilling time is crucial for clean slices. I know it’s hard to wait, but trust me on this.
Step 6: Slice and Serve
Once fully chilled, use the parchment overhang to lift the entire block of cheesecake bars out of the pan. Place it on a cutting board. Use a sharp knife to slice into 24 bars (6 rows by 4 rows). For clean cuts, wipe the knife clean between each slice. Serve cold or at room temperature, topped with whipped cream and a sprinkle of crushed gingersnaps.
Cooking Tips & Techniques
Over the years, I’ve made a few mistakes so you don’t have to. Here are my best tips for perfect bars every time.
Don’t Overmix the Filling: This is the number one mistake I see. Overmixing incorporates too much air, which causes the cheesecake to puff up and then crack as it cools. Mix on low speed and stop as soon as everything is combined. A few streaks are fine—they’ll bake out.
Room Temperature Ingredients Are Non-Negotiable: Cold cream cheese creates lumps that are nearly impossible to smooth out. Take it out of the fridge 30 to 45 minutes before you start. Same goes for the eggs. I’ve tried to rush this step, and I always end up with a lumpy batter. Learn from my impatience.
Pack the Crust Firmly: A loose crust will crumble when you cut the bars. Use the bottom of a measuring cup or a flat glass to really press it down. I even use my fingers to press the edges into the corners. It’s worth the extra minute.
Chill Overnight for Best Results: I know you want to dig in, but the bars need time to set properly. Four hours is the minimum, but overnight gives you those clean, beautiful slices that look like they came from a bakery. The flavors also meld together overnight, making every bite more delicious.
Use a Sharp Knife for Slicing: A dull knife will drag through the cheesecake and ruin the edges. Run your knife under hot water, dry it, and slice. Wipe the blade clean between each cut. This takes a little extra time, but the result is worth it.
Watch the Bake Time: Ovens vary, so start checking at 30 minutes. The edges should be set and slightly puffed, but the center should still have a slight wobble. It will continue to set as it cools. Overbaking leads to a dry, cracked cheesecake.
Variations & Adaptations
One of the best things about this recipe is how versatile it is. Here are some ways I’ve adapted it over the years.
Gluten-Free Version
Use gluten-free gingersnap cookies for the crust. I’ve tested this with several brands, and they all work well. Just make sure the rest of your ingredients (like the vanilla extract) are certified gluten-free. The filling is naturally gluten-free, so this is an easy swap.
Dairy-Free Version
Substitute the cream cheese with a high-quality vegan cream cheese, like Kite Hill or Miyoko’s. Use a plant-based butter for the crust. The texture will be slightly less dense, but the flavor is still fantastic. I’ve served this to dairy-free friends, and they couldn’t tell the difference.
Pumpkin Spice Latte Twist
Add 1 tablespoon of instant espresso powder dissolved in 1 teaspoon of hot water to the filling. This gives the bars a subtle coffee flavor that pairs beautifully with the pumpkin and ginger. I tried this on a whim one morning, and it’s become my secret-weapon variation for adult gatherings.
Mini Bar Option
Press the crust into a mini muffin tin (lined with paper liners) and fill with the cheesecake batter. Bake for 15 to 18 minutes. These are perfect for parties and potlucks. I made these for a bridal shower, and they were gone in minutes.
Chocolate Drizzle
After the bars have chilled, melt 1/2 cup of dark chocolate chips with 1 teaspoon of coconut oil and drizzle over the top. The chocolate adds a rich, bitter contrast to the sweet, spiced filling. It’s an extra step, but it makes the bars look incredibly elegant.
Serving & Storage Suggestions
These bars are best served cold, straight from the fridge. The texture is firm and creamy, and the crust stays perfectly crunchy. If you prefer a softer texture, let them sit at room temperature for 10 to 15 minutes before serving. I like to serve them on a large platter with a generous dollop of whipped cream and a sprinkle of crushed gingersnaps or candied pecans.
What to Serve Alongside: These bars pair beautifully with a cup of hot coffee, a spiced chai latte, or even a glass of cold milk. For a full dessert spread, serve them alongside a warm apple crisp or a plate of chocolate truffles. The combination of creamy and crunchy is always a hit.
Storage Instructions: Store any leftover bars in an airtight container in the refrigerator for up to 5 days. The flavors actually deepen after a day or two, so don’t be afraid to make them ahead. I’ve even frozen them successfully. Wrap individual bars in plastic wrap, then place them in a freezer-safe bag. They’ll keep for up to 3 months. Thaw overnight in the fridge before serving.
Reheating Tips: I don’t recommend reheating these bars—they’re meant to be served cold. But if you want a warm dessert, pop a single bar in the microwave for 10 seconds. The crust will soften slightly, and the filling will become almost pudding-like. It’s a different experience, but still delicious.
Flavor Development: I’ve noticed that these bars taste even better on day two. The spices in the filling meld with the gingersnap crust, creating a deeper, more complex flavor. So if you’re planning a party, make these a day ahead. Your guests will thank you.
Nutritional Information & Benefits
Here’s the approximate nutritional breakdown for one bar (based on 24 servings):
- Calories: 245
- Fat: 16g
- Saturated Fat: 9g
- Carbohydrates: 22g
- Sugar: 15g
- Protein: 4g
- Fiber: 1g
- Sodium: 210mg
Health Benefits: Pumpkin is packed with vitamin A, which is great for eye health and immune function. It’s also a good source of fiber, which helps with digestion. The cream cheese provides calcium and protein, making this a more balanced dessert option. Of course, it’s still a treat, but you can feel a little better about that second slice.
Dietary Considerations: This recipe contains dairy, eggs, and gluten (from the gingersnaps). For a gluten-free version, use gluten-free cookies. For a dairy-free version, use vegan cream cheese and plant-based butter. I’ve tested both, and they work beautifully.
Personal Wellness Perspective: I believe in balance. These bars are a celebration dessert—something to enjoy at a gathering with friends and family. I don’t stress about the calories or the sugar. Instead, I focus on the joy of sharing something homemade and delicious. Life is too short to skip dessert.
Conclusion
These pumpkin cheesecake bars with a gingersnap crust are more than just a dessert—they’re a testament to the beauty of kitchen accidents. What started as a frantic substitution has become my most-requested recipe, the one I’m asked to bring to every fall gathering. The spicy, buttery crust paired with the creamy, spiced filling is a combination that just works. It’s comfort food at its finest, and it’s surprisingly simple to make.
I encourage you to play with this recipe. Try the chocolate drizzle, experiment with different spices, or make a batch of mini bars for your next party. The beauty of this recipe is its flexibility. It’s forgiving, it’s delicious, and it’s guaranteed to impress. Whether you’re hosting a Thanksgiving dinner or just craving a taste of fall, these bars are the answer.
I’d love to hear how yours turn out! Leave a comment below with your favorite variation, or tag me in your photos on social media. Don’t forget to pin this recipe for later and share it with your friends. Happy baking, and remember: sometimes the best recipes come from the moments you least expect them.
Frequently Asked Questions
Can I use fresh pumpkin instead of canned?
Yes, you can use fresh pumpkin puree. Just make sure to roast and puree the pumpkin until it’s very smooth, then drain any excess liquid through a cheesecloth or fine-mesh sieve. Canned pumpkin is more consistent in moisture content, which is why I prefer it for baking.
How do I prevent the crust from getting soggy?
Pre-baking the crust for 10 minutes is the key. This sets the butter and creates a barrier that prevents the wet filling from seeping in. Also, make sure your pumpkin puree isn’t too watery—drain it if necessary.
Can I make these bars ahead of time?
Absolutely! In fact, I recommend it. These bars taste even better after a day in the fridge. You can make them up to 2 days in advance and store them covered in the refrigerator. They’re perfect for stress-free entertaining.
Why did my cheesecake filling crack?
Cracks usually happen from overmixing the batter or overbaking. Mix on low speed and stop as soon as the ingredients are combined. Also, avoid opening the oven door during baking, as the temperature fluctuation can cause cracks. If cracks do appear, don’t worry—the whipped cream topping will hide them beautifully.
Can I freeze these bars?
Yes, they freeze wonderfully. Wrap individual bars tightly in plastic wrap, then place them in a freezer-safe bag. They’ll keep for up to 3 months. Thaw overnight in the fridge before serving. The texture remains creamy and delicious.
Pin This Recipe!
Best Easy Pumpkin Cheesecake Bars with Gingersnap Crust
These pumpkin cheesecake bars with a gingersnap crust are a happy accident turned into a beloved fall dessert. The spicy, buttery crust pairs perfectly with the creamy, spiced pumpkin cheesecake filling for a crowd-pleasing treat.
- Prep Time: 20 minutes
- Cook Time: 40 minutes
- Total Time: 5 hours (includes chilling time)
- Yield: 24 servings 1x
- Category: Dessert
- Cuisine: American
Ingredients
- 2 cups (about 8 ounces) crushed gingersnap cookies
- 1/4 cup (50g) granulated sugar
- 6 tablespoons (85g) unsalted butter, melted
- 1/4 teaspoon salt
- 16 ounces (two 8-ounce blocks) cream cheese, softened
- 3/4 cup (150g) granulated sugar
- 1 cup (245g) canned pumpkin puree
- 3 large eggs, room temperature
- 1 teaspoon vanilla extract
- 1 teaspoon pumpkin pie spice
- 1/2 teaspoon ground cinnamon
- 1/4 teaspoon salt
- 1 cup (240ml) heavy cream
- 2 tablespoons powdered sugar
- 1/2 teaspoon vanilla extract
- Crushed gingersnaps or candied pecans for garnish
Instructions
- Preheat your oven to 350°F (175°C). Line a 9×13-inch baking pan with parchment paper, leaving about 2 inches of overhang on the long sides. Lightly grease the parchment.
- In a food processor, pulse the gingersnap cookies until fine crumbs. Transfer to a medium bowl. Add 1/4 cup sugar and 1/4 teaspoon salt, stir to combine. Pour in melted butter and mix with a fork until all crumbs are evenly moistened.
- Press the mixture firmly and evenly into the bottom of the prepared pan. Bake for 10 minutes, then remove and let cool slightly. Leave the oven on.
- In a large mixing bowl, beat the softened cream cheese with an electric mixer on medium speed until smooth and creamy, about 2 minutes. Scrape down the sides. Add 3/4 cup sugar and beat for another minute until fluffy.
- Add pumpkin puree, 1 teaspoon vanilla extract, pumpkin pie spice, cinnamon, and 1/4 teaspoon salt. Beat on low speed until just combined.
- Add eggs one at a time, beating on low speed after each addition until just incorporated. Scrape down the bowl after each egg.
- Pour the filling over the pre-baked crust. Spread evenly to the edges. Tap the pan gently on the counter to release air bubbles.
- Bake for 35 to 40 minutes, until edges are set and center is slightly jiggly. A toothpick inserted into the center should come out mostly clean with a few moist crumbs.
- Remove from oven and place on a wire rack to cool completely at room temperature, about 1 hour. Then cover with plastic wrap and refrigerate for at least 4 hours, preferably overnight.
- Once fully chilled, use the parchment overhang to lift the bars out of the pan. Place on a cutting board. Slice into 24 bars (6 rows by 4 rows) using a sharp knife, wiping clean between cuts.
- Serve cold or at room temperature, topped with whipped cream and a sprinkle of crushed gingersnaps or candied pecans.
Notes
For clean slices, chill overnight. Use room temperature ingredients for a smooth filling. Pre-baking the crust prevents sogginess. If cracks appear, cover with whipped cream.
Nutrition
- Serving Size: 1 bar
- Calories: 245
- Sugar: 15
- Sodium: 210
- Fat: 16
- Saturated Fat: 9
- Carbohydrates: 22
- Fiber: 1
- Protein: 4
Keywords: pumpkin cheesecake bars, gingersnap crust, fall dessert, Thanksgiving dessert, easy cheesecake bars