Love this? Save it for later!
Share the inspiration with your friends
I wasn’t expecting baking advice from my accountant, but there I was, standing in his driveway last October as he unloaded bags of leaves, telling me exactly how to make the perfect Halloween brownie. Mr. Henderson—who I’d only ever seen in a tie, holding a calculator—had apparently been the neighborhood’s secret baking legend for thirty years. His wife finally ratted him out at the annual block party, and now here he was, sharing his spiderweb technique with someone who could barely frost a cupcake straight. Honestly, I almost laughed when he started. But the man was dead serious about cream cheese and cocoa powder ratios, and let me tell you, I learned something that day.
These Halloween Peanut Butter Spiderweb Brownies are the result of that unexpected driveway tutorial, mixed with about four test batches of my own. Because here’s the thing—Mr. Henderson’s original recipe was good, but it needed to feed a crowd. It needed to look dramatic enough that people stop mid-conversation to grab one. And it absolutely needed that peanut butter layer, because what’s Halloween without a little salty-sweet chaos? I tweaked and burned and scraped failed attempts into the trash until I got it right. The first time I brought these to a friend’s Halloween party, three people asked for the recipe before the night was over. One of them texted me the next morning saying she dreamt about them. I mean, that’s the kind of impact we’re talking about here.
Maybe you’ve been there—staring at Pinterest boards full of complicated Halloween desserts that look amazing but take six hours and a pastry degree. These brownies aren’t that. They’re rich, fudgy, swirled with creamy peanut butter, and topped with a ghostly white spiderweb that makes everyone think you tried way harder than you actually did. The best part? You can make them the night before your party, and they actually get better overnight. That’s the kind of recipe that stays in your rotation year after year.
Why You’ll Love This Recipe
Let me be honest with you—I’ve tested a lot of brownie recipes in my time. Some were too cakey, some were too greasy, and some just didn’t have that wow factor you need for a Halloween gathering. These brownies are different. They’re the result of trial and error, a generous accountant, and a deep love for peanut butter that borders on obsession. Here’s why they work:
- Quick & Easy: From start to finish, these come together in about 45 minutes. The spiderweb design looks fancy, but it’s just a toothpick drag technique anyone can master.
- Simple Ingredients: You probably already have most of these in your pantry. No weird gelatin sheets or obscure extracts needed.
- Perfect for Halloween Parties: They’re portable, they don’t need refrigeration for hours, and they look incredible on a dessert table next to punch bowls and fake spiderwebs.
- Crowd-Pleaser: Kids love the spiderweb design. Adults love the peanut butter-chocolate combo. Everyone loves that they’re not too sweet.
- Unbelievably Delicious: The texture is everything—fudgy brownie base, creamy peanut butter swirl, and a delicate white chocolate web that cracks perfectly when you bite into it.
What makes this recipe different from the dozens of other spiderweb brownies out there? It’s the ratio. Most recipes either skimp on the peanut butter or make the web too thick. I spent three batches getting the cream cheese-to-powdered sugar balance right so the web stays visible but doesn’t overpower the brownie. Plus, I add a tiny pinch of salt to the peanut butter layer that makes the chocolate taste deeper. It’s a chef trick I picked up from a pastry class years ago, and it makes all the difference.
This is the kind of dessert that makes people close their eyes after the first bite. It’s comfort food with a Halloween twist—familiar enough that nobody’s scared to try it, but special enough that it steals the show. Perfect for impressing guests without spending all day in the kitchen, or turning a simple get-together into something memorable.
What Ingredients You Will Need
This recipe uses simple, wholesome ingredients to deliver that rich, fudgy texture and bold peanut butter flavor. Most of these are pantry staples, which means you can whip these up on a whim without a special grocery trip. Here’s what you’ll need:
For the Brownie Base
- 1 cup (226g) unsalted butter, melted and slightly cooled (I use Kerrygold for the richest flavor, but any good butter works)
- 2 cups (400g) granulated sugar (adds sweetness and helps create that crackly top)
- 4 large eggs, room temperature (cold eggs can seize the butter, so let them sit out for 30 minutes)
- 2 teaspoons vanilla extract (pure, not imitation—it really does matter here)
- 1 cup (120g) all-purpose flour (spoon and level it—don’t scoop directly from the bag)
- 3/4 cup (75g) unsweetened cocoa powder (I prefer Ghirardelli or Hershey’s Special Dark for deeper flavor)
- 1/2 teaspoon salt (balances the sweetness and enhances the chocolate)
- 1/2 teaspoon baking powder (gives just enough lift without making them cakey)
For the Peanut Butter Swirl
- 1/2 cup (130g) creamy peanut butter (Jif or Skippy work best—natural peanut butter that separates can make the swirl grainy)
- 4 oz (113g) cream cheese, softened (adds tanginess and helps the swirl hold its shape)
- 1/4 cup (50g) granulated sugar
- 1 large egg yolk (the yolk adds richness without thinning the mixture)
- 1/2 teaspoon vanilla extract
- Pinch of salt (trust me on this—it makes the peanut butter pop)
For the Spiderweb Topping
- 1/2 cup (90g) white chocolate chips (use a good brand like Ghirardelli or Guittard—cheap white chocolate can seize)
- 2 tablespoons (30g) cream cheese, softened (this keeps the web pliable instead of brittle)
- 1/2 cup (60g) powdered sugar, sifted (sifting prevents lumps in your web)
- 1-2 tablespoons milk, as needed (adjust for drizzling consistency)
For the peanut butter swirl, I recommend using a creamy, commercial peanut butter rather than the natural kind that separates. I learned this the hard way when my first test batch came out oily and the swirl just melted into the brownie instead of staying distinct. If you only have natural peanut butter, stir it really well and add an extra tablespoon of powdered sugar to help stabilize it.
If you’re dairy-free, you can substitute the butter with vegan butter and use dairy-free cream cheese. The texture will be slightly less fudgy, but still delicious. For a gluten-free version, swap the all-purpose flour with a 1:1 gluten-free baking blend—I’ve had good results with Bob’s Red Mill.
Equipment Needed
You don’t need a professional bakery setup for these brownies, which is part of their charm. Here’s what you’ll need:
- 9×13-inch baking pan (metal or glass both work, but metal gives a crisper edge)
- Parchment paper (non-negotiable—it makes lifting the brownies out so much easier)
- Large mixing bowl (for the brownie batter)
- Medium mixing bowl (for the peanut butter swirl and web topping)
- Whisk (for combining dry ingredients)
- Spatula (for folding and spreading)
- Hand mixer or stand mixer (for the peanut butter swirl—you can do it by hand, but it’s a workout)
- Toothpick or skewer (for creating the spiderweb design)
- Piping bag or small zip-top bag (for drizzling the web topping)
- Cooling rack (helps the brownies cool evenly)
If you don’t have a piping bag, don’t worry. A small zip-top bag with the corner snipped off works perfectly. I’ve used that method more times than I can count, and honestly, it’s easier to control than a piping bag. Just don’t snip too big of a hole—start small and cut more if needed.
For the pan, I prefer a metal 9×13 because it conducts heat more evenly and gives those slightly chewy edges that everyone fights over. Glass pans work too, but you might need to add 5 minutes to the baking time since glass doesn’t heat up as quickly.
Preparation Method
Alright, let’s get to the fun part. Here’s how to make these crowd-pleasing brownies step by step. Take your time with the spiderweb design—it’s easier than it looks, I promise.
- Preheat your oven to 350°F (175°C). Line your 9×13-inch baking pan with parchment paper, leaving some overhang on two sides. This creates handles so you can lift the brownies out later. Lightly grease the parchment with butter or non-stick spray.
- Make the brownie batter. In a large bowl, whisk together the melted butter and granulated sugar until smooth. It should look like wet sand. Add the eggs one at a time, whisking well after each addition. Stir in the vanilla extract.
- Combine the dry ingredients. In a separate medium bowl, whisk together the flour, cocoa powder, salt, and baking powder. Make sure there are no lumps—cocoa powder can be stubborn. Gradually add the dry ingredients to the wet ingredients, folding gently with a spatula until just combined. Don’t overmix, or your brownies will be tough. The batter will be thick and glossy.
- Spread the batter into the prepared pan. Use your spatula to spread it evenly into all corners. It will be thick, so take your time. If it’s sticking to your spatula, lightly wet it with water.
- Make the peanut butter swirl. In a medium bowl, beat the softened cream cheese and peanut butter together with a hand mixer until smooth. Add the sugar, egg yolk, vanilla extract, and pinch of salt. Beat until everything is combined and creamy. It should be thick but spreadable.
- Drop spoonfuls of the peanut butter mixture over the brownie batter. Use about 8-10 dollops spaced evenly apart. Then, using a butter knife or skewer, gently swirl the peanut butter into the brownie batter. Don’t over-swirl—you want distinct ribbons of peanut butter, not a fully blended mixture. A few figure-eight motions are enough.
- Bake for 25-28 minutes. The edges should look set and slightly pulling away from the pan, but the center should still look slightly underdone. A toothpick inserted into the center should come out with a few moist crumbs—not raw batter. Overbaking is the enemy of fudgy brownies, so err on the side of underdone.
- Cool completely in the pan on a wire rack. This is crucial. If you try to add the spiderweb topping while the brownies are warm, the white chocolate mixture will melt and disappear. Let them cool for at least 1 hour. I usually let them cool completely, then refrigerate for 30 minutes to firm up the peanut butter layer.
- Make the spiderweb topping. In a small microwave-safe bowl, melt the white chocolate chips in 20-second intervals, stirring between each, until smooth. Be careful—white chocolate burns easily. Let it cool for 2 minutes. In a separate bowl, beat the softened cream cheese and powdered sugar until smooth. Stir in the melted white chocolate. Add milk 1 teaspoon at a time until the mixture is thin enough to drizzle but not watery.
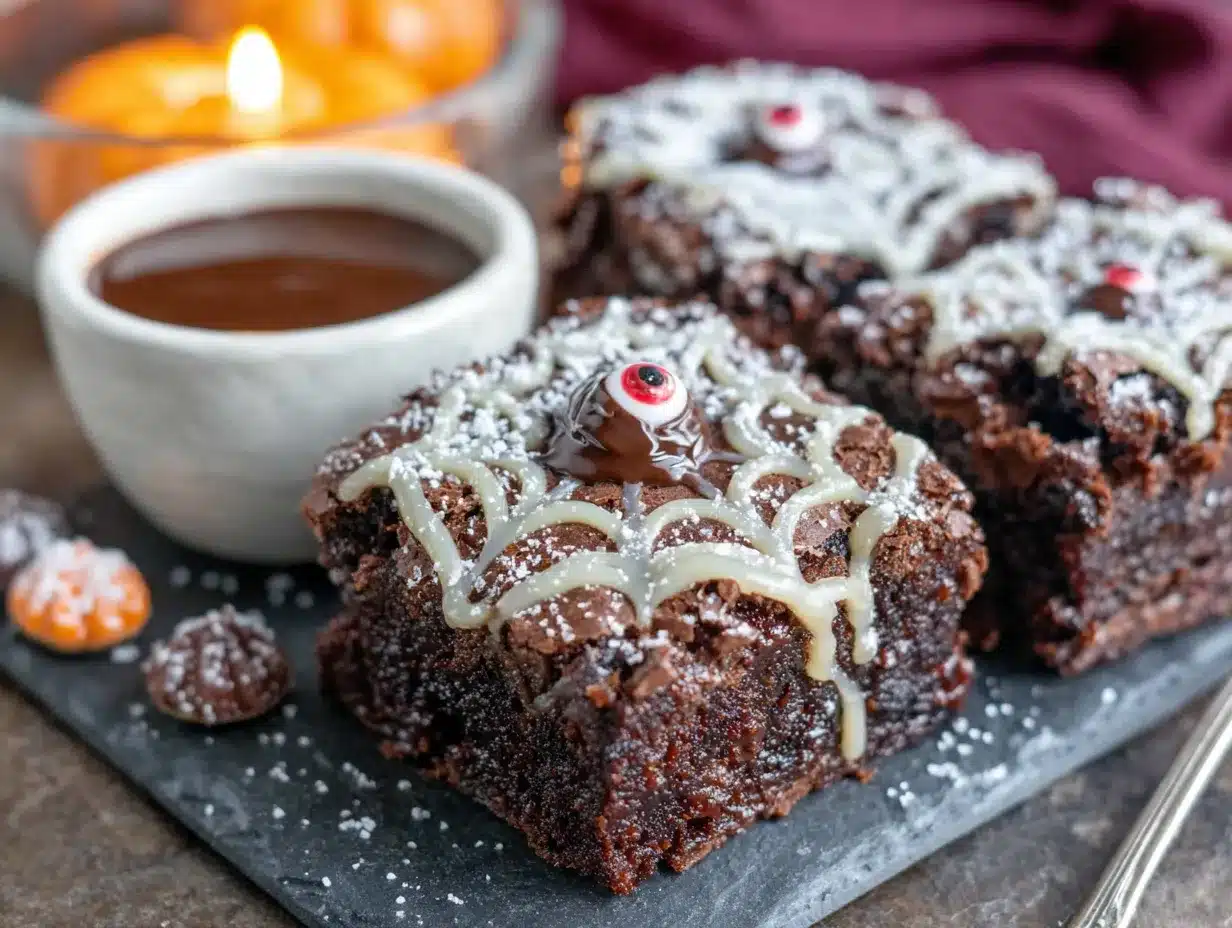
- Create the spiderweb design. Transfer the white chocolate mixture to a piping bag or zip-top bag with a tiny corner snipped off. Pipe a large spiral on top of the cooled brownies, starting from the center and working outward. Then, using a toothpick or skewer, drag lines from the center outward through the spiral, like drawing spokes on a wheel. This creates the classic spiderweb pattern. Wipe the toothpick clean between each line for the best effect.
- Let the topping set. Let the brownies sit at room temperature for about 30 minutes until the web is firm. Or pop them in the fridge for 15 minutes if you’re impatient—I won’t judge.
- Lift the brownies out using the parchment handles. Place them on a cutting board and slice into squares. For clean cuts, wipe the knife clean between each slice. I recommend 24 squares for a crowd, or 16 larger ones if you want to be generous.
A quick warning here—when you’re swirling the peanut butter, resist the urge to go crazy. I ruined my first batch by over-swirling until the peanut butter completely disappeared into the batter. You want distinct pockets of peanut butter flavor, not a uniform mixture. Think of it like creating marble—gentle, deliberate movements.
Cooking Tips & Techniques
After making these brownies about eight times (my neighbors were very happy test subjects), I’ve picked up a few tricks that make the process smoother and the results more consistent. Here’s what I wish someone had told me:
Don’t overmix the brownie batter. This is the number one mistake I see home bakers make. Once you add the flour, mix only until it disappears. Overmixing develops gluten, which makes brownies cakey instead of fudgy. You want that dense, almost gooey texture that feels like a hug in dessert form.
Room temperature ingredients matter. I know, I know—nobody plans ahead that much. But cold eggs can cause the melted butter to seize, creating a grainy texture. Cold cream cheese won’t blend smoothly into the peanut butter swirl. If you forget to take them out of the fridge, place the eggs in a bowl of warm water for 5 minutes, and microwave the cream cheese for 10 seconds on low power.
Use a light hand with the spiderweb. The first time I tried this, I pressed too hard with the toothpick and ended up with a messy blob instead of a web. You want to drag the toothpick gently through the white chocolate spiral—just enough to pull the lines outward. Think of it like drawing on a foggy window, not carving into stone.
Let the brownies cool completely before slicing. I learned this lesson the hard way when I tried to cut warm brownies for a party and ended up with a crumbly mess. Warm brownies are fragile. If you can wait, refrigerate them for an hour before slicing. The peanut butter layer firms up, and you get clean, Instagram-worthy squares.
Timing is everything for a crowd. If you’re making these for a Halloween party, bake them the day before and add the spiderweb topping the morning of. The flavors actually meld together overnight, and the brownies get even fudgier. Plus, you avoid the stress of doing everything on party day. Your future self will thank you.
Variations & Adaptations
One of the best things about this recipe is how adaptable it is. I’ve played around with different variations depending on the occasion and who’s coming over. Here are some of my favorites:
Dark Chocolate Spiderweb Brownies: Swap the regular cocoa powder for Dutch-process cocoa powder for a richer, darker chocolate flavor. The spiderweb stands out even more against the dark background. I did this for a Halloween party last year, and the contrast was stunning.
Nut-Free Version: If you’re serving kids or have guests with allergies, swap the peanut butter for sunflower seed butter (like SunButter) or cookie butter (like Biscoff). The texture is similar, and the flavor is still delicious. Just note that sunflower seed butter can turn green when baked due to a reaction with baking powder—it’s totally safe, just a little surprising if you’re not expecting it.
Gluten-Free Adaptation: Use a 1:1 gluten-free baking flour blend instead of all-purpose flour. I’ve tested this with Bob’s Red Mill and King Arthur Measure for Measure, and both work well. The texture is slightly more delicate, so be gentle when swirling and slicing.
Spooky Color Twist: Add a few drops of orange or purple food coloring to the spiderweb topping for a festive look. I’ve done orange webs for Halloween parties, and they’re always a hit. Just use gel food coloring instead of liquid to avoid thinning the mixture too much.
Extra Crunchy Version: Sprinkle crushed pretzels or chopped peanuts over the peanut butter swirl before baking. The salty crunch pairs beautifully with the fudgy brownie and sweet web. I tried this on a whim one afternoon, and now it’s my go-to for potlucks.
Serving & Storage Suggestions
These brownies are incredibly versatile when it comes to serving. Here’s how I like to present them for maximum impact:
Serving Temperature: Serve them at room temperature for the best texture. The peanut butter swirl is soft and creamy, the brownie base is fudgy, and the spiderweb topping has a slight snap. If you’ve refrigerated them, let them sit out for 20 minutes before serving. For an extra indulgent treat, warm a brownie in the microwave for 10 seconds and top with a scoop of vanilla ice cream. The warm brownie with cold ice cream is pure magic.
Presentation Tips: Arrange the brownies on a black or orange platter for Halloween. Sprinkle a few edible glitter stars or candy eyeballs on top for a spooky touch. I like to place a small fake spider on the corner of the platter as a fun surprise—it always gets a laugh.
What to Serve Alongside: These brownies pair beautifully with a glass of cold milk, a hot apple cider, or a pumpkin spice latte. For an adult gathering, try them with a dark stout beer or a bourbon cocktail. The richness of the brownie stands up well to bold flavors.
Storage Instructions: Store leftover brownies in an airtight container at room temperature for up to 3 days. If your kitchen is warm, refrigerate them to keep the spiderweb topping from getting too soft. They actually taste better on day two—the flavors meld together and the texture becomes even more fudgy. You can also freeze them for up to 3 months. Wrap individual brownies in plastic wrap, then place them in a freezer bag. Thaw at room temperature for about an hour before serving.
Reheating Tips: If you prefer warm brownies, microwave individual squares for 10-15 seconds. The spiderweb topping will soften slightly, but it holds its shape well. For a crowd, you can warm the entire pan in a 300°F oven for 5-7 minutes—just watch carefully so the topping doesn’t melt.
Nutritional Information & Benefits
Let’s be real—these are a treat, not a health food. But I believe in enjoying dessert mindfully, and these brownies have a few redeeming qualities worth mentioning. Here’s the estimated nutritional breakdown per brownie (based on 24 servings):
| Nutrient | Amount Per Serving |
|---|---|
| Calories | 285 |
| Total Fat | 17g |
| Saturated Fat | 9g |
| Carbohydrates | 32g |
| Sugar | 24g |
| Protein | 5g |
| Fiber | 2g |
| Sodium | 150mg |
The peanut butter in this recipe adds a decent amount of protein and healthy fats, which helps balance out the sugar rush. Cocoa powder is rich in antioxidants—specifically flavonoids that support heart health. And while I wouldn’t call these a health food, they’re made with real ingredients, no artificial preservatives, and you control exactly what goes in them.
For dietary considerations: These contain gluten, dairy, eggs, and peanuts. For a nut-free version, use sunflower seed butter. For a dairy-free version, use vegan butter and dairy-free cream cheese. For a gluten-free version, use a 1:1 gluten-free flour blend. Always check labels if you’re serving guests with allergies.
Personally, I believe that dessert should be enjoyed without guilt. One of these brownies with a glass of milk is a perfectly reasonable way to celebrate Halloween. Life’s too short to skip the spiderweb.
Conclusion
These Halloween Peanut Butter Spiderweb Brownies are everything I want in a holiday dessert—impressive enough to steal the show, simple enough to make without stress, and delicious enough that people ask for the recipe before the party’s over. They came from an unexpected source, got better through trial and error, and now they’re a staple in my Halloween rotation.
I love that you can customize them based on your crowd, your allergies, or just your mood. Want a darker chocolate base? Go for it. Need a nut-free version? Easy swap. Feeling extra festive? Add some orange food coloring to the web. This recipe is forgiving, adaptable, and always delivers.
If you make these brownies for your next Halloween gathering, I’d love to hear how they turn out. Drop a comment below with your spiderweb design photos, or tag me on social media so I can see your creations. Did you try a fun variation? Did the kids help with the toothpick dragging? Tell me all about it. And if you’re looking for more crowd-pleasing dessert ideas, check out my Halloween candy bark recipe or these pumpkin cheesecake bars for another festive option.
Happy Halloween, and happy baking! Remember—the spiderweb doesn’t have to be perfect. It just has to be delicious. And trust me, these brownies absolutely are.
Frequently Asked Questions
Can I use natural peanut butter for the swirl?
You can, but I recommend using a commercial creamy peanut butter like Jif or Skippy. Natural peanut butter that separates can make the swirl oily and less distinct. If you only have natural peanut butter, stir it really well and add an extra tablespoon of powdered sugar to help stabilize it.
How do I prevent the spiderweb from melting into the brownies?
The key is letting the brownies cool completely before adding the web. I usually let them cool for at least an hour at room temperature, then refrigerate for 30 minutes. The white chocolate mixture needs a cool surface to set on—if the brownies are even slightly warm, the web will melt and disappear.
Can I make these brownies ahead of time for a party?
Absolutely! In fact, they taste even better the next day. Bake the brownies and add the peanut butter swirl the day before, but wait to add the spiderweb topping until the morning of your party. Store them covered at room temperature. The flavors meld together overnight, and the texture gets even more fudgy.
My brownies came out dry—what went wrong?
The most common culprit is overbaking. Brownies should look slightly underdone in the center when you take them out of the oven—they continue cooking from residual heat. Check them at 25 minutes and look for a toothpick with moist crumbs, not clean. Also, make sure you’re measuring your flour correctly by spooning it into the measuring cup and leveling it off.
Can I freeze these brownies?
Yes, they freeze beautifully. Let the brownies cool completely, then wrap individual squares in plastic wrap and place them in a freezer bag. They’ll keep for up to 3 months. Thaw at room temperature for about an hour before serving. The spiderweb topping might soften slightly, but it still looks great.
Pin This Recipe!
Halloween Peanut Butter Spiderweb Brownies: Easy Crowd-Pleasing Dessert
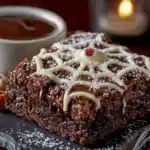
Rich, fudgy brownies swirled with creamy peanut butter and topped with a ghostly white chocolate spiderweb. An easy, impressive Halloween dessert that comes together in about 45 minutes and tastes even better the next day.
- Prep Time: 15 minutes
- Cook Time: 28 minutes
- Total Time: 45 minutes
- Yield: 24 servings 1x
- Category: Dessert
- Cuisine: American
Ingredients
- 1 cup (226g) unsalted butter, melted and slightly cooled
- 2 cups (400g) granulated sugar
- 4 large eggs, room temperature
- 2 teaspoons vanilla extract
- 1 cup (120g) all-purpose flour
- 3/4 cup (75g) unsweetened cocoa powder
- 1/2 teaspoon salt
- 1/2 teaspoon baking powder
- 1/2 cup (130g) creamy peanut butter
- 4 oz (113g) cream cheese, softened
- 1/4 cup (50g) granulated sugar
- 1 large egg yolk
- 1/2 teaspoon vanilla extract
- Pinch of salt
- 1/2 cup (90g) white chocolate chips
- 2 tablespoons (30g) cream cheese, softened
- 1/2 cup (60g) powdered sugar, sifted
- 1–2 tablespoons milk
Instructions
- Preheat your oven to 350°F (175°C). Line your 9×13-inch baking pan with parchment paper, leaving some overhang on two sides. Lightly grease the parchment with butter or non-stick spray.
- In a large bowl, whisk together the melted butter and granulated sugar until smooth. Add the eggs one at a time, whisking well after each addition. Stir in the vanilla extract.
- In a separate medium bowl, whisk together the flour, cocoa powder, salt, and baking powder. Gradually add the dry ingredients to the wet ingredients, folding gently with a spatula until just combined. Do not overmix.
- Spread the batter evenly into the prepared pan using a spatula.
- In a medium bowl, beat the softened cream cheese and peanut butter together with a hand mixer until smooth. Add the sugar, egg yolk, vanilla extract, and pinch of salt. Beat until combined and creamy.
- Drop spoonfuls of the peanut butter mixture over the brownie batter (about 8-10 dollops). Using a butter knife or skewer, gently swirl the peanut butter into the brownie batter with a few figure-eight motions. Do not over-swirl.
- Bake for 25-28 minutes. The edges should look set and slightly pulling away from the pan, but the center should still look slightly underdone. A toothpick inserted into the center should come out with a few moist crumbs.
- Cool completely in the pan on a wire rack for at least 1 hour. For best results, refrigerate for 30 minutes to firm up the peanut butter layer.
- In a small microwave-safe bowl, melt the white chocolate chips in 20-second intervals, stirring between each, until smooth. Let cool for 2 minutes.
- In a separate bowl, beat the softened cream cheese and powdered sugar until smooth. Stir in the melted white chocolate. Add milk 1 teaspoon at a time until the mixture is thin enough to drizzle but not watery.
- Transfer the white chocolate mixture to a piping bag or zip-top bag with a tiny corner snipped off. Pipe a large spiral on top of the cooled brownies, starting from the center and working outward.
- Using a toothpick or skewer, drag lines from the center outward through the spiral, like drawing spokes on a wheel. Wipe the toothpick clean between each line.
- Let the topping set at room temperature for about 30 minutes, or refrigerate for 15 minutes.
- Lift the brownies out using the parchment handles. Place on a cutting board and slice into squares. For clean cuts, wipe the knife clean between each slice.
Notes
For the peanut butter swirl, use a commercial creamy peanut butter (like Jif or Skippy) rather than natural peanut butter that separates. Let the brownies cool completely before adding the spiderweb topping to prevent it from melting. The brownies taste even better the next day—bake them ahead and add the web the morning of your party. For clean slices, refrigerate the brownies for an hour before cutting.
Nutrition
- Serving Size: 1 brownie
- Calories: 285
- Sugar: 24
- Sodium: 150
- Fat: 17
- Saturated Fat: 9
- Carbohydrates: 32
- Fiber: 2
- Protein: 5
Keywords: Halloween brownies, peanut butter brownies, spiderweb brownies, fudgy brownies, easy Halloween dessert, crowd-pleasing dessert