Love this? Save it for later!
Share the inspiration with your friends
The neighborhood Halloween potluck was in six hours and I’d completely forgotten. Everyone else would be bringing those Pinterest-perfect mummy hot dogs, bubbling cauldrons of chili, and elaborate spiderweb cakes that probably took them three days. I had a box of instant pudding, a package of Oreos, and a vague memory of something my aunt made once when I was twelve. Honestly, I was this close to just bringing a bag of chips and owning the shame. But then I remembered those little cups of dirt we used to make as kids—the ones with the gummy worms poking out. I figured, how hard could it be to make them look, you know, intentional? I mean, really, the bar was low. I was just hoping no one would notice I’d basically thrown it together in a panic. Let me tell you, the panic was real. I was literally digging through my pantry like a raccoon, muttering to myself. But something clicked when I crushed those Oreos. The texture, the dark crumb, it just looked right. I threw in some extra cream cheese to make the pudding feel a little more grown-up, and before I knew it, I had a tray of these little graveyard scenes. The best part? They were a complete hit. Someone actually asked me for the recipe, and I had to pretend I’d planned it all along. That’s the thing about this Best Graveyard Dirt Pudding Cups with Easy Oreo Crumble—it’s the kind of recipe that makes you look like a hero without breaking a sweat. And honestly, that’s my favorite kind of recipe to share. Maybe you’ve been there, staring at a half-empty pantry and a full-blown panic. This one’s for you.
Why You’ll Love This Recipe
Let’s be real—when you’re hosting a Halloween party or a fall get-together, you want something that looks impressive but doesn’t have you sweating in the kitchen while your guests are having all the fun. These Graveyard Dirt Pudding Cups are exactly that. I’ve tested this version more times than I can count, tweaking the ratios until the pudding was perfectly creamy and the Oreo crumble had that just-right crunch. Here’s why this recipe has become my go-to for every spooky celebration:
– **Quick & Easy:** You can whip these up in about 20 minutes of active time. The hardest part is waiting for the pudding to chill, and honestly, that’s a good excuse to put your feet up before the doorbell starts ringing.
– **Simple Ingredients:** No weird stuff. You probably already have cream cheese, milk, and vanilla in your fridge. The only special purchase is a pack of Oreos and some gummy worms—both of which are easy to find.
– **Perfect for Halloween Parties:** These little cups are made for a crowd. You can serve them in clear plastic cups for a grab-and-go dessert that’s way more fun than a slice of cake.
– **Crowd-Pleaser:** I’ve seen kids scrape the cups clean and adults go back for seconds without shame. The combination of creamy pudding and crunchy Oreo is just… unstoppable.
– **Unbelievably Delicious:** This isn’t your childhood dirt cup. The cream cheese adds a tangy richness that makes it feel like a real dessert, not just a snack.
What makes this version different? I spent a lot of time figuring out the perfect pudding-to-crumb ratio. Too much Oreo and it’s dry; too little and it’s just pudding. I also found that letting the Oreo crumbs sit for a few minutes after crushing them creates a texture that mimics real dirt without being dusty. It’s a small trick, but it makes a world of difference. This isn’t just another recipe—it’s the one that gets requested every single year. It’s comfort food with a spooky twist, and it’s guaranteed to make you the host with the most.
What Ingredients You Will Need
This recipe uses simple, everyday ingredients to create a dessert that feels special without the fuss. The magic is in how they come together—creamy, crunchy, and just a little bit creepy. Here’s everything you’ll need:
– **For the Creamy Pudding Layer:**
– 1 package (3.4 oz) instant vanilla pudding mix (I prefer Jell-O brand for consistent texture)
– 2 cups cold whole milk (adds richness; 2% works in a pinch)
– 8 oz cream cheese, softened to room temperature (this is non-negotiable for that tangy, creamy base)
– 1/4 cup unsalted butter, softened
– 1/2 cup powdered sugar
– 1 teaspoon vanilla extract
– 1 cup heavy whipping cream (for an extra-luscious texture; you can also use 1 cup of Cool Whip if you’re in a hurry)
– **For the Oreo Dirt Crumble:**
– 1 standard package (14.3 oz) Oreo cookies (about 36 cookies)
– 2 tablespoons melted butter (helps the crumbs clump slightly, giving them a more “dirt-like” texture)
– **For Decoration & Assembly:**
– 12-15 gummy worms (I like the sour ones for a tangy contrast)
– 12 small clear plastic cups (5-7 oz size works perfectly)
– Optional: small sprigs of fresh rosemary to look like “dead trees” or candy pumpkins for a harvest twist
**Ingredient Tips from My Kitchen:** I’ve found that using full-fat cream cheese is crucial here—the low-fat version makes the pudding layer a bit too thin. Also, don’t skip letting the cream cheese come to room temperature. I made that mistake once and ended up with lumpy pudding. Not a good look for a Halloween dessert. For the Oreos, I’ve tried the double-stuf version, but I actually prefer the classic ones for this recipe. The extra cream filling in double-stuf makes the crumble stickier and less “dirt-like.” If you want a gluten-free option, use gluten-free chocolate sandwich cookies—they work beautifully.
Equipment Needed
You don’t need a fancy kitchen to pull this off. Here’s what I use, along with a few alternatives if you’re missing something:
– **Electric hand mixer or stand mixer:** Essential for getting the cream cheese and butter smooth. A whisk and some elbow grease will work, but your arm will thank you for using a mixer.
– **Large mixing bowls:** You’ll need at least two—one for the pudding and one for crushing Oreos.
– **Rolling pin or food processor:** For crushing the Oreos. I use a rolling pin and a zip-top bag because I like the uneven texture it creates. A food processor makes finer crumbs if you want a smoother “dirt.”
– **Measuring cups and spoons:** Precision matters, especially for the pudding mix.
– **Spatula:** For scraping every last bit of that creamy goodness.
– **Small clear plastic cups:** These are key for the visual effect. I buy them at the dollar store in packs of 20. You can also use small mason jars or even shot glasses for a party appetizer version.
**My Personal Experience:** I used to hate crushing Oreos by hand—it always felt messy. Then I discovered the rolling pin trick. Put the cookies in a sturdy zip-top bag, push out the air, and go to town. It’s oddly satisfying and gives you control over the crumb size. For the mixer, I’ve used a $20 hand mixer for years and it works perfectly. Don’t feel pressured to buy expensive equipment for this recipe.
Preparation Method
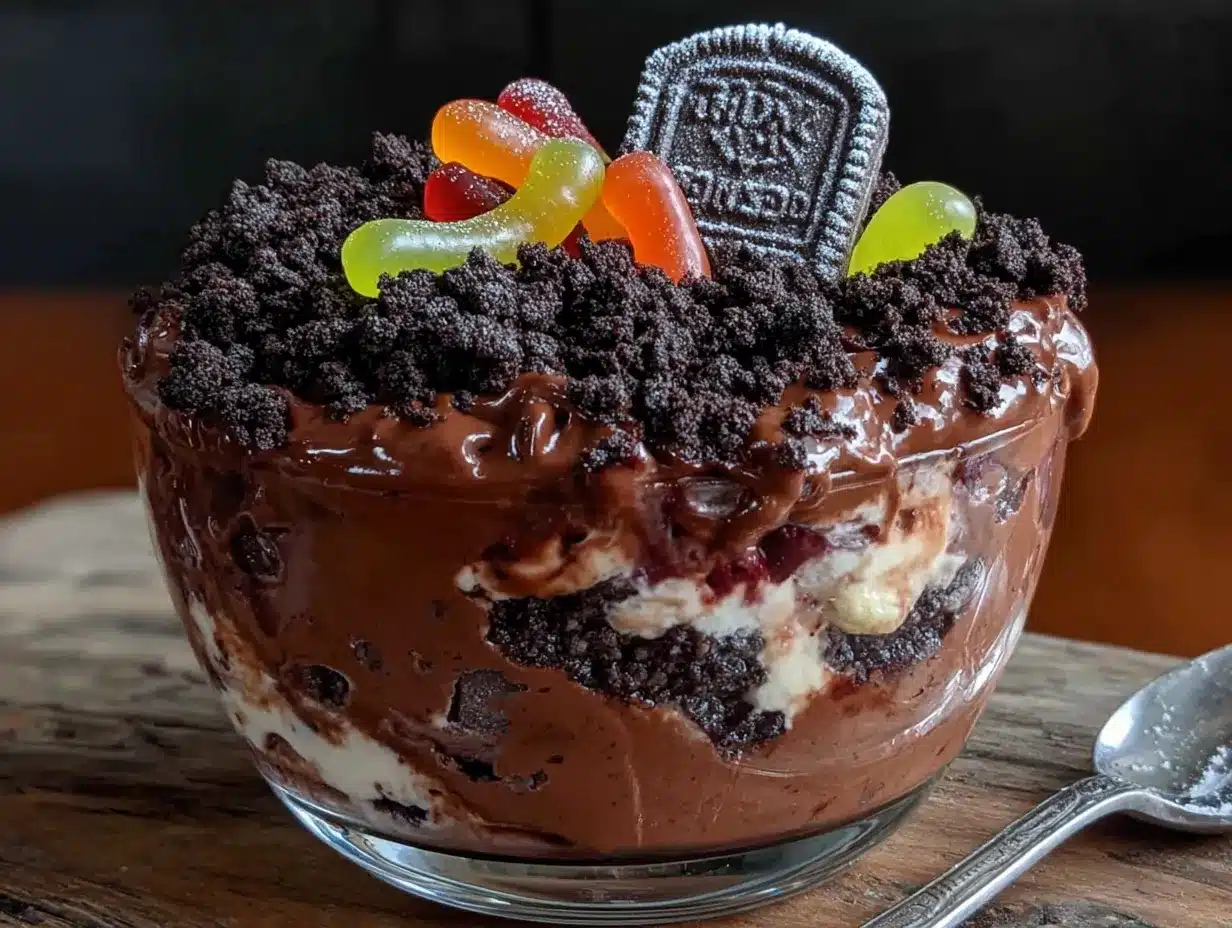
This recipe comes together in layers, and that’s part of the fun. Here’s how I do it, step by step.
1. **Make the Oreo Dirt Crumble:** Place all 36 Oreo cookies (cream filling and all) into a large zip-top bag. Seal it tightly, pressing out the air. Using a rolling pin, crush the cookies into fine crumbs. You want a mix of fine powder and tiny chunks—that’s what gives it the “dirt” texture. Transfer the crumbs to a medium bowl and stir in the 2 tablespoons of melted butter. Mix with a fork until the butter is evenly distributed. Set aside.
2. **Prepare the Cream Cheese Base:** In a large mixing bowl, beat the softened cream cheese and 1/4 cup softened butter together with an electric mixer on medium speed until smooth and fluffy, about 2 minutes. Add the 1/2 cup powdered sugar and 1 teaspoon vanilla extract. Beat again until well combined, scraping down the sides of the bowl with a spatula as needed.
3. **Make the Pudding:** In a separate bowl, whisk together the instant vanilla pudding mix and 2 cups of cold whole milk. Whisk vigorously for about 2 minutes until the pudding starts to thicken. It will still be a bit loose—that’s okay. Let it sit for 2-3 minutes to set up slightly.
4. **Combine and Whip:** Pour the thickened pudding into the cream cheese mixture. Beat on medium speed until everything is smooth and creamy, about 1 minute. In a separate small bowl, whip the 1 cup of heavy whipping cream until stiff peaks form (about 3-4 minutes with a mixer). Gently fold the whipped cream into the pudding mixture using a spatula. Fold until no white streaks remain. This step is what makes the filling so light and airy.
5. **Chill the Pudding (Optional but Recommended):** For the best texture, cover the bowl with plastic wrap and refrigerate the pudding mixture for 30 minutes. This makes it easier to layer without everything running together. If you’re in a hurry, you can skip this step—just be a bit gentler when adding the layers.
6. **Assemble the Cups:** Grab your 12 clear plastic cups. Begin by adding 2 tablespoons of the Oreo crumble to the bottom of each cup. Gently press it down with the back of a spoon to create a solid “dirt” base. Next, spoon or pipe the pudding mixture on top, filling each cup about halfway. Add another layer of Oreo crumble—about 1 to 2 tablespoons—on top of the pudding. You want a nice, thick layer of “dirt” on top.
7. **Add the Garnishes:** Poke 2 or 3 gummy worms into the top layer of each cup, letting some of them “escape” over the rim. This is the fun part! If you’re using rosemary sprigs for “dead trees,” stick one into the center of each cup. You can also add a small candy pumpkin or a plastic spider ring for extra flair.
8. **Chill Before Serving:** Place the assembled cups in the refrigerator for at least 1 hour before serving. This allows the flavors to meld and the Oreo crumble to soften just a bit, making it taste even more like real dirt (in the best way possible). The cups will keep in the fridge for up to 2 days.
**A Note from My First Attempt:** The first time I made these, I skipped the chilling step and served them immediately. The pudding was too runny and the crumbs just sank to the bottom. It was a mess. Don’t be like me—give them time to set. Your patience will be rewarded.
Cooking Tips & Techniques
Over the years, I’ve learned a few things that make this recipe foolproof. Here are my best tips:
– **The Crumb Consistency:** The key to perfect “dirt” is texture. If you crush the Oreos too finely, they turn into dust and don’t look like soil. If they’re too chunky, they look like, well, crushed cookies. Aim for a mix of fine powder and small pea-sized pieces. The melted butter helps bind them just enough to feel like damp earth.
– **Pudding Thickness:** If your pudding layer turns out too thin, you might have used milk that wasn’t cold enough. Always start with cold milk straight from the fridge. Also, don’t over-whisk the pudding—stop as soon as it starts to thicken. Overworking it can make it grainy.
– **Layering Like a Pro:** To get clean layers, use a piping bag or a zip-top bag with the corner snipped off to add the pudding. It gives you more control and prevents the Oreo crumbs from getting mixed into the pudding. I learned this after a few “muddy” cups.
– **Make-Ahead Magic:** These cups are perfect for prepping a day ahead. Just wait to add the gummy worms and any fragile decorations until just before serving, so they stay fresh and perky. The flavors actually get better after a day in the fridge.
– **Temperature Matters:** Serve these cups cold, straight from the fridge. The contrast between the cold, creamy pudding and the slightly softened Oreo crumble is what makes them so satisfying. If they sit out too long, the pudding gets warm and loses its structure.
Variations & Adaptations
This recipe is incredibly flexible. Here are a few ways I’ve adapted it over the years:
– **Chocolate Lover’s Version:** Use chocolate instant pudding instead of vanilla. It makes the whole thing darker and richer. I’ve also added a tablespoon of cocoa powder to the Oreo crumble for an extra-chocolatey kick.
– **Peanut Butter Dirt Cups:** Add 1/4 cup of creamy peanut butter to the cream cheese mixture. It pairs beautifully with the chocolate Oreos. Just be sure to use a natural peanut butter without added sugar to keep the sweetness balanced.
– **Vegan & Dairy-Free Adaptation:** Use a plant-based cream cheese (like Kite Hill), coconut cream instead of heavy cream, and a vegan instant pudding mix. Most Oreos are actually vegan, so the crumble is already good to go. I’ve tested this version for a friend with dairy allergies, and it was a hit.
– **Harvest Twist:** For a fall-themed party, skip the gummy worms and top the cups with a sprinkle of cinnamon and a small candy pumpkin. The warm spice complements the chocolate perfectly.
– **Gluten-Free Option:** Use gluten-free chocolate sandwich cookies. The texture is slightly different, but the flavor is almost identical. Just check the package to ensure they’re certified gluten-free if needed.
Serving & Storage Suggestions
These cups are designed to be a showstopper at any gathering. Here’s how to serve and store them:
– **Serving Temperature:** Serve them cold, straight from the fridge. I like to take them out about 10 minutes before serving to take the chill off, but they should still feel cool.
– **Presentation Ideas:** Arrange the cups on a large platter or a wooden board. I sometimes scatter extra Oreo crumbs around the base of the cups and add a few plastic spiders for a creepy effect. For a dinner party, I’ve used small mason jars tied with twine and a mini tag that says “Eat at your own risk.”
– **What to Serve Alongside:** These pair wonderfully with a warm apple cider or a pumpkin spice latte. For a full Halloween menu, serve them after a bowl of chili or alongside mummy hot dogs. The sweetness balances the savory perfectly.
– **Storage Instructions:** Store the assembled cups in the refrigerator, covered loosely with plastic wrap, for up to 3 days. The Oreo crumble will soften over time, which some people actually prefer. If you want to keep the crumble crunchy, store the components separately and assemble just before serving.
– **Reheating?** Please don’t. These are meant to be served cold. If they’ve been sitting out for more than 2 hours, it’s time to say goodbye.
Nutritional Information & Benefits
Let’s be honest—this is a treat, not a health food. But here’s a rough breakdown per serving (based on 12 cups):
– **Calories:** Approximately 380 per cup
– **Fat:** 22g (13g saturated)
– **Carbohydrates:** 42g (30g sugar)
– **Protein:** 6g
– **Fiber:** 1g
**Health Highlights:** The cream cheese and milk provide a decent amount of calcium and protein. The Oreos offer a little iron from the cocoa. Of course, the main benefit here is the joy it brings to a party—sometimes that’s the most important nutrition of all. If you’re watching your sugar intake, you can use a sugar-free pudding mix and reduce the powdered sugar in the cream cheese mixture. I’ve done that before, and while it’s a bit less decadent, it still hits the spot.
Conclusion
This Best Graveyard Dirt Pudding Cups with Easy Oreo Crumble recipe has saved me more times than I can count. It’s the dessert that makes you look like you spent hours in the kitchen when really, you just had a box of pudding and a good attitude. It’s perfect for Halloween, but honestly, I’ve served it at birthday parties and even a casual summer barbecue (without the gummy worms, just the dirt cups). The best part is watching people’s faces light up when they see the little worms poking out—it’s pure, silly joy. I’d love to hear how yours turn out! Leave a comment below and tell me about your own graveyard creations. Did you add any fun decorations? Did your guests go back for thirds? Share your photos and tag me on social media—I’m always looking for new ideas. Happy haunting, and happy eating!
Frequently Asked Questions
**Can I make these dirt pudding cups ahead of time?**
Yes! You can assemble them up to 2 days in advance. Just wait to add the gummy worms until right before serving so they stay fresh and don’t get too soft.
**Can I use a different type of cookie for the crumble?**
Absolutely. Chocolate wafer cookies, gluten-free chocolate cookies, or even crushed graham crackers work well. Just keep in mind that the flavor and texture will change slightly.
**How do I keep the Oreo crumble from getting soggy?**
The crumble will soften over time, which is part of the charm. If you want it crunchier, store the crumble separately and add it to the cups just before serving.
**Can I make this recipe without cream cheese?**
Yes. You can skip the cream cheese and just use the pudding and whipped cream. The texture will be lighter and less rich, but it’s still delicious. You might want to add a pinch of salt to balance the sweetness.
**My pudding turned out runny. What went wrong?**
This usually happens if the milk wasn’t cold enough or if the pudding wasn’t whisked long enough. Make sure your milk is straight from the fridge, and whisk for a full 2 minutes. Let it sit for a few minutes before combining with the cream cheese.
Pin This Recipe!
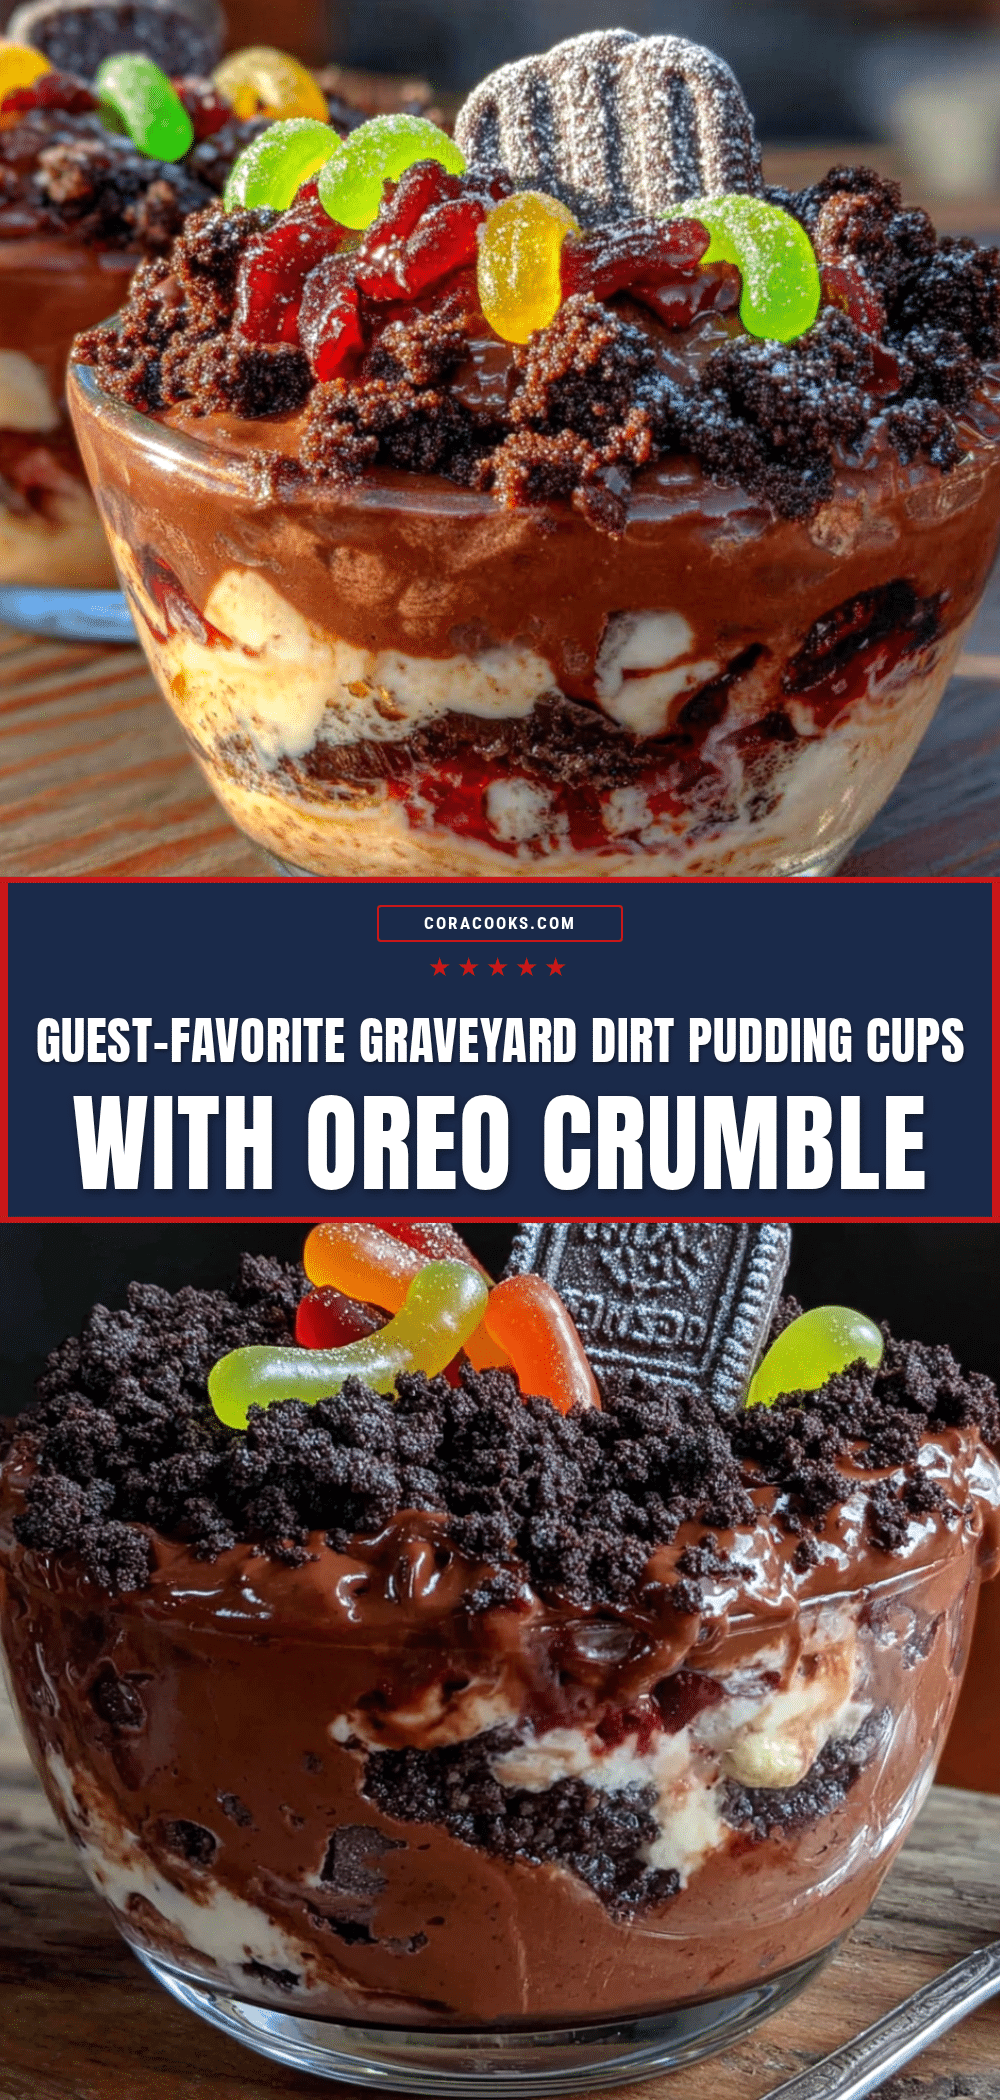
Best Graveyard Dirt Pudding Cups with Easy Oreo Crumble

These spooky and delicious dirt pudding cups are made with a creamy vanilla pudding and cream cheese filling, topped with an easy Oreo crumble and gummy worms. Perfect for Halloween parties, they come together in just 20 minutes of active time and are a guaranteed crowd-pleaser.
- Prep Time: 20 minutes
- Cook Time: 0 minutes
- Total Time: 1 hour 20 minutes (includes chilling)
- Yield: 12 servings 1x
- Category: Dessert
- Cuisine: American
Ingredients
- 1 package (3.4 oz) instant vanilla pudding mix
- 2 cups cold whole milk
- 8 oz cream cheese, softened
- 1/4 cup unsalted butter, softened
- 1/2 cup powdered sugar
- 1 teaspoon vanilla extract
- 1 cup heavy whipping cream
- 1 standard package (14.3 oz) Oreo cookies (about 36 cookies)
- 2 tablespoons melted butter
- 12–15 gummy worms
- 12 small clear plastic cups (5–7 oz size)
- Optional: small sprigs of fresh rosemary or candy pumpkins for decoration
Instructions
- Make the Oreo Dirt Crumble: Place all 36 Oreo cookies into a large zip-top bag. Seal tightly and crush with a rolling pin into fine crumbs with some small chunks. Transfer to a medium bowl and stir in 2 tablespoons melted butter until evenly distributed. Set aside.
- Prepare the Cream Cheese Base: In a large mixing bowl, beat softened cream cheese and 1/4 cup softened butter with an electric mixer on medium speed until smooth and fluffy, about 2 minutes. Add 1/2 cup powdered sugar and 1 teaspoon vanilla extract. Beat until well combined, scraping down sides as needed.
- Make the Pudding: In a separate bowl, whisk together instant vanilla pudding mix and 2 cups cold whole milk. Whisk vigorously for about 2 minutes until pudding starts to thicken. Let sit for 2-3 minutes to set up slightly.
- Combine and Whip: Pour thickened pudding into cream cheese mixture. Beat on medium speed until smooth and creamy, about 1 minute. In a separate small bowl, whip 1 cup heavy whipping cream until stiff peaks form (about 3-4 minutes). Gently fold whipped cream into pudding mixture until no white streaks remain.
- Chill the Pudding (Optional but Recommended): Cover bowl with plastic wrap and refrigerate pudding mixture for 30 minutes for easier layering.
- Assemble the Cups: Add 2 tablespoons Oreo crumble to the bottom of each cup. Gently press down with a spoon. Spoon or pipe pudding mixture on top, filling each cup about halfway. Add another layer of Oreo crumble (1-2 tablespoons) on top.
- Add the Garnishes: Poke 2-3 gummy worms into the top layer of each cup, letting some ‘escape’ over the rim. Optionally, add a rosemary sprig or candy pumpkin.
- Chill Before Serving: Refrigerate assembled cups for at least 1 hour before serving. Cups keep in the fridge for up to 2 days.
Notes
For best texture, let cream cheese come to room temperature. Use full-fat cream cheese for a thicker pudding layer. Classic Oreos work better than double-stuf for a more ‘dirt-like’ crumble. Chilling is essential to prevent runny layers. Store assembled cups in the refrigerator for up to 3 days; add gummy worms just before serving for freshness.
Nutrition
- Serving Size: 1 cup
- Calories: 380
- Sugar: 30
- Fat: 22
- Saturated Fat: 13
- Carbohydrates: 42
- Fiber: 1
- Protein: 6
Keywords: Halloween dessert, dirt pudding cups, Oreo crumble, gummy worms, easy dessert, no-bake dessert, spooky treats