Love this? Save it for later!
Share the inspiration with your friends
The woman at the pumpkin patch watched me fumbling with a wriggling toddler and a half-empty bag of gourds. She didn’t say anything at first. Then she just smiled and handed me a small paper cup filled with something that looked like dirt but smelled like chocolate. “For the little one,” she said. “It’ll buy you ten minutes of peace.”
I laughed, thanked her, and honestly thought nothing more of it until my kid took one bite and went completely silent. That’s the moment I knew I needed the recipe. It wasn’t fancy. It wasn’t complicated. It was just chocolate pudding, crushed cookies, and a few gummy worms tucked in like they were crawling out of the soil. But the look on my daughter’s face—pure Halloween magic—made it feel like the most important recipe in the world.
That afternoon, standing by a stack of hay bales with cocoa smeared on my sleeve, I realized something. Halloween doesn’t have to be about elaborate costumes or Pinterest-perfect decorations. Sometimes it’s about a five-minute dessert that makes everyone smile. I’ve been making these cozy Halloween dirt cups with gummy worms ever since, and they’ve become our family’s go-to for spooky season. No stress, no fuss, just a little chocolate and a lot of giggles.
Maybe you’ve been there too—running around trying to make the holiday special and ending up exhausted before the fun even starts. These little cups are my way of saying, “Hey, take a breath. This is all you need.” They’re cozy, they’re cute, and they take almost no time at all. Let me show you how to make them.
Why You’ll Love This Recipe
I’ve tested a lot of Halloween desserts over the years. Some were too complicated. Some looked great but tasted meh. These cozy Halloween dirt cups with gummy worms hit that sweet spot where easy meets absolutely delicious. Here’s why they’ve earned a permanent spot in my recipe collection.
- Quick & Easy: You can make these in under five minutes. Seriously. No baking, no boiling, no complicated steps. It’s basically assembly, and that’s exactly what you need when Halloween chaos hits.
- Simple Ingredients: You probably already have most of what you need in your pantry. Chocolate pudding mix, milk, Oreo cookies, and gummy worms. That’s it. No special trips to a fancy grocery store.
- Perfect for Halloween: Whether it’s a classroom party, a family movie night, or just a fun treat after trick-or-treating, these cups fit right in. They’re spooky without being scary, which makes them great for little kids too.
- Crowd-Pleaser: I’ve brought these to potlucks and playdates, and they disappear every single time. Kids love the gummy worms. Adults love the nostalgic chocolate pudding vibe. Everyone wins.
- Unbelievably Delicious: The combination of silky chocolate pudding, crunchy cookie crumbs, and chewy gummy worms is honestly next-level. It’s comfort food disguised as a Halloween treat.
What makes this version different from the usual dirt cup recipe? I’ve perfected the ratio of pudding to crumbs so you get that perfect spoonful every time. No dry bites, no soggy layers—just creamy, crunchy, chewy goodness. Plus, I’ll share my trick for making the gummy worms look like they’re actually crawling out of the dirt, which always gets the biggest reaction.
This recipe isn’t just good—it’s the kind that makes you close your eyes after the first bite. It’s Halloween comfort food at its finest. Faster than a store-bought treat, but with all the homemade love.
What Ingredients You Will Need
This recipe uses simple, everyday ingredients to create something that feels special. You don’t need anything fancy—just a few pantry staples and some Halloween-themed fun. Here’s everything you’ll need to make the perfect cozy Halloween dirt cups with gummy worms.
For the Pudding Base
- 1 box (3.9 ounces) instant chocolate pudding mix (I prefer Jell-O brand for the smoothest texture, but store brands work fine too)
- 2 cups cold whole milk (Use 2% or oat milk if you prefer—just know the pudding will be slightly less creamy)
For the Dirt Topping
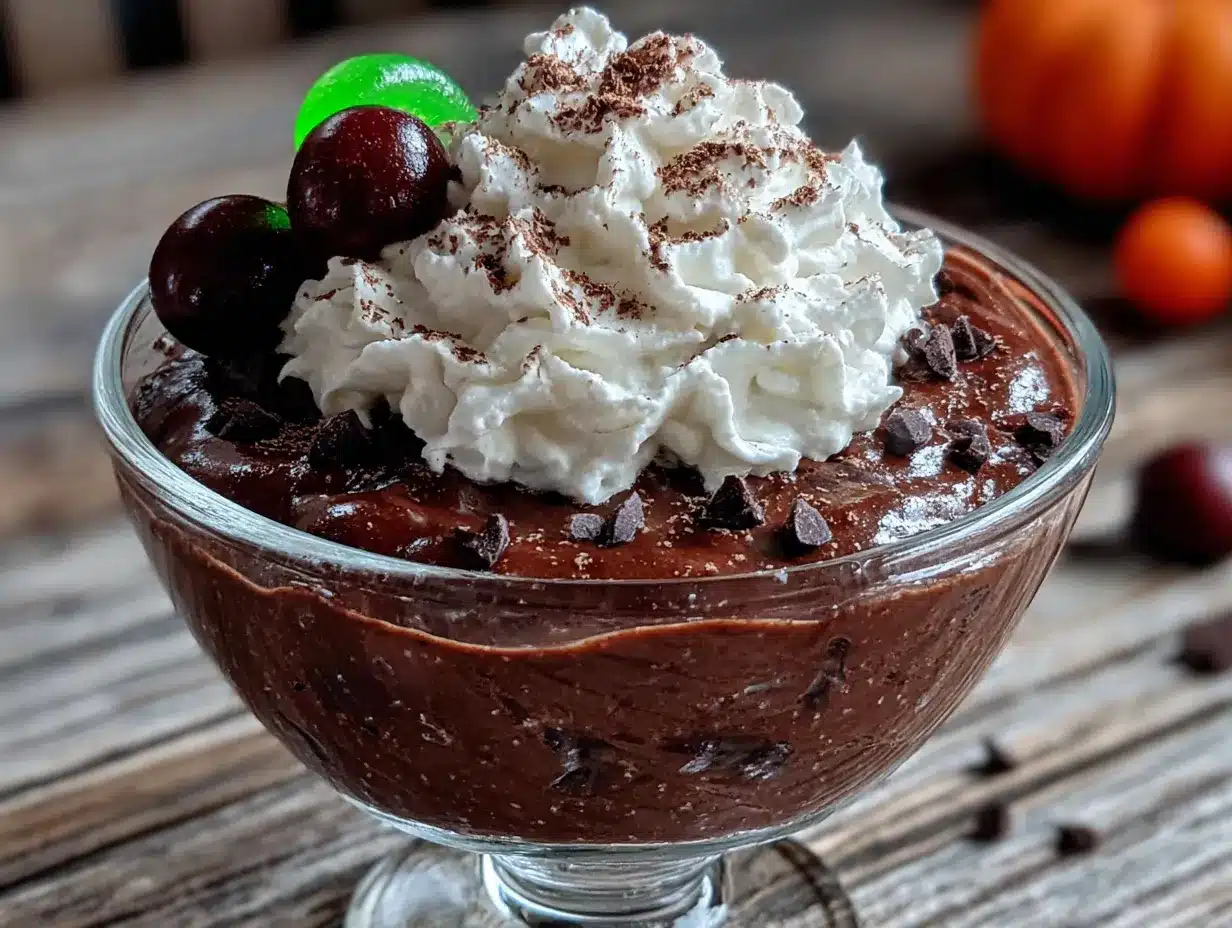
- 12 to 15 Oreo cookies (Regular or Double Stuf—both work great. The cream filling adds a nice sweetness to the “dirt”)
- 1 tablespoon unsalted butter, melted (optional, but it helps the crumbs stick together and adds richness)
For the Spooky Decorations
- 12 to 15 gummy worms (I like the sour ones for extra zing, but classic sweet worms are perfect too)
- Optional: Halloween sprinkles (little pumpkins, ghosts, or bats add a fun touch)
- Optional: Mint leaves or small plastic spider rings for garnish
Ingredient Selection Tips
For the best results, use cold milk straight from the fridge. It helps the pudding set up faster and gives you that perfect creamy texture. If you’re using a plant-based milk, look for one that’s unsweetened and unflavored—vanilla or original works best. I’ve tried almond milk and coconut milk, and both work, but the pudding will be a bit thinner.
When it comes to Oreos, don’t skip the step of removing the cream filling if you want a darker “dirt” color. The cream makes the crumbs lighter, which is fine, but if you want that rich, soil-like look, scrape it off. I usually save the cream for another use—or just eat it, honestly. No judgment here.
For the gummy worms, look for the ones that are extra long and twisty. They stick out of the dirt more dramatically and look way cooler. The sour ones add a nice tangy contrast to the sweet pudding, but classic worms are totally fine too.
Substitution Guidance
If you’re gluten-free, use gluten-free chocolate sandwich cookies (like Glutino or Goodie Girl) and double-check your pudding mix label. Most instant pudding is gluten-free, but always verify. For a dairy-free version, swap the whole milk for full-fat oat milk or coconut milk—the extra fat helps the pudding stay creamy. And if you don’t have Oreos, chocolate graham crackers or chocolate wafer cookies make an excellent substitute.
Equipment Needed
You don’t need much to make these cozy Halloween dirt cups with gummy worms. That’s part of the beauty. Here’s what you’ll want on hand.
- 6 small cups or jars (I use 6-ounce clear plastic cups so you can see the layers, but small mason jars or even paper cups work great)
- Medium mixing bowl (for the pudding)
- Whisk (a hand whisk is fine, but an electric mixer makes it even faster)
- Ziploc bag or food processor (for crushing the Oreos into fine crumbs)
- Rolling pin (if you’re using the Ziploc bag method and want to get out some aggression—very satisfying)
- Small spatula or spoon (for layering)
- Measuring cups and spoons
If you don’t have a food processor, don’t worry. Just put the Oreos in a Ziploc bag, seal it tight, and go to town with a rolling pin. It takes about two minutes and works like a charm. I actually prefer this method because I can control the texture—some bigger chunks for crunch, some fine powder for that authentic dirt look.
For the cups, clear ones really show off the layers, which makes the final presentation way more fun. But honestly, any small container will do. I’ve used juice glasses, shot glasses for mini versions, and even paper cups for classroom parties. The taste is the same no matter what you serve them in.
Preparation Method
Making these cozy Halloween dirt cups with gummy worms is almost too easy. But don’t let the simplicity fool you—the result is absolutely delightful. Follow these steps, and you’ll have a spooky treat in minutes.
- Make the pudding. In a medium mixing bowl, whisk together the instant chocolate pudding mix and 2 cups of cold whole milk. Whisk for about 2 minutes until the mixture thickens. It should look smooth and glossy with no lumps. If you’re using an electric mixer, keep it on low speed to avoid splashing. Let the pudding sit for 5 minutes to fully set. You’ll know it’s ready when you can lift the whisk and the pudding holds a soft peak.
- Crush the Oreos. While the pudding sets, prepare your “dirt.” Remove the cream filling from the Oreos if you want a darker color—I usually leave it in for extra sweetness. Place the cookies in a Ziploc bag and seal it tight. Use a rolling pin to crush them into fine crumbs. You want a mix of fine powder and tiny chunks for texture. Alternatively, pulse them in a food processor until you get a sandy consistency. Set aside about 2 tablespoons of the crumbs for garnish.
- Layer the cups. Grab your cups or jars. Start with a spoonful of crushed Oreos at the bottom—about 1 tablespoon per cup. This creates a solid “dirt” base. Next, spoon in a layer of chocolate pudding, filling each cup about halfway. Tap the cup gently on the counter to settle the pudding and remove any air bubbles.
- Add the worms. Take 2 to 3 gummy worms and press them gently into the pudding layer. Let a few inches stick out over the edge of the cup. This creates the illusion that the worms are crawling out of the dirt. For extra drama, curl one worm around the rim of the cup.
- Top with more dirt. Sprinkle a generous layer of crushed Oreos over the pudding, covering the worms completely. Use about 1.5 tablespoons per cup. The crumbs should look like fresh soil. If you want a more realistic effect, leave a few patches where the cookie crumbs are thicker and others where the dark pudding peeks through.
- Garnish and serve. Add a final gummy worm on top, half-buried in the cookie crumbs. If you’re using Halloween sprinkles or plastic spiders, now’s the time to add them. Serve immediately for the best texture, or refrigerate for 30 minutes to let the flavors meld. The longer they sit, the more the cookie crumbs soften into the pudding—almost like a chocolate mud pie.
Pro tip: If you’re making these ahead of time, wait to add the top layer of cookie crumbs and the garnish worms until just before serving. This keeps the “dirt” crunchy and the worms looking fresh. I learned this the hard way when I made them the night before a party and the worms got all shriveled and sad-looking. Not a good look.
Cooking Tips & Techniques
Over the years, I’ve made my fair share of mistakes with these cozy Halloween dirt cups with gummy worms. Let me save you some trouble with these tips.
Don’t overmix the pudding. I know it’s tempting to keep whisking until it’s perfectly smooth, but overmixing can make the pudding grainy. Stop as soon as it thickens and looks glossy. Trust the process—it will set up beautifully on its own.
Crush the Oreos to the right consistency. You want a mix of fine powder and small chunks. If you pulverize them into dust, the texture is one-note. If you leave big pieces, it doesn’t look like dirt. Aim for that sandy, gravelly texture. I like to crush them by hand in a bag so I can feel the texture as I go.
Layer strategically. The bottom cookie layer should be thin—just enough to cover the bottom of the cup. The middle pudding layer should be the thickest. And the top “dirt” layer should be generous enough to hide the worms but not so thick that you can’t see them poking through. I use about 1.5 tablespoons of crumbs on top per cup.
One mistake I made early on: I used chocolate pudding that wasn’t fully set. The worms sank right to the bottom, and the whole thing looked like a muddy mess. Now I always let the pudding set for a full 5 minutes before layering. The worms stay put, and the presentation is way better.
Multitasking tip: While the pudding is setting, crush the Oreos and arrange your cups. This saves you about 3 minutes total, but in the chaos of Halloween prep, every minute counts.
For the creamiest texture, use whole milk. I know, I know—skim milk is healthier. But the fat in whole milk makes the pudding silky and luxurious. If you’re using a plant-based milk, go for full-fat oat milk or coconut milk. The extra richness makes a real difference.
Variations & Adaptations
One of the best things about this recipe is how easy it is to change up. Here are some of my favorite variations on these cozy Halloween dirt cups with gummy worms.
Peanut Butter Dirt Cups: Add 2 tablespoons of peanut butter to the pudding mix before whisking. It gives the pudding a creamy, nutty flavor that pairs beautifully with chocolate. Top with crushed peanut butter cookies instead of Oreos for extra peanut butter goodness. My kids go crazy for this version.
Vegan Dirt Cups: Use a vegan chocolate pudding mix (many instant mixes are accidentally vegan) and swap the milk for full-fat oat milk or coconut milk. Use vegan chocolate sandwich cookies and check that your gummy worms are gelatin-free—many brands offer vegan options now. The texture is slightly different, but still delicious.
Pumpkin Spice Dirt Cups: For a fall twist, add 1 teaspoon of pumpkin pie spice to the pudding mix before whisking. Layer the bottom with crushed ginger snaps instead of Oreos, and top with a small candy pumpkin instead of a gummy worm. It tastes like autumn in a cup.
Gluten-Free Option: Use gluten-free chocolate sandwich cookies and double-check your pudding mix. Most instant chocolate pudding is gluten-free, but always read the label. The rest of the ingredients are naturally gluten-free, so this swap is easy.
Mini Bite-Sized Cups: Use shot glasses or small paper cups to make mini versions. They’re perfect for parties where guests want a tiny treat. Just reduce the layering amounts—about 1 teaspoon of crumbs and 2 tablespoons of pudding per mini cup. Use half a gummy worm on top.
I once tried a version with crushed pretzels mixed into the Oreo crumbs for a salty-sweet twist. It was amazing. The salt cuts through the sweetness of the pudding and makes the whole thing taste even more decadent. Highly recommend if you’re feeling adventurous.
Serving & Storage Suggestions
These cozy Halloween dirt cups with gummy worms are best served cold, straight from the fridge. The contrast between the chilly pudding and the slightly chewy gummy worms is part of the magic. Set them out on a platter about 10 minutes before serving to take the chill off, but don’t let them sit too long—the worms can get sticky and the cookie crumbs can get soggy.
What to serve with them: These cups are perfect on their own, but if you’re hosting a Halloween party, pair them with warm apple cider, a bowl of popcorn, or a plate of caramel apples. They also make a great finish to a Halloween dinner of mummy hot dogs or pumpkin soup.
For presentation: Arrange the cups on a black or orange platter. Add a few fake spider webs, plastic spiders, or candy corn around the base for a spooky tablescape. If you’re serving them at a classroom party, write each kid’s name on the cup with a permanent marker—it doubles as a place setting and a favor.
Storage: These keep well in the refrigerator for up to 2 days. Cover each cup with plastic wrap or a small lid to prevent the pudding from absorbing fridge odors. The cookie crumbs will soften over time, but that’s not a bad thing—it turns into a kind of chocolate mousse cake texture. I actually prefer them the next day when the flavors have melded together.
Freezing: I don’t recommend freezing these. The pudding gets icy and the gummy worms turn into rock-hard little monsters. Not in a fun way. Stick to refrigeration.
Reheating: There’s no need to reheat these. They’re a cold dessert through and through. If you’ve stored them in the fridge, just pull them out and serve. Easy.
Nutritional Information & Benefits
Let’s be real—these cozy Halloween dirt cups with gummy worms are a treat, not a health food. But here’s the estimated nutritional breakdown for one serving (based on 6 servings per recipe).
| Nutrient | Amount Per Serving |
|---|---|
| Calories | 290 |
| Total Fat | 12g |
| Saturated Fat | 5g |
| Carbohydrates | 44g |
| Sugar | 32g |
| Protein | 5g |
| Calcium | 120mg |
Now, let’s talk about the good stuff. The chocolate pudding contains milk, which provides calcium and vitamin D for bone health. The Oreos? Well, they bring joy. And the gummy worms? They’re basically a multivitamin of fun. Look, everything in moderation. These cups are about making memories, not hitting your macros.
Dietary considerations: This recipe contains dairy and gluten. For a dairy-free version, use plant-based milk and dairy-free pudding. For gluten-free, use gluten-free cookies. The gummy worms may contain gelatin, so check the label if you’re vegetarian or vegan.
Allergen note: Oreos may be processed in facilities that handle peanuts and tree nuts. If you’re serving these to someone with severe allergies, check the packaging carefully or make your own chocolate cookie crumbs from scratch.
FAQs
Can I use homemade chocolate pudding instead of instant?
Absolutely. Homemade pudding works just as well, though it takes more time. Just make sure it’s fully cooled and thickened before layering. The texture will be even creamier than instant.
How far in advance can I make these?
You can assemble them up to 2 days ahead. Just wait to add the top layer of cookie crumbs and the garnish worms until right before serving. This keeps everything looking fresh and crunchy.
Can I use sugar-free pudding mix?
Yes, sugar-free pudding works fine. The texture might be slightly less creamy, but it’s a good option if you’re watching your sugar intake. Use cold milk as usual.
My worms keep sinking! What am I doing wrong?
This happens when the pudding is too thin. Make sure your pudding has fully set—wait the full 5 minutes after whisking. Also, try pressing the worms into the pudding gently rather than dropping them in from above. The slower you go, the less they’ll sink.
Can I make these in a large dish instead of individual cups?
Totally. Use a 9×9 baking dish or a trifle bowl. Layer the pudding, crumbs, and worms as directed, then repeat for a second layer. It makes a great party dessert that you can scoop out in big spoonfuls.
Conclusion
These cozy Halloween dirt cups with gummy worms are everything I love about holiday cooking. They’re simple, they’re fun, and they bring people together. No stress, no complicated techniques—just a little chocolate, a few gummy worms, and a whole lot of smiles.
I hope you make these for your family, your classroom, or just for yourself on a quiet October evening. Customize them however you like—add sprinkles, swap the cookies, make them vegan or gluten-free. The recipe is just a starting point. What matters is the joy they bring.
I’d love to hear how yours turn out. Drop a comment below and tell me your favorite Halloween tradition, or share a photo of your dirt cups. And if you have a variation that blew your mind, please share it—I’m always looking for new ideas. Until next time, happy Halloween, and may your pudding always be perfectly set.
Pin This Recipe!
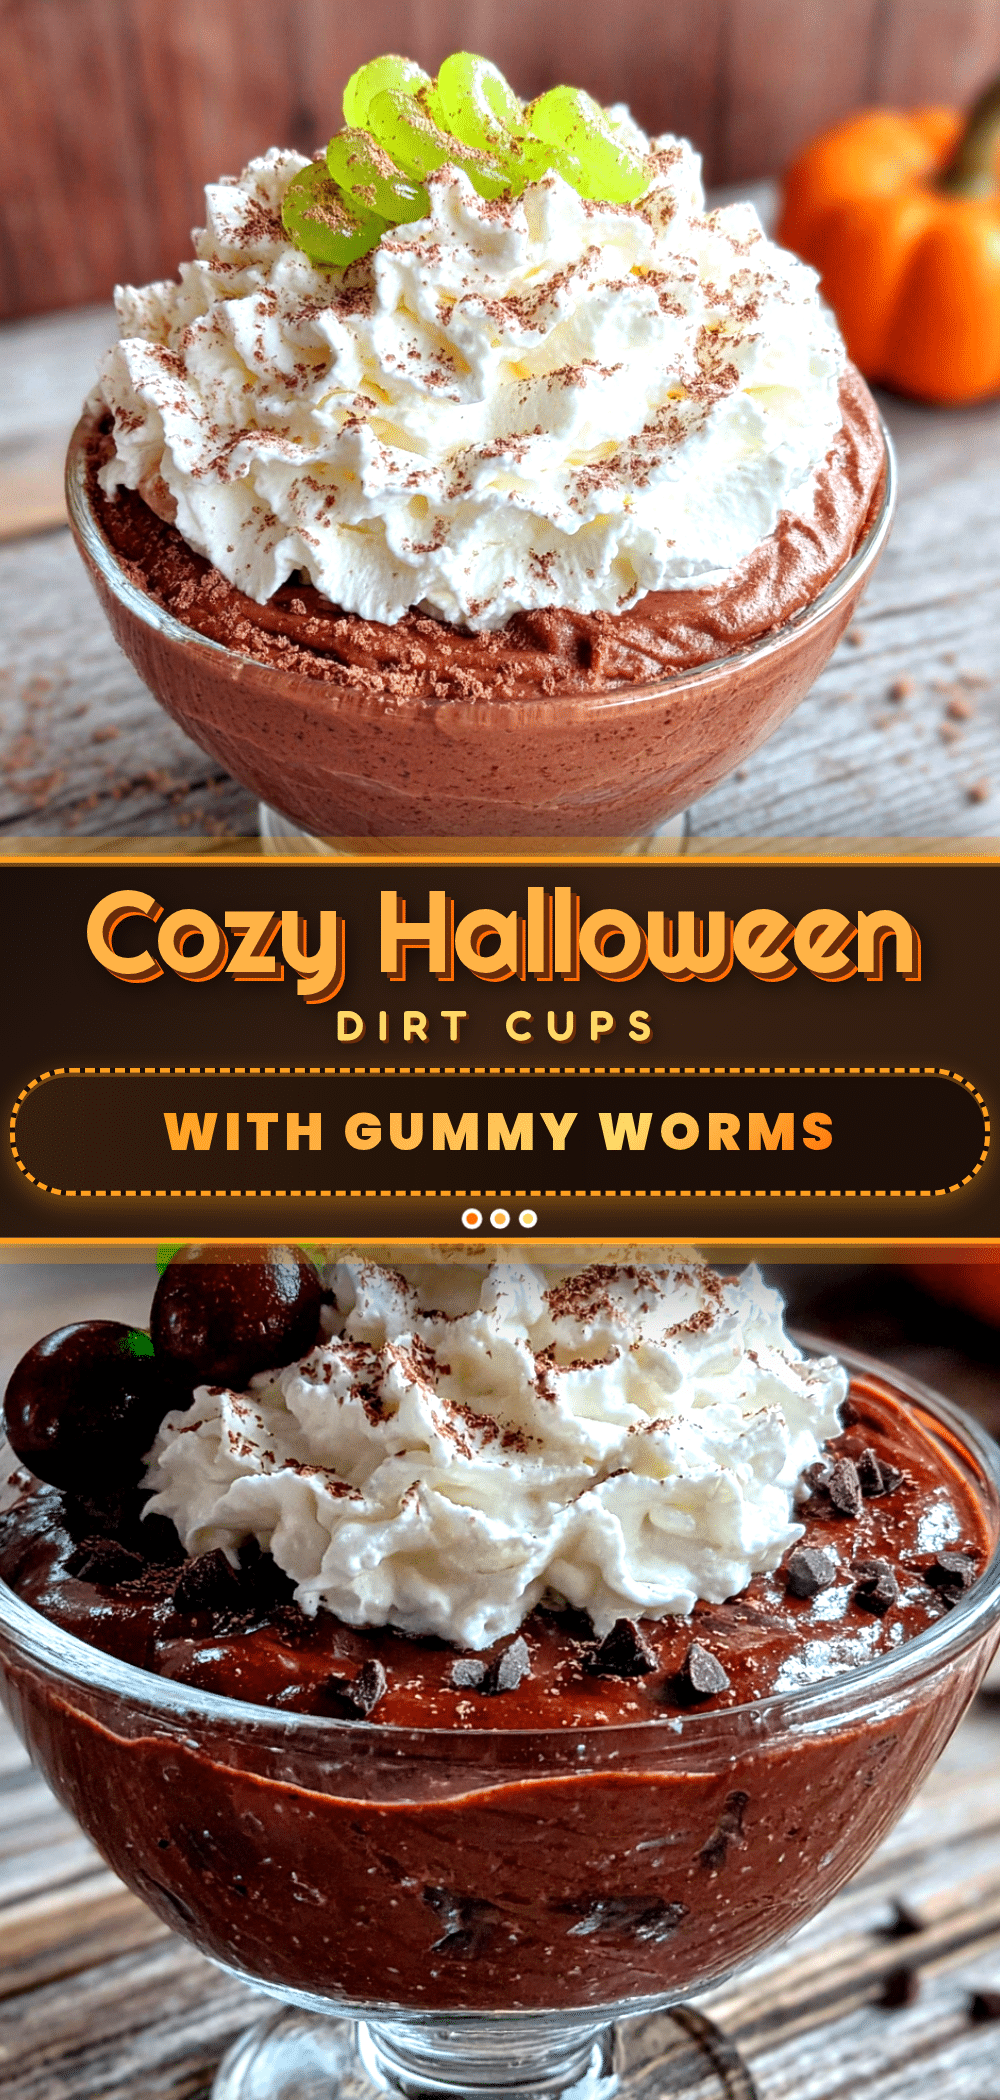
Cozy Halloween Dirt Cups with Gummy Worms: Easy 5-Minute Dessert
These no-bake Halloween dirt cups are made with creamy chocolate pudding, crushed Oreo cookies, and gummy worms for a spooky treat that comes together in just 5 minutes. Perfect for parties, classroom celebrations, or a fun family dessert.
- Prep Time: 5 minutes
- Cook Time: 0 minutes
- Total Time: 5 minutes
- Yield: 6 servings 1x
- Category: Dessert
- Cuisine: American
Ingredients
- 1 box (3.9 ounces) instant chocolate pudding mix
- 2 cups cold whole milk
- 12 to 15 Oreo cookies (regular or Double Stuf)
- 1 tablespoon unsalted butter, melted (optional)
- 12 to 15 gummy worms
- Halloween sprinkles (optional)
- Mint leaves or small plastic spider rings for garnish (optional)
Instructions
- In a medium mixing bowl, whisk together the instant chocolate pudding mix and 2 cups of cold whole milk. Whisk for about 2 minutes until the mixture thickens. Let the pudding sit for 5 minutes to fully set.
- While the pudding sets, prepare the ‘dirt.’ Remove the cream filling from the Oreos if desired for a darker color. Place the cookies in a Ziploc bag and crush with a rolling pin into fine crumbs with some small chunks. Alternatively, pulse in a food processor. Set aside about 2 tablespoons of crumbs for garnish.
- Grab 6 small cups or jars. Start with a spoonful of crushed Oreos at the bottom—about 1 tablespoon per cup. Next, spoon in a layer of chocolate pudding, filling each cup about halfway. Tap the cup gently on the counter to settle the pudding.
- Take 2 to 3 gummy worms and press them gently into the pudding layer, letting a few inches stick out over the edge of the cup. For extra drama, curl one worm around the rim.
- Sprinkle a generous layer of crushed Oreos over the pudding, covering the worms completely—about 1.5 tablespoons per cup. Leave a few patches where the dark pudding peeks through for a realistic effect.
- Add a final gummy worm on top, half-buried in the cookie crumbs. Add Halloween sprinkles or plastic spiders if desired. Serve immediately or refrigerate for 30 minutes to let flavors meld.
Notes
For best results, use cold milk straight from the fridge. If making ahead, wait to add the top layer of cookie crumbs and garnish worms until just before serving to keep the ‘dirt’ crunchy. The pudding must be fully set (5 minutes) before layering to prevent worms from sinking. For a darker ‘dirt’ color, remove the cream filling from Oreos. Store covered in the refrigerator for up to 2 days; cookie crumbs will soften over time.
Nutrition
- Serving Size: 1 cup
- Calories: 290
- Sugar: 32
- Sodium: 380
- Fat: 12
- Saturated Fat: 5
- Carbohydrates: 44
- Fiber: 1
- Protein: 5
Keywords: Halloween dirt cups, gummy worms, chocolate pudding, no-bake dessert, easy Halloween treat, kid-friendly dessert


