Love this? Save it for later!
Share the inspiration with your friends
The power went out right as the frosting was being mixed, and honestly, that was the best thing that could have happened to my dessert game. It was three days before Halloween, and the house was already a chaotic mess of plastic spiders and fake cobwebs. I had planned a complicated baked treat, but the darkness forced me to improvise with what was already in the pantry. My neighbor, Mrs. Gable, saw the emergency unfolding through her window and wandered over with a bag of chocolate cookies and a tub of instant pudding. She didn’t say much, just handed me the ingredients and pointed to the plastic cups sitting on my counter. We sat in the dark, lit by a single candle, and she showed me how to layer the “dirt” without turning the kitchen into a disaster zone. That unplanned afternoon taught me more about stress-free baking than any cookbook ever did. I still make this no-bake Halloween dirt cups recipe every year because it saves me from last-minute panic. It’s simple, spooky, and requires zero oven time. You know that feeling when you’re trying to be a perfect hostess but life gets in the way? This recipe is the perfect rescue. It turns a potential disaster into a crowd-pleasing hit that kids and adults both love. The texture is creamy, the look is eerie, and the effort is minimal. I mean, who doesn’t love a dessert that looks like it came from a witch’s garden? It’s become a staple in my home, and I suspect it will become one in yours too. Let me tell you, there is something magical about making treats in the dark. It feels secretive and fun, like we’re part of a club. This no-bake Halloween dirt cups creation is not just food; it’s a memory of a dark, candlelit evening that turned into laughter. I keep making it because it reminds me that the best moments often come from unplanned detours. Plus, it’s incredibly easy to customize for different age groups or dietary needs. Whether you are hosting a party or just want a spooky snack, this recipe has your back. It’s reliable, delicious, and surprisingly elegant when presented right. I promise you, once you try this, you’ll never go back to complicated desserts. It’s the kind of recipe that feels like a secret weapon for any busy parent or host. So, let’s get into the details of how to make these creepy-crawly delights.
Why You’ll Love This Recipe
There is a specific kind of magic in a dessert that looks complicated but is actually a breeze to make. This no-bake Halloween dirt cups recipe hits that sweet spot perfectly. I’ve tested dozens of variations over the years, and this one stands out because it balances flavor with fun without requiring any culinary degree. You get the rich, chocolatey taste of chocolate pudding mixed with the crunch of crushed cookies, topped with something that looks like it crawled out of the earth. It’s the kind of treat that makes you close your eyes after the first bite and just smile. Here is why this recipe is a must-try for your Halloween celebrations:
- Quick & Easy: This comes together in under 30 minutes. No oven, no waiting for cooling racks, and no complicated techniques. It is perfect for busy weeknights or last-minute party prep.
- Simple Ingredients: You likely already have everything in your kitchen. Chocolate pudding mix, cookies, cream cheese, and a few spooky garnishes are all you need. No fancy grocery trips required.
- Perfect for Kids: Children love anything they can help make. This recipe allows them to crush cookies and pipe “worms” without making a huge mess. It turns cooking into a playful activity.
- Crowd-Pleaser: It always gets rave reviews from both kids and adults. The texture is creamy and satisfying, while the visual theme is just silly enough to be fun but not too scary for younger guests.
- Unbelievably Delicious: The combination of tangy cream cheese, sweet pudding, and crunchy cookies is next-level comfort food. It feels indulgent but is actually quite manageable to eat.
What makes this no-bake Halloween dirt cups different from other versions is the addition of cream cheese to the pudding layer. This adds a slight tang that cuts through the sweetness, preventing it from being cloying. It also gives the mixture a richer, more stable texture that holds up well in cups. I’ve tried versions with just pudding, but they tend to separate or get too runny. This method keeps everything firm and scoopable. It’s comfort food reimagined for the season—spooky, fun, but with the same soul-soothing satisfaction of a classic dessert. Perfect for impressing guests without stress, or turning a simple afternoon into a memorable Halloween tradition.
What Ingredients You Will Need
This recipe uses simple, wholesome ingredients to deliver bold flavor and satisfying texture without the fuss. The beauty of this no-bake Halloween dirt cups lies in its accessibility. You don’t need specialty stores or hard-to-find items. Most of these are pantry staples that you might already have on hand. If you are making this for a party, you can scale up easily by doubling or tripling the batches. Here is what you need to gather:
- Instant Chocolate Pudding Mix: One large box (about 5.1 oz). This forms the base of the “dirt.” I recommend Jell-O for its reliable texture and consistent flavor. Avoid the “light” versions as they can be too airy and don’t hold up well.
- Milk: 2 cups of cold whole milk. Whole milk gives the best richness and creaminess. You can use 2% if needed, but the fat content helps with the mouthfeel.
- Chocolate Sandwich Cookies: One package of standard chocolate sandwich cookies (like Oreos). These are crushed to create the “dirt” effect. You need enough to cover the bottom and top of the cups.
- Cream Cheese: 8 oz, softened. This is the secret ingredient. It adds tang and stability to the pudding layer. Use full-fat block cream cheese, not the spreadable kind in a tub, as it has a different water content.
- Powdered Sugar: 2 tablespoons. This sweetens the cream cheese mixture slightly and helps it blend smoothly. Adjust based on how sweet you like your treats.
- Vanilla Extract: 1 teaspoon. Adds a warm, aromatic note that complements the chocolate.
- White Chocolate Chips: 1/2 cup, melted. These are used to create the “spiderwebs” or “ghosts” for decoration. White chocolate melts smoothly and provides a nice contrast to the dark dirt.
- Gummy Worms: 1 package, assorted colors. These are the classic garnish. Look for larger, squiggly worms for better visual impact. They add a chewy texture that kids love.
- Candied Spider Eyes: Optional, for extra spookiness. These add a fun, thematic touch without altering the flavor profile.
For the best results, ensure your cream cheese is fully softened to room temperature before mixing. This prevents lumps in your pudding layer. If you are using gluten-free cookies, make sure to check the label, as some brands crumble differently. The key is to have a good balance of crunch and cream. Don’t skip the powdered sugar; it helps dissolve any graininess from the cream cheese. This no-bake Halloween dirt cups recipe is flexible, so feel free to swap the cookies for chocolate wafer cookies if you prefer a finer crumb. The ingredients list is short for a reason—it lets each component shine.
Equipment Needed
You don’t need a lot of fancy tools to make this no-bake Halloween dirt cups recipe. In fact, the beauty of this dish is its simplicity. Here is the basic equipment you will need:
- Mixing Bowls: Two medium-sized bowls. One for whisking the pudding and milk, and another for beating the cream cheese mixture.
- Electric Mixer: A hand mixer or stand mixer is helpful for beating the cream cheese until smooth. However, you can use a sturdy whisk and some elbow grease if you prefer. Just make sure to beat it well to avoid lumps.
- Ziplock Bags: Large gallon-sized bags for crushing the cookies. This is much easier than using a food processor and creates a nice irregular crunch. You can also use a rolling pin and a towel if you don’t have bags.
- Serving Cups: Clear plastic or glass cups. Clear cups are essential for showing off the layers. You can use small yogurt cups, shot glasses, or specialized Halloween-themed plastic cups. I prefer 4-6 oz cups for individual portions.
- Piping Bags or Ziplock Bags: For the white chocolate decoration. If you don’t have piping bags, just snip a tiny corner off a ziplock bag to create a makeshift piping tool.
- Spatula: A rubber spatula is great for scraping down the sides of the bowl and folding the mixture gently.
I’ve tried making this with a food processor for the cookies, but I found that the crumbs were too fine, like actual dirt. The ziplock bag method gives you those chunky, realistic-looking “dirt” pieces that add better texture. If you are on a budget, you can reuse plastic cups from other products, just make sure to wash them thoroughly. The equipment list is minimal, which is why this recipe is so accessible. You likely have everything you need in your kitchen right now. Keep your workspace clean, as the dark cookies can leave crumbs everywhere. A damp cloth nearby is a lifesaver for quick wipes.
Preparation Method
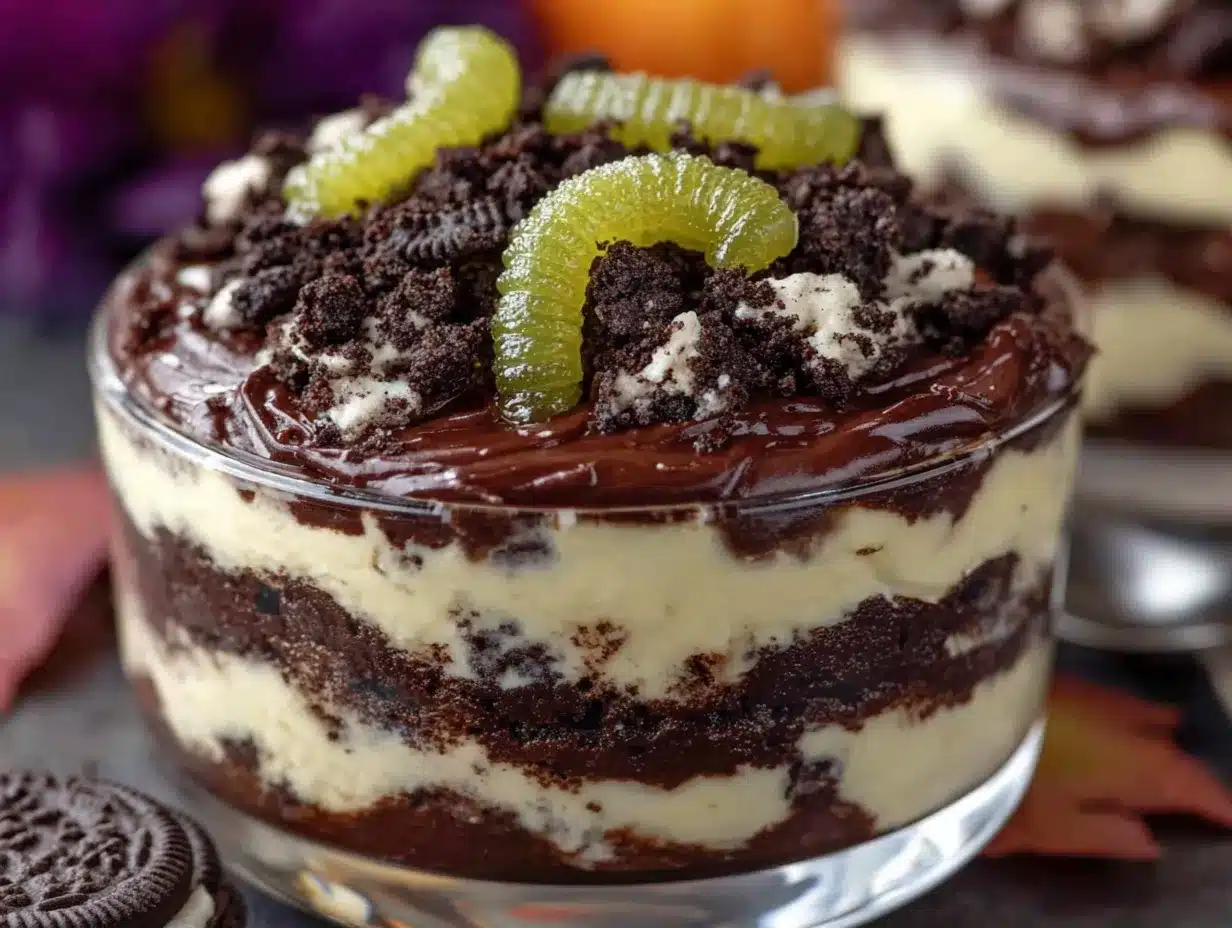
Making this no-bake Halloween dirt cups is straightforward, but there are a few steps to get the texture just right. Follow these instructions carefully for the best results.
- Crush the Cookies: Place your chocolate sandwich cookies into a large ziplock bag. Squeeze out as much air as possible and seal it tight. Use a rolling pin, meat mallet, or your hands to crush the cookies. You want a mix of fine crumbs and small chunks. Avoid turning them into dust. This should take about 2-3 minutes. Set aside about 1/2 cup of the larger chunks for garnish later.
- Prepare the Pudding: In a medium mixing bowl, whisk together the instant chocolate pudding mix and the cold milk. Beat with a whisk for about 2 minutes until the mixture thickens. It should hold its shape when you lift the whisk. This step usually takes 2-3 minutes. Do not skip the whisking; it ensures the pudding sets properly.
- Make the Cream Cheese Mixture: In a separate bowl, beat the softened cream cheese and powdered sugar until smooth and creamy. Add the vanilla extract and mix well. This should take about 1-2 minutes. The mixture should be fluffy and free of lumps. If you see lumps, keep beating until they disappear.
- Combine the Layers: Gently fold the cream cheese mixture into the chocolate pudding. Use a spatula to fold it in slowly. You want to keep the mixture airy and light. Do not overmix, or you will deflate the pudding. This should take about 1-2 minutes. The result should be a smooth, pale chocolate mixture.
- Assemble the Cups: Take your serving cups. Add a layer of crushed cookies to the bottom, about 1 inch thick. This is your first “dirt” layer. Spoon a generous layer of the pudding mixture on top, about 1-2 inches. Add another layer of crushed cookies on top of the pudding. This creates the layered “dirt” effect. Repeat if you have enough mixture.
- Chill the Cups: Place the assembled cups in the refrigerator for at least 30 minutes. This helps the layers set and makes them easier to handle. This is a crucial step for structure.
- Prepare the White Chocolate: Melt the white chocolate chips in the microwave in 30-second intervals, stirring between each. Be careful not to burn it. Once smooth, transfer to a ziplock bag and snip a tiny corner. Drizzle the white chocolate over the top of the cups to create spiderwebs or abstract designs. This takes about 2-3 minutes.
- Add the Garnish: Once the white chocolate has set slightly, place gummy worms on top of the cups. You can drape them over the edge or tuck them into the “dirt.” Add candied spider eyes if desired. This is the fun part!
Pay attention to the consistency of the pudding. If it seems too runny, you may need to chill it longer. If the cream cheese was not soft enough, you might have lumps. Always taste your mixture before assembling to adjust sweetness if needed. The chilling step is non-negotiable for clean layers. Trust me, rushing this step leads to a messy cup. Take your time with the crushing; the texture makes the dish.
Cooking Tips & Techniques
There are a few pro tips that can take this no-bake Halloween dirt cups from good to great. I learned these through trial and error, and they save so much frustration.
- Softened Cream Cheese: This is the most important tip. If your cream cheese is cold, it will clump. Take it out of the fridge at least an hour before you start. If you forget, you can microwave it in 5-second bursts, but be careful not to melt it.
- Cookie Crunch: Don’t use a food processor for the cookies. The blades make too fine a powder. Use a rolling pin in a bag for that rustic, chunky look. It mimics real dirt better.
- Layering: Press the cookie layers down gently with the back of a spoon. This helps them stick together and prevents the pudding from sinking too much. It creates a more stable structure.
- White Chocolate Handling: White chocolate is sensitive to heat. Never microwave it for more than 30 seconds at a time. Stir constantly. If it gets too thick, add a tiny drop of vegetable oil to thin it out. This makes it easier to drizzle.
- Garnish Timing: Add the gummy worms after the white chocolate has set slightly. If you add them too early, they might sink into the pudding. If you add them too late, the chocolate might be too hard to stick to. Wait until the drizzle is tacky.
I once tried making this with whipped cream instead of cream cheese. It was too light and fell apart. The cream cheese provides the necessary weight and tang. Another mistake I made was using warm milk. Always use cold milk for instant pudding; it sets faster and better. Keep your workspace organized. Have all your ingredients measured and ready before you start assembling. This prevents cross-contamination and keeps the process smooth. Remember, these are no-bake, so hygiene is key. Wash your hands often and use clean utensils. The visual appeal is huge, so take your time with the drizzling. It doesn’t have to be perfect; messy is part of the charm. These tips ensure consistency every time you make this recipe.
Variations & Adaptations
One of the best things about this no-bake Halloween dirt cups recipe is how adaptable it is. You can tweak it to suit different tastes or dietary needs.
- Gluten-Free Option: Use gluten-free chocolate sandwich cookies. Most major brands make these now. The texture might be slightly softer, but the flavor remains the same. Check the cookie packaging for gluten-free certification.
- Dairy-Free Version: Substitute the cream cheese with a dairy-free block-style alternative. Use coconut milk or almond milk for the pudding. Ensure your cookies are dairy-free as well. This version is rich and creamy, though the flavor profile will be slightly different.
- Flavor Twist: Instead of chocolate pudding, try vanilla pudding with crushed chocolate cookies. It looks like vanilla dirt with chocolate chips. Or, use strawberry pudding for a “blood” theme. The possibilities are endless.
- Low-Sugar Option: Use sugar-free pudding mix and sugar-free cookies. You can sweeten the cream cheese with a natural sweetener like stevia or monk fruit. This version is great for those watching their sugar intake.
- Adult Version: Add a splash of bourbon or Bailey’s Irish Cream to the pudding mixture for a grown-up treat. The alcohol pairs beautifully with chocolate and cream cheese. This is perfect for Halloween parties with adults.
I’ve tried the vanilla pudding variation, and it was a hit with guests who didn’t like chocolate. It looked like a vanilla dessert with chocolate sprinkles, which was a nice change. For the low-sugar version, I found that the texture was slightly less creamy, so I added a bit more cream cheese to compensate. The adult version is my personal favorite for evening gatherings. The alcohol adds a warmth that enhances the chocolate flavor. When adapting recipes, always taste as you go. Adjust sweetness and consistency based on your ingredients. These variations make the recipe versatile for any occasion. You can even make them for birthdays or summer parties by changing the garnishes. The base recipe is a solid foundation for creativity.
Serving & Storage Suggestions
Serving these no-bake Halloween dirt cups is easy and fun. They are perfect for individual portions, which helps with portion control and presentation.
- Serving Temperature: Serve them chilled. Cold pudding is more refreshing and the flavors are more pronounced. Take them out of the fridge 5 minutes before serving to let them come to room temperature slightly if you prefer.
- Presentation: Arrange the cups on a platter with a black or orange napkin underneath. Add some fake leaves or plastic bats around the platter for a festive display. They look great on a tiered stand for parties.
- Complementary Dishes: Serve with a glass of cold milk or hot cocoa. They pair well with savory snacks like pretzels or chips for a balanced party spread. For a Halloween party, they fit perfectly with other spooky treats.
- Storage: Store leftovers in the refrigerator in an airtight container. They will keep for up to 3 days. The cookies may soften over time, so it’s best to eat them within 24-48 hours for the best texture.
- Freezing: You can freeze these cups for up to 1 month. Thaw them in the refrigerator overnight before serving. Note that the texture may change slightly after freezing, becoming a bit softer.
- Reheating: Do not reheat these. They are meant to be eaten cold. Reheating will melt the white chocolate and ruin the layers.
I’ve found that the flavors develop over time, becoming more cohesive after a day in the fridge. The cookies absorb some of the pudding, creating a cake-like layer at the bottom. This is actually quite delicious. Just make sure to cover them tightly to prevent them from absorbing odors from the fridge. If you are making them for a party, assemble them the day before. This saves time on the day of the event. They hold up well in the fridge, so you can prepare them in advance. The key is to keep them cold until serving. Enjoy them as a fun snack or a dessert. They are sure to be a hit at any gathering.
Nutritional Information & Benefits
While this no-bake Halloween dirt cups recipe is a treat, it’s good to know what you are eating. Here is an estimated nutritional breakdown per cup:
- Calories: Approximately 250-300 calories per cup, depending on the size and specific ingredients used.
- Fat: Around 12-15 grams, primarily from the cream cheese and cookies.
- Carbohydrates: About 35-40 grams, mostly from the sugar in the pudding and cookies.
- Protein: Roughly 4-6 grams, from the cream cheese and milk.
The cream cheese provides calcium and protein, which adds some nutritional value. The chocolate pudding contains some antioxidants, though the sugar content is high. This recipe is not suitable for gluten-free or dairy-free diets unless you use substitutes. It is also high in sugar, so moderation is key. I like to view this as a special occasion treat rather than a daily snack. The fun factor outweighs the nutritional concerns for Halloween. If you are concerned about sugar, consider using sugar-free alternatives as mentioned in the variations. Remember, balance is important. Enjoy these as part of a balanced diet. They are a delicious way to celebrate the season.
Conclusion
This no-bake Halloween dirt cups recipe is a fantastic way to add some spooky fun to your Halloween celebrations. It is easy to make, delicious to eat, and visually impressive. I love how simple it is to customize for different tastes and dietary needs. Whether you are a parent looking for a fun activity with your kids or a host wanting a unique dessert, this recipe fits the bill. I encourage you to try it and make it your own. Add your favorite garnishes or experiment with different pudding flavors. Share your creations with friends and family. I would love to hear how you adapt this recipe. Leave a comment below with your variations or photos of your spooky cups. Don’t forget to share this recipe with others who might enjoy it. Halloween is all about fun and creativity, and this dessert is a perfect example. So, grab your ingredients and get ready to dig in. Happy Halloween!
FAQs
Can I make these dirt cups ahead of time?
Yes, you can assemble them up to 24 hours in advance. Store them in the refrigerator covered with plastic wrap. This actually helps the layers set and makes them easier to serve.
What can I use instead of chocolate pudding?
You can use vanilla pudding, chocolate mousse, or even chocolate yogurt for a lighter option. Just ensure the consistency is thick enough to hold the layers.
How do I keep the cookies from getting too soggy?
Press the cookie layers down gently and ensure the pudding is thick. Chilling the cups for at least 30 minutes helps set the layers. Eat them within 2 days for the best crunch.
Can I freeze these dirt cups?
Yes, you can freeze them for up to 1 month. Thaw them in the refrigerator overnight. Note that the texture may become softer after freezing.
What is the best way to decorate the white chocolate?
Use a ziplock bag with a tiny corner cut off for drizzling. Create random lines for a spiderweb effect or draw simple shapes like bats or ghosts. Let it set before adding garnishes.
Pin This Recipe!
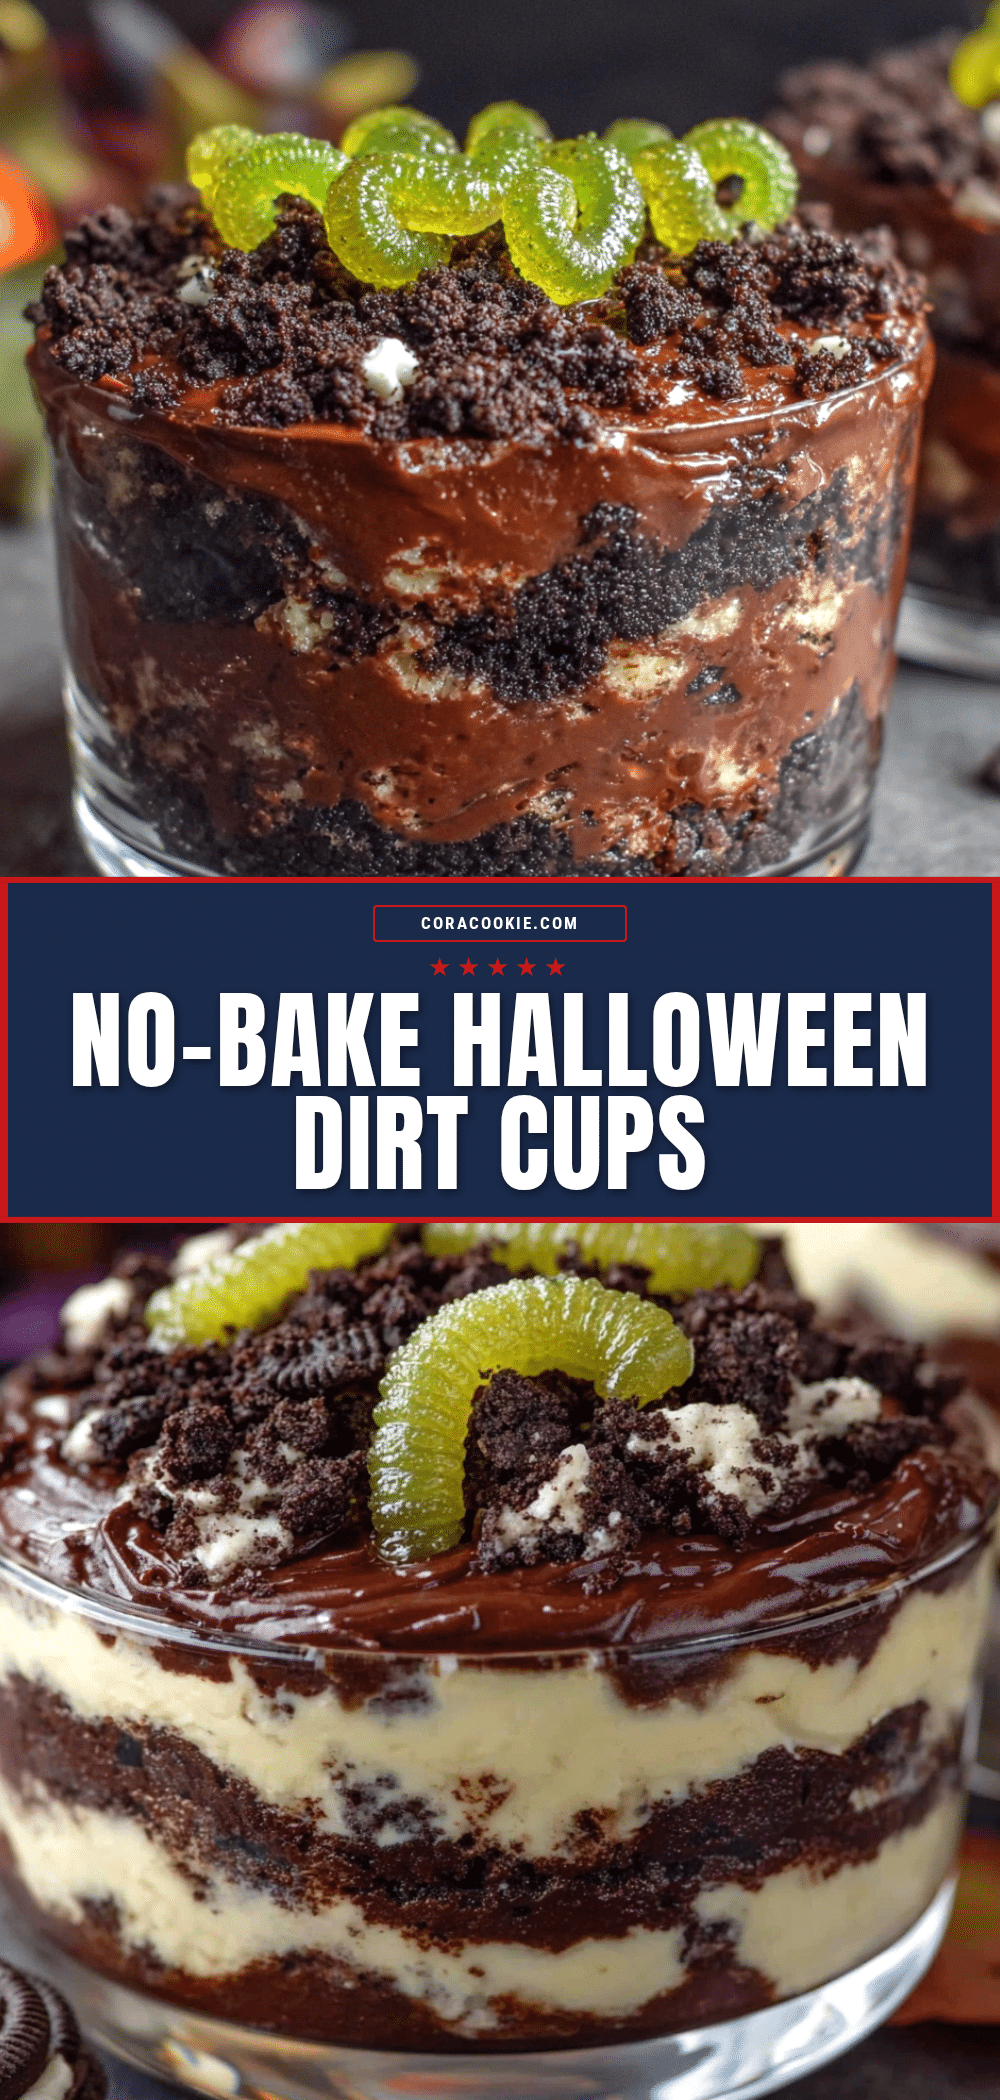
No-Bake Halloween Dirt Cups
A spooky, no-bake dessert featuring layers of chocolate pudding, cream cheese, and crushed cookies, topped with white chocolate spiderwebs and gummy worms. Perfect for Halloween parties and easy enough for kids to help make.
- Prep Time: 15 minutes
- Cook Time: 0 minutes
- Total Time: 45 minutes
- Yield: 6 servings 1x
- Category: Dessert
- Cuisine: American
Ingredients
- 1 large box (5.1 oz) instant chocolate pudding mix
- 2 cups cold whole milk
- 1 package chocolate sandwich cookies (like Oreos)
- 8 oz full-fat cream cheese, softened
- 2 tablespoons powdered sugar
- 1 teaspoon vanilla extract
- 1/2 cup white chocolate chips, melted
- 1 package gummy worms
- Candied spider eyes (optional)
Instructions
- Place chocolate sandwich cookies in a large ziplock bag, seal tight, and crush using a rolling pin or hands until you have a mix of fine crumbs and small chunks. Reserve 1/2 cup of larger chunks for garnish.
- In a medium mixing bowl, whisk together the instant chocolate pudding mix and cold milk for about 2 minutes until the mixture thickens.
- In a separate bowl, beat the softened cream cheese and powdered sugar until smooth. Add vanilla extract and mix well until fluffy and lump-free.
- Gently fold the cream cheese mixture into the chocolate pudding using a spatula until combined into a smooth, pale chocolate mixture.
- Assemble the cups by adding a 1-inch layer of crushed cookies to the bottom, followed by a 1-2 inch layer of the pudding mixture, and another layer of crushed cookies on top.
- Refrigerate the assembled cups for at least 30 minutes to allow the layers to set.
- Melt white chocolate chips in the microwave in 30-second intervals, stirring between each, until smooth. Transfer to a ziplock bag with a snipped corner.
- Drizzle the melted white chocolate over the chilled cups to create spiderweb designs.
- Once the white chocolate has set slightly, place gummy worms on top and add candied spider eyes if desired.
Notes
Ensure cream cheese is fully softened to room temperature to avoid lumps. Use cold milk for instant pudding to ensure proper setting. Do not use a food processor for cookies as it creates too fine a powder; hand crushing provides better texture. Store in the refrigerator for up to 3 days. Do not reheat.
Nutrition
- Serving Size: 1 cup
- Calories: 275
- Sugar: 28
- Sodium: 250
- Fat: 13.5
- Saturated Fat: 7
- Carbohydrates: 37.5
- Fiber: 2
- Protein: 5
Keywords: Halloween, no-bake, dessert, dirt cups, chocolate pudding, gummy worms, easy treats, party food, spooky snacks


